10 Blow Out Hair Do Ideas
Blow out hair styling has become one of the most searched Pinterest ideas because it offers a smooth, voluminous, and polished finish without requiring complex salon techniques. A well-done blow out enhances natural hair texture, improves manageability, and creates a professional-looking result suitable for daily wear or special occasions. This topic continues to gain attention because it bridges the gap between salon-level styling and at-home execution. People are increasingly looking for practical DIY methods that reduce time spent on expensive appointments while still achieving a clean and modern design. Blow out techniques also allow flexibility, making it possible to create soft waves, straight finishes, or voluminous layers depending on preference.
This article explores 10 blow out hair do ideas that are structured, beginner friendly, and suitable for various hair lengths and textures. Each idea is designed to provide step-by-step inspiration that can be followed at home with simple materials and preparation. The focus is on practical styling approaches that emphasize control, smoothness, and lasting shape. Readers will learn how different blow out variations can transform everyday hair into aesthetic, Pinterest-worthy styles. The content also highlights preparation methods, styling logic, and finishing techniques to ensure consistent results. Whether the goal is a minimalist style or a more voluminous look, these ideas provide a complete guide to achieving modern, creative, and wearable blow out hairstyles.
Why This Idea Is Trending or Useful
Blow out hairstyles are trending widely on Pinterest because they combine simplicity with a high-impact visual result. The style gives hair a smooth, lifted, and controlled appearance that aligns with modern beauty preferences focused on natural enhancement rather than heavy styling. Many people are drawn to blow out techniques because they can be done at home with minimal equipment, making them a practical DIY solution. The appeal also lies in their versatility, as blow outs can be adjusted for casual, professional, or formal settings without requiring a complete restyle. This adaptability makes them highly relevant for users searching for Pinterest ideas that fit everyday life.
Another reason for their popularity is the rise of minimalist style and easy project beauty routines. People prefer methods that are efficient, budget friendly, and time saving while still achieving polished results. Blow out hair tutorials provide a structured approach that beginners can follow without difficulty. They also align with modern home decor and aesthetic inspiration trends where simplicity and refinement are valued. The ability to create salon-like results at home adds to their usefulness, especially for individuals interested in creative ideas that enhance personal grooming routines. As a result, blow out styles continue to dominate Pinterest searches as a reliable and stylish hair solution.
Materials and Preparation
Before starting any blow out hairstyle, proper preparation is essential for achieving smooth and long-lasting results. The basic materials include a blow dryer with a nozzle attachment, a round brush in different sizes, and a heat-protective spray to reduce damage during styling. A comb for sectioning hair is also important to ensure even distribution of heat and controlled styling. Hair clips help divide hair into manageable sections, which is crucial for achieving a consistent blow out finish. Depending on hair type, lightweight styling cream or smoothing serum may be used to reduce frizz and enhance shine. These materials form the foundation of most blow out tutorials and support a structured styling process.
Preparation involves starting with clean, towel-dried hair that is slightly damp but not soaking wet. Detangling the hair thoroughly ensures smoother brushing and prevents breakage during the blow drying process. Sectioning the hair into layers allows better control and ensures each part receives equal heat and styling attention. Planning the desired final look is also important, whether aiming for volume, straightness, or soft curls. Understanding the hair’s natural texture helps determine brush size and drying direction. Proper preparation improves efficiency, reduces styling time, and ensures a more polished result. With the right setup, blow out styling becomes an easy project that can be repeated consistently for different creative ideas.
MAIN IDEAS SECTION
Idea 1: Classic Voluminous Blow Out
How to Create
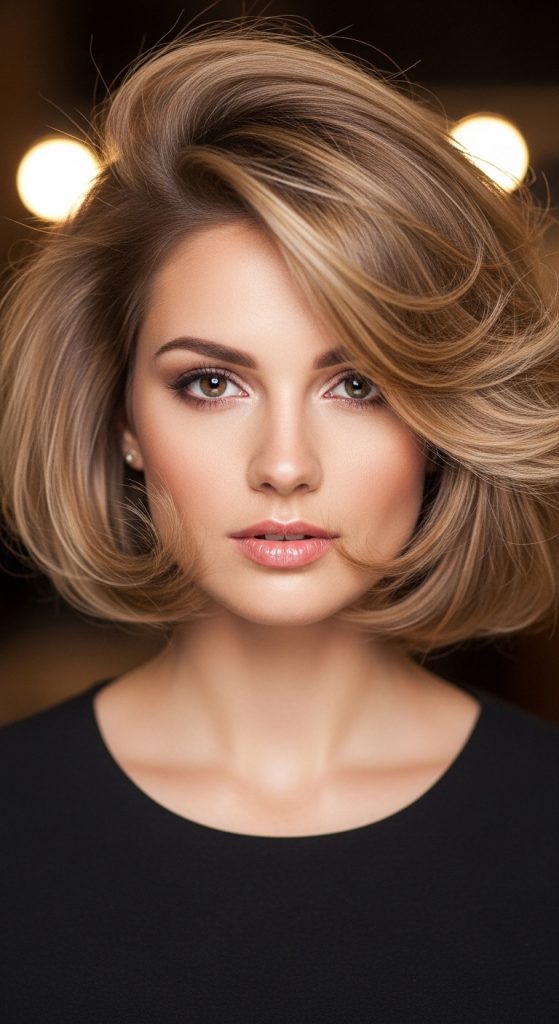
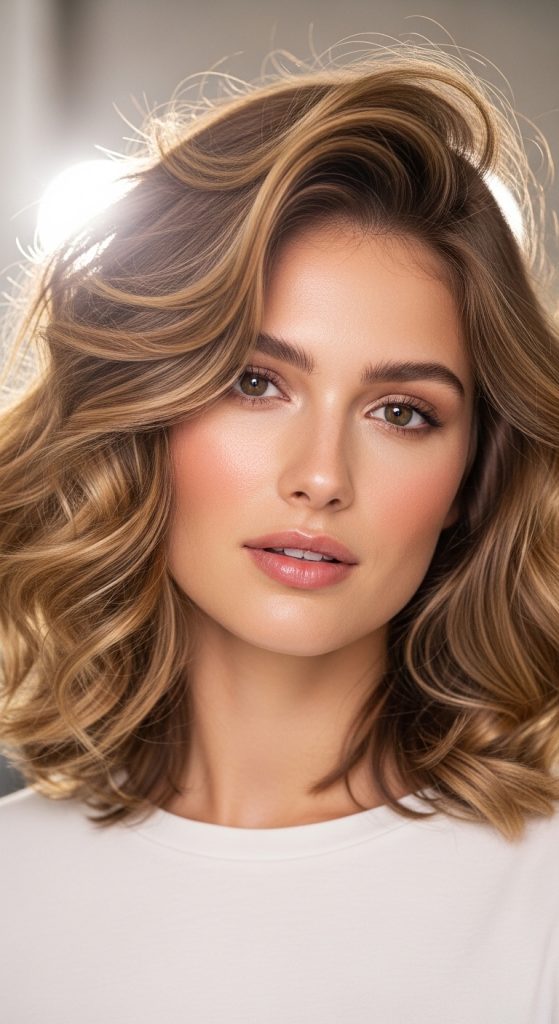
The classic voluminous blow out is one of the most timeless Pinterest ideas because it focuses on creating smooth, full-bodied hair with natural lift at the roots. This style enhances the overall shape of the hair by adding controlled volume without making it look overly styled. It works well for medium to long hair lengths and suits both straight and slightly wavy textures. The goal is to achieve a balanced finish where the hair appears soft, bouncy, and naturally thick. This style is often associated with modern beauty inspiration because it delivers a clean, elegant look that fits everyday wear and formal settings. It emphasizes movement and structure, making it ideal for individuals who want a polished appearance without complex styling techniques.
To create this look, begin with damp, detangled hair and apply a heat protectant evenly. Divide the hair into sections and start blow drying from the bottom layers. Use a medium round brush to lift hair at the roots while directing airflow downward for smoothness. Roll each section under the brush and hold briefly before releasing to build volume. Continue this process across all sections, ensuring consistent tension for even shaping. Once dry, cool the hair with a blast of cold air to lock in volume. Finish by gently brushing through the hair to soften the shape while maintaining lift. This method is beginner friendly and provides a reliable foundation for many other blow out variations.
Step-by-Step Execution
The execution of a classic voluminous blow out requires patience and controlled sectioning to achieve consistent results. Start by separating the hair into four main sections: top, sides, and back. Working in small subsections ensures each strand receives equal heat distribution, which is essential for achieving long-lasting volume. The round brush technique plays a critical role in shaping the final result, as the direction of the brush determines the movement of the hair. Lifting at the roots while rolling the brush inward creates a natural bounce that defines the style. Maintaining moderate heat levels prevents damage while still allowing effective shaping.
After completing the drying process, allow the hair to cool completely before touching it further. This helps set the structure and prevents premature flattening. Lightly applying a finishing serum can enhance shine without weighing the hair down. The final result should appear soft, full, and naturally lifted. This blow out style is widely used in Pinterest ideas because it is adaptable and easy to maintain. With practice, it becomes an efficient DIY routine suitable for everyday styling.
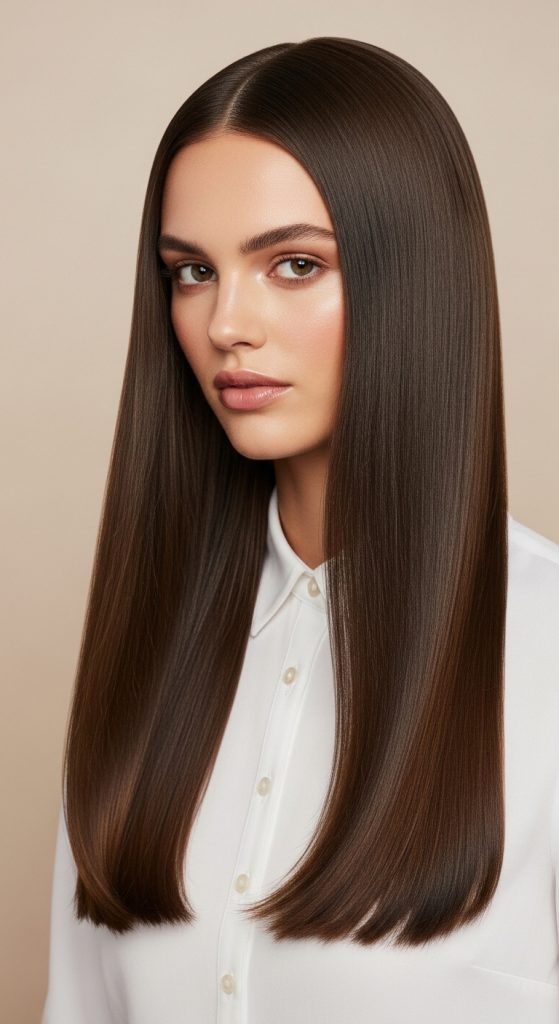
Idea 2: Sleek Straight Blow Out
How to Create
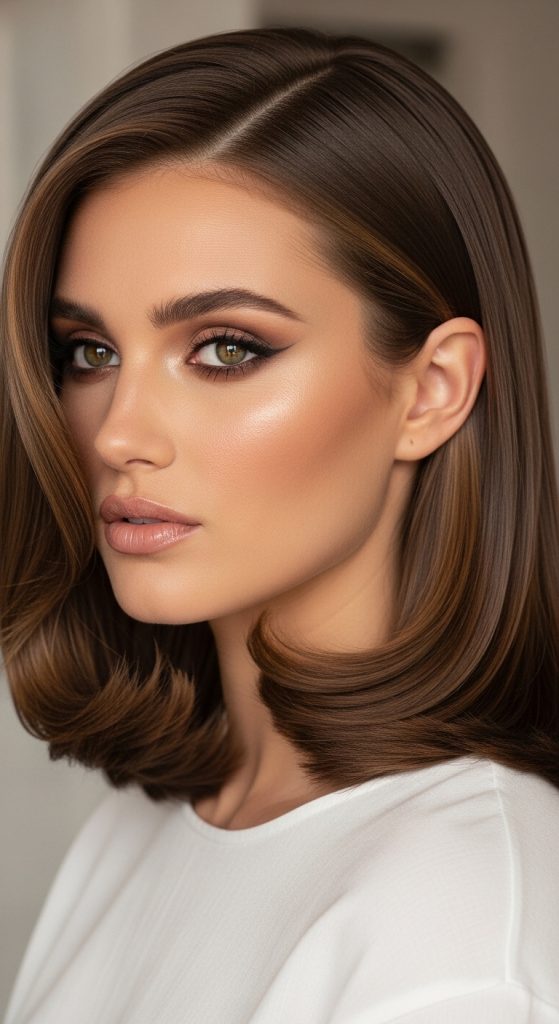
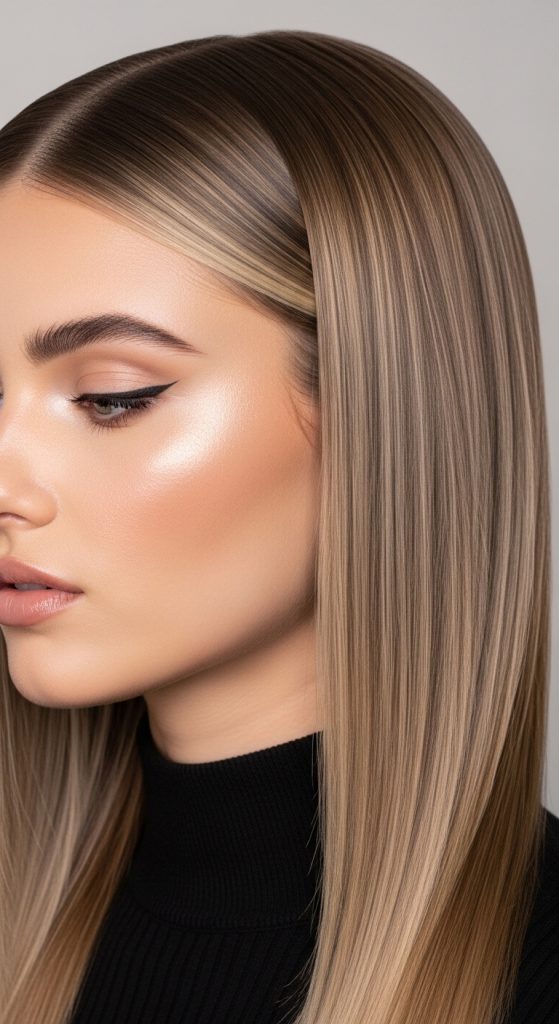
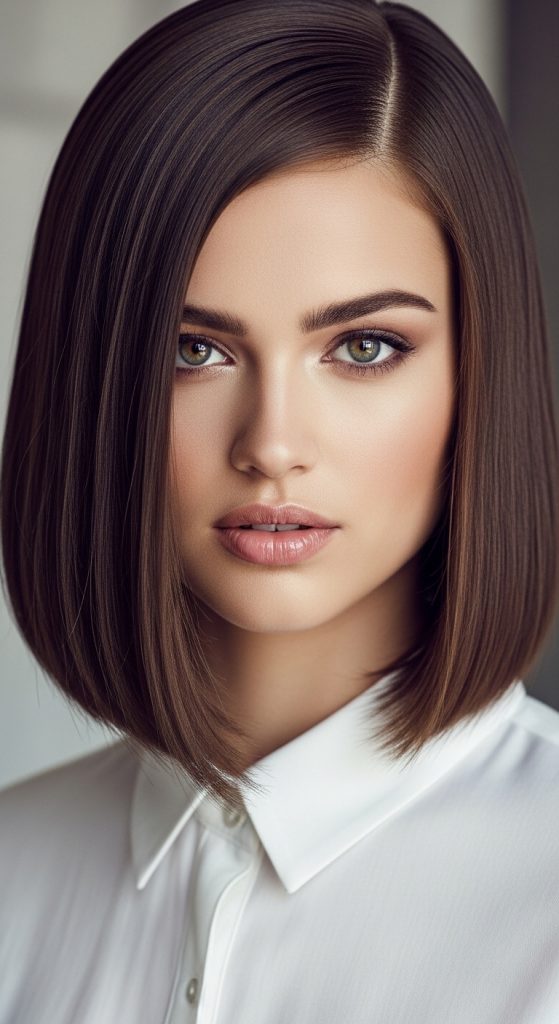
The sleek straight blow out focuses on achieving a smooth, polished finish with minimal frizz and maximum shine. This style is popular in modern design inspiration because it emphasizes simplicity and control. It works especially well for individuals who prefer a clean aesthetic look that highlights hair length and health. Unlike volumized styles, this blow out reduces lift at the roots and prioritizes straight alignment from top to bottom. It is suitable for all hair lengths but is most effective on medium to long hair where the straight effect is more visible. The overall goal is to create a refined, minimalist appearance that looks naturally well-groomed.
To achieve this style, begin with damp hair and apply a smoothing product evenly throughout. Section the hair into manageable parts and use a paddle brush or a flat round brush for control. Blow dry each section while directing airflow downward to reduce frizz and enhance smoothness. Maintain consistent tension on the brush to keep hair aligned. Avoid excessive lifting at the roots to preserve the sleek structure. Once all sections are dry, use a cool air setting to lock in the straight finish. A light finishing serum can be applied to enhance shine and maintain a clean appearance. This method is simple, efficient, and ideal for everyday styling routines.
Step-by-Step Guide
The step-by-step process for a sleek straight blow out requires precision and controlled movement. Start by dividing the hair into even sections to ensure uniform drying. Working in smaller sections allows better heat penetration and prevents uneven texture. The brush should glide slowly from root to tip, ensuring each strand is smoothed thoroughly. The direction of airflow should always follow the brush movement to maintain alignment and reduce flyaways. Consistency in technique is key to achieving a uniform finish across the entire head.
Once the blow drying is complete, allow the hair to cool before making any adjustments. This helps the structure settle and improves durability. If needed, a flat brush can be used to refine the final shape. The sleek straight blow out is widely used in Pinterest ideas because it complements professional and casual looks equally well. It is also highly practical for individuals seeking a low-maintenance yet stylish option. With regular practice, this technique becomes a quick and effective part of a daily beauty routine.
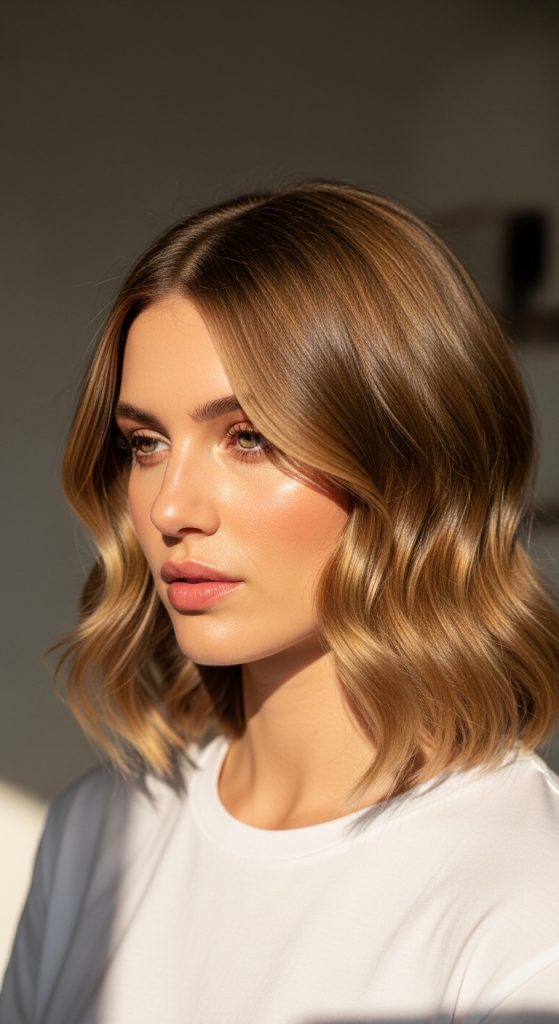
Idea 3: Soft Wave Blow Out
How to Create
The soft wave blow out is a highly popular Pinterest hairstyle that blends smooth drying techniques with gentle wave formation. This style creates a natural, relaxed movement in the hair while maintaining a polished finish. It is ideal for individuals who want a balance between structured styling and effortless texture. The waves are not tightly defined but instead appear soft and flowing, making the style suitable for casual wear, outings, or creative inspiration looks. This blow out variation works well on medium to long hair and enhances natural volume while maintaining a lightweight feel.
To create this style, start with damp hair and apply a lightweight styling cream for flexibility. Section the hair and use a medium round brush to begin blow drying. Instead of pulling the hair straight, twist the brush slightly while drying each section. This introduces gentle bends into the hair shaft, forming soft waves. Alternate directions between sections to create a natural flow. Once all sections are dry, allow the hair to cool and lightly separate the waves using fingers. Avoid heavy brushing, as it can flatten the texture. The result is a soft, airy wave pattern that looks effortless yet intentionally styled.
Execution Process
The execution of a soft wave blow out requires controlled twisting and directional variation during drying. Each section should be wrapped loosely around the brush to encourage natural curvature. The airflow should follow the twist pattern to help set the wave shape. This technique is particularly effective when working with slightly damp hair, as it holds shape better during drying. Consistency in section size ensures uniform wave formation across the entire head.
After completing the blow out, allow the hair to settle naturally before styling further. A light texturizing spray can be used to enhance definition without stiffness. This hairstyle is widely featured in Pinterest ideas because it provides a relaxed yet refined appearance. It is beginner friendly and does not require advanced tools or techniques. The soft wave blow out is ideal for creative ideas focused on natural beauty and minimal effort styling.
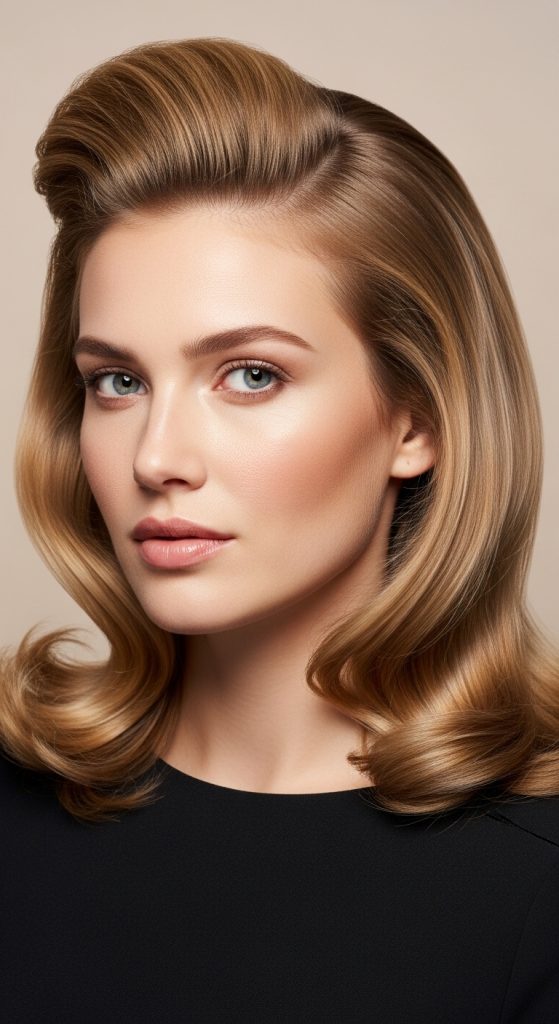
Idea 4: Root Lift Blow Out
How to Create
The root lift blow out focuses primarily on creating height and volume at the crown while keeping the rest of the hair smooth and controlled. This style is popular in modern Pinterest inspiration because it adds dimension and structure without requiring full-body volume. It is especially useful for individuals with fine or flat hair who want a lifted appearance. The emphasis is on creating a strong foundation at the roots, which enhances the overall silhouette of the hairstyle. This blow out works well for medium to long hair and can be combined with other styling variations for added effect.
To create this style, start by applying a volumizing product at the roots of damp hair. Section the hair and focus on drying the crown area first using a round brush. Lift each section upward while applying heat directly to the roots. Hold for a few seconds before releasing to set the volume. Continue working through the rest of the hair with smoother brush strokes to maintain balance. Once complete, cool the roots with a blast of cold air to lock in lift. This technique creates a long-lasting volumized base that supports the overall hairstyle.
Setup Method
The setup method for a root lift blow out involves strategic sectioning and root-focused drying. Begin by isolating the crown area as the priority section. This ensures maximum lift is achieved where it matters most. The brush should be positioned underneath the hair to push it upward during drying. Maintaining upward tension is essential for creating structural height. The rest of the hair should be styled more gently to avoid overpowering the root volume.
After finishing, allow the hair to cool completely before adjusting. Light finger lifting at the roots can help refine the shape. This style is widely used in Pinterest ideas because it creates an instant visual lift and enhances facial framing. It is simple, effective, and suitable for everyday styling routines.
Idea 5: Curved End Blow Out
How to Create
The curved end blow out focuses on shaping the ends of the hair inward or outward for a soft, styled finish. This hairstyle is popular in Pinterest inspiration because it adds subtle elegance without requiring full curls or waves. It works best for medium-length hair and provides a polished yet natural appearance. The key feature of this style is controlled curvature at the ends, which enhances movement and shape. It is often used in minimalist style routines where small details create a refined overall look.
To create this style, begin with damp hair and apply a smoothing product. Section the hair and use a round brush to dry each section. When reaching the ends, roll the brush inward or outward depending on the desired finish. Hold briefly with heat before releasing to set the curve. Repeat consistently across all sections. Once complete, allow the hair to cool before lightly shaping with fingers. This creates a soft, intentional bend at the ends that defines the style without making it appear overly styled.
Step-by-Step Guide
The step-by-step process requires focus on end positioning during drying. Each section should be dried from root to mid-length smoothly before concentrating on the ends. The brush rotation at the final stage determines the direction of the curve. Consistency ensures uniform styling across the entire hair length. Avoid rushing this step, as the ends define the final appearance.
After finishing, a light serum can be applied to maintain smoothness. The curved end blow out is widely appreciated in Pinterest ideas for its subtle enhancement effect. It is simple, beginner friendly, and suitable for everyday wear.
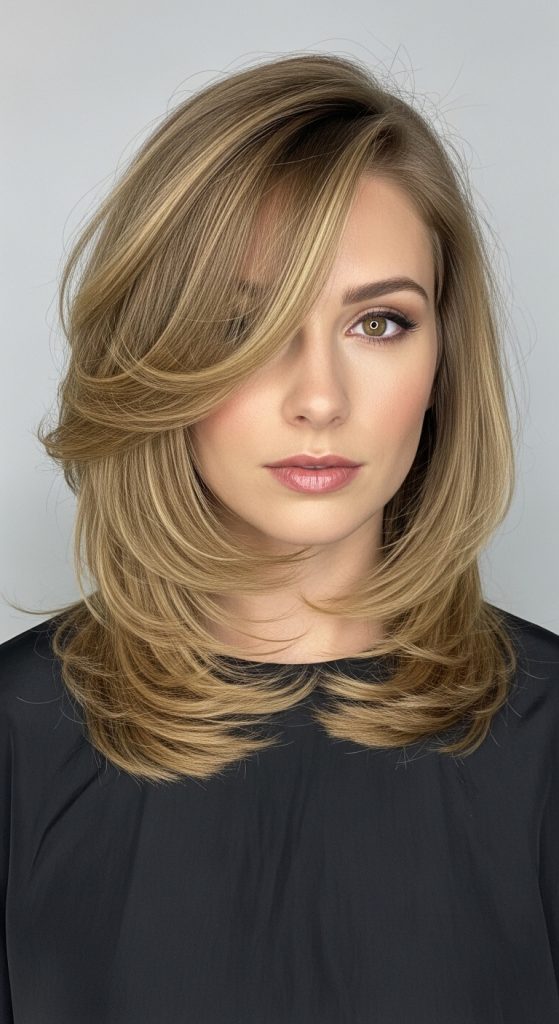
Idea 6: Layered Bounce Blow Out
How to Create
The layered bounce blow out enhances natural hair layers by creating movement and separation between sections. This style is popular in creative Pinterest ideas because it adds dimension and flow. It is ideal for layered haircuts where structure needs to be emphasized. The goal is to create visible bounce between layers while maintaining a smooth base. This results in a dynamic and lively hairstyle that looks full and natural.
To achieve this look, begin with damp hair and apply a lightweight volumizing product. Section the hair according to natural layers and dry each layer individually. Use a round brush to lift and roll each section, focusing on creating separation between layers. Allow each layer to cool before moving to the next. This ensures the bounce is preserved and not flattened during styling.
Execution Process
The execution process requires careful attention to layer distinction. Each layer should be styled independently to maintain definition. The brush direction should alternate slightly to enhance natural movement. Once complete, gently separate layers with fingers for added bounce. This style is widely used in Pinterest inspiration for its natural, dynamic appearance.
Idea 7: Feathered Blow Out
How to Create
The feathered blow out creates soft, airy strands that frame the face gently. This style is ideal for achieving a light, flowing aesthetic that feels effortless. It works well for medium to long hair and enhances facial features subtly. The feathered effect is created through outward brushing techniques during drying.
Begin with damp hair and apply a lightweight styling cream. Section the hair and dry using a round brush, directing the ends outward. Focus on creating soft separation rather than uniform alignment. This results in a feathered texture that feels natural and light.
Step-by-Step Guide
The process involves outward brushing and controlled airflow. Each section should be lifted slightly while drying to create separation. After completion, gently shake the hair to enhance feathering. This style is commonly used in Pinterest ideas for its soft, aesthetic appeal.
Idea 8: Smooth Crown Blow Out
How to Create
The smooth crown blow out emphasizes a flat, controlled crown with smooth lengths. This style is ideal for sleek and structured looks. It balances volume control with smooth styling for a refined finish.
Start by focusing on the crown area, drying it flat with controlled tension. Continue through the lengths with smooth brushing techniques.
Execution Process
Maintain downward airflow and controlled brush movement. The crown should remain flat while the rest flows smoothly. This creates a clean and structured appearance.
Idea 9: Airy Volume Blow Out
How to Create
This style focuses on lightweight volume throughout the hair. It creates a soft, airy effect ideal for casual looks.
Use volumizing products and lift sections while drying. Maintain loose brush tension for airy movement.
Setup Method
Dry sections loosely and avoid heavy flattening. This ensures natural volume distribution.
Idea 10: Polished Ends Blow Out
How to Create
This style emphasizes smooth, polished ends with controlled alignment. It creates a clean and finished appearance.
Dry hair smoothly and focus on sealing ends with brush tension.
Step-by-Step Guide
Maintain consistent downward brushing and finish with cooling air for smooth ends.
Common Beginner Mistakes and How to Avoid Them
Many beginners make mistakes such as using overly wet hair, skipping heat protection, or rushing sectioning. These errors lead to uneven results and frizz. Proper preparation and patience are essential for achieving smooth blow out styles. Another common mistake is using incorrect brush sizes, which affects volume and shaping. Avoiding these mistakes ensures better results and longer-lasting styles.
Practical Tips for Better Results
Consistent sectioning improves control and uniformity. Using moderate heat prevents damage while maintaining styling efficiency. Cooling hair before finishing helps lock in shape. These simple adjustments significantly improve blow out quality and support long-lasting results.
Styling, Presentation, or Organization Ideas
Blow out styles can be enhanced by adjusting parting lines, adding subtle volume variation, or combining smooth and textured elements. Presentation depends on hair length and layering. Organizing styling steps ensures better control and cleaner results.
Budget or Time Planning
Blow out styling at home is cost effective and time efficient. Most styles can be completed within a structured routine once mastered. Proper preparation reduces styling time and improves consistency. This makes blow out techniques ideal for daily use.
Creative Expansion and Advanced Inspiration
Advanced variations include combining blow out techniques with braiding, layering different volume zones, or integrating wave transitions. These creative ideas expand styling possibilities and support personalized looks. Blow out techniques offer strong flexibility for continuous experimentation and design improvement.