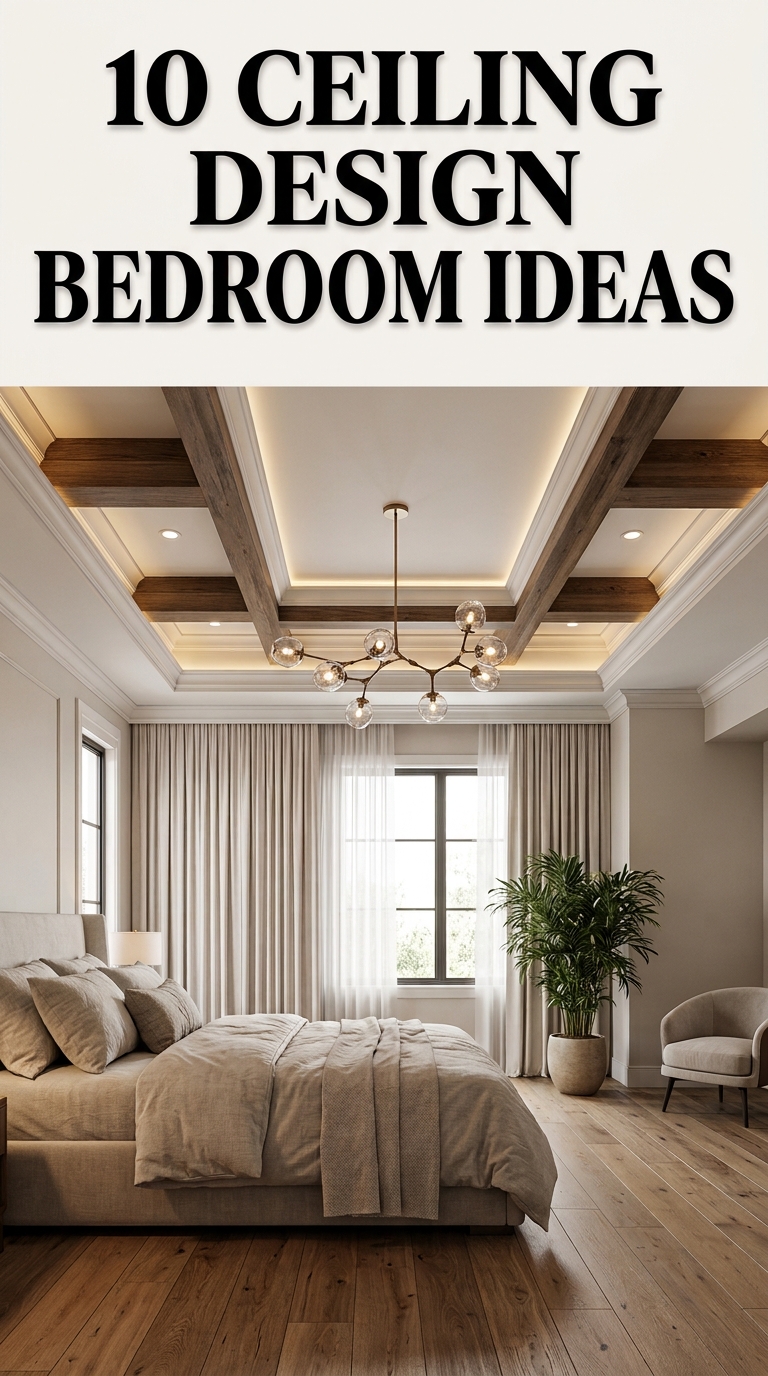
10 Ceiling Design Bedroom Ideas
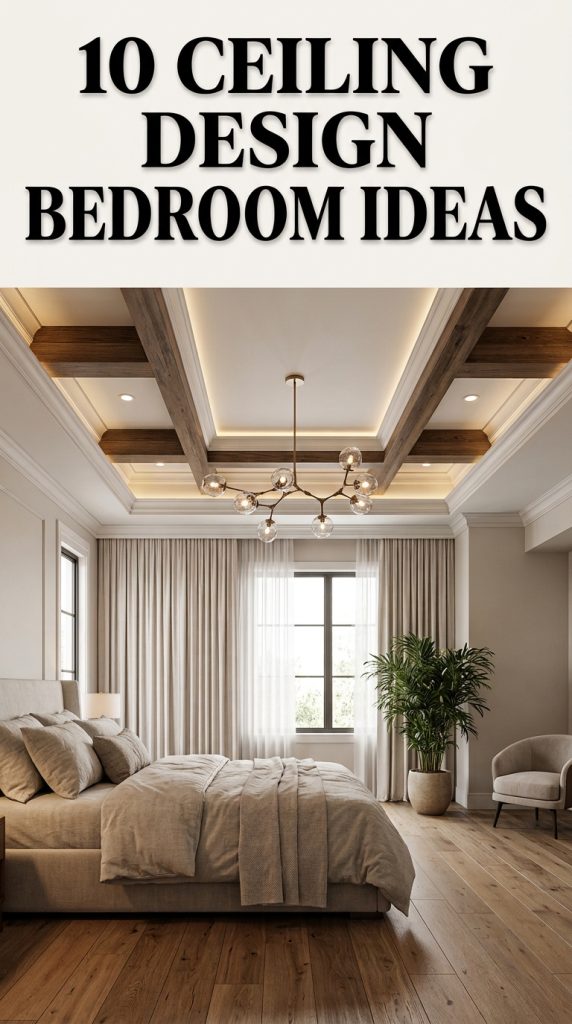
Redesigning your overhead space is one of the most effective strategies for introducing architectural depth and visual balance into a bedroom layout. The fifth wall of a room is frequently overlooked, yet it holds immense potential to alter spatial perceptions, improve acoustics, and define functional zones within an intimate environment. On platforms like Pinterest, customized overhead modifications have taken center stage among interior design enthusiasts who want to move away from flat, uninspiring plaster surfaces. This comprehensive home decor tutorial will guide you step by step through the process of evaluating structural ceiling types, calculating clearance requirements, and implementing impactful surface treatments. You will learn how to balance heavy structural elements with strategic illumination, select appropriate materials for high durability, and execute clean geometric finishes that elevate your property value independently. Whether you are dealing with a compact guest room, a standard suburban layout, or a sprawling master suite, mastering these overhead concepts provides highly practical styling solutions. By focusing on rich textural contrasts and precise planning, you can convert basic architectural surfaces into sophisticated focal points that completely redefine the character of your personal sanctuary.
Why Strategic Overhead Interventions Dominate Contemporary Interior Inspiration
The massive surge in popularity surrounding specialized overhead designs underscores a significant shift in modern home planning toward multi-dimensional, comforting room environments. Modern design inspiration heavily features clean lines, integrated lighting, and layered textures, making the ceiling a foundational canvas for high-impact creative projects. These trending ideas offer immense practical value because overhead manipulation can make low ceilings feel infinitely higher or bring large, cavernous rooms down to a cozy, restful scale. The DIY appeal of these projects is exceptionally strong, allowing individuals to customize their spaces using accessible materials like lightweight timber slats, prefabricated moldings, or textured wallpapers. Beginners can confidently approach this creative project because the structural methods can be scaled down to straightforward surface applications that do not require complex structural load alterations. Furthermore, the aesthetic versatility of a customized overhead layout means it adapts seamlessly to varied interior movements, including a sleek minimalist style, an industrial loft look, or a warm rustic farmhouse theme. By taking design elements off the floor and placing them gracefully overhead, you establish an inviting harmony that maximizes the visual potential of your existing home footprint.
Sourcing Quality Materials, Tool Selection, and Safety Groundwork
Thorough initial planning and correct material preparation are critical to ensuring your overhead installation remains completely stable, safe, and visually flawless over time. Before purchasing any construction supplies, you must use a high-precision electronic stud finder to locate the internal wooden framing joists behind your drywall, as all heavy architectural additions must anchor directly into structural supports. The primary materials required for a standard multi-layered installation typically include lightweight select pine boards, medium-density fiberboard slats, moisture-resistant drywall panels, premium wood glue, and heavy-duty structural construction screws. Essential tools for this tutorial include a miter saw or circular saw, a power drill with assorted bits, a pneumatic brad nailer, a professional laser level, a chalk line, and a sturdy scaffolding platform or heavy-duty stepladder. Preparation involves clearing all portable furniture out of the workspace, masking off the upper walls with low-tack painter’s tape, and drawing perfectly straight reference lines across the ceiling using a laser guide. By securing your raw components early, verifying local building codes for overhead clearances, and organizing your hardware beforehand, you can ensure a smooth, error-free execution.
Main Ideas for Bedroom Ceiling Designs
Idea 1: The Minimalist Recessed Tray Niche
Step-by-Step Guide
The minimalist recessed tray niche relies on clean geometric drops to introduce subtle architectural interest and hidden illumination channels directly above the bed area. This concept involves constructing a shallow, drop-down outer perimeter frame along the edges of the room, leaving the central ceiling section recessed at its original height. The design philosophy centers on architectural zoning, using the physical height transition to frame the sleeping zone precisely while keeping the surface completely free of visible fixtures. The vertical transition walls of the tray provide a perfect concealment ledge for low-voltage LED strip lights, casting a soft, diffused warm glow across the ceiling that eliminates harsh glare. This sleek minimalist style works exceptionally well in modern master suites with standard eight-foot ceilings, where maximizing an illusion of open vertical space is essential to maintaining a peaceful room mood.
To set up this architectural recessed tray, begin by projecting a perfectly level horizontal line around the entire upper perimeter of your bedroom walls using a digital laser level. Secure a continuous running border of two-by-two utility lumber directly into your wall studs along this line using heavy three-inch construction screws to form your foundational support cleat. Build a matching internal framework of two-by-two studs attached directly to the ceiling joists, spacing the frame exactly twelve inches outward from the perimeter walls to define the tray width. Line the underside and vertical faces of this newly constructed frame with half-inch moisture-resistant drywall panels, securing them tightly with standard drywall screws driven flush. Apply mesh joint tape and multiple thin layers of joint compound over the seams, sanding the surfaces perfectly smooth once dried. Finish the tray structure by painting the outer dropped border a clean matte white, while running a flexible, self-adhesive warm white LED light strip inside the hidden upper ledge channel.

Idea 2: Clean Scandinavian Linear Timber Slats
How to Create
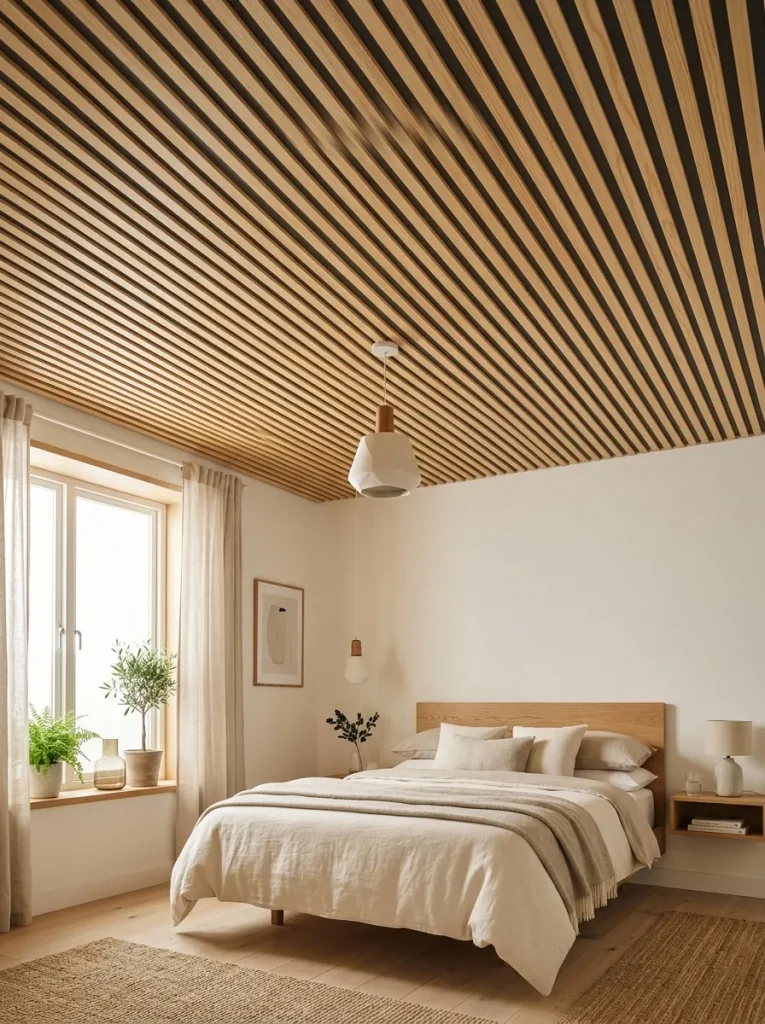
The clean Scandinavian linear timber slats concept utilizes parallel wooden bands to introduce a rich tactile texture and a strong linear rhythm to your bedroom ceiling layout. This design style relies on slender, uniformly spaced select pine or oak boards installed directly over a dark background canvas to maximize visual contrast and shadow depth. The design philosophy focuses on natural warmth and acoustic absorption, using the repeating timber lines to break up flat, echo-prone plaster surfaces gracefully. This setup provides an excellent way to elongate a narrow bedroom visually, as the continuous running timber lines draw the eye smoothly along the path of the grain. It pairs beautifully with minimalist backgrounds and neutral home decor palettes, adding a sophisticated, high-end architectural layer that feels deeply connected to modern organic design movements.
To execute this linear timber design, begin by painting your entire existing ceiling surface with two coats of an ultra-matte charcoal gray or deep black acrylic house paint to establish a high-contrast background shadow layer. Use your miter saw to cut high-quality one-by-two-inch select pine slats to the exact width of your bedroom, ensuring all edges are perfectly square and sanded smooth. Apply a continuous bead of high-tack construction adhesive to the back of your first timber slat, and press it flat against the ceiling corner, running perpendicular to your internal ceiling joists. Secure the wood strip permanently by driving two-inch finishing nails through the face of the wood directly into the underlying joists using a pneumatic brad nailer. Cut a small three-quarter-inch wood scrap block to use as a temporary spacing guide, placing it tightly against your installed slat before positioning the next timber piece. Repeat this alignment process systematically across the entire ceiling width, ensuring your spacing remains completely uniform from corner to corner.
Idea 3: Geometric Box-Beam Coffered Grid
Execution Process
The geometric box-beam coffered grid introduces a luxurious, classic architectural framework that mimics the heavy, interlocking timber structures found in historic European estates. This design concept relies on building a series of hollow, three-dimensional wooden beams arranged in an intersecting grid pattern across your ceiling surface, creating deep recessed square panels known as coffers. The design philosophy centers on structural grandeur and geometric precision, using the alternating lines of light and shadow to create an unexpected statement piece overhead. This heavy-duty approach works exceptionally well in large master bedrooms with tall ceilings, where adding a substantial, multi-dimensional grid helps lower the visual scale of the room to a comfortable, cozy proportion.
Initiate the execution process by measuring your bedroom ceiling dimensions precisely, sketching a balanced grid layout on graph paper to ensure all your recessed coffer squares emerge with identical square dimensions. Use a chalk line to snap your master grid reference lines directly onto the ceiling surface, identifying exactly where the centerlines of your upcoming beams will intersect. Construct the primary internal structural supports by screwing long, straight two-by-four utility boards flat along your snapped chalk guidelines, ensuring they lock directly into the internal ceiling joists with heavy lag screws. Build hollow three-sided box casings from smooth three-quarter-inch medium-density fiberboard panels, cutting the side panels to a uniform depth of five inches to form the beam profiles. Slide these hollow wooden casings tightly over your mounted two-by-four support tracks, securing them firmly from the sides using a pneumatic brad nailer driven flush. Finish the grid by installing decorative crown molding trim along all internal intersecting corners, filling the nail holes, and painting the entire structure a crisp semi-gloss white.

Idea 4: Seamless Shiplap Farmhouse Planking
Setup Method
The seamless shiplap farmhouse planking idea infuses a cozy, rustic cottage charm into your contemporary bedroom environment using interlocking horizontal wooden boards. This styling concept utilizes tongue-and-groove or shiplap boards installed flat across the entire ceiling plane, covering up plain builder-grade drywall with a continuous, hand-crafted timber texture. The design philosophy focuses on understated warmth, using the subtle, fine groove lines between the interlocking planks to add a delicate visual rhythm without overwhelming the room layout. This easy project is exceptionally beginner friendly because shiplap boards naturally align themselves using built-in interlocking lips, making it highly realistic for decorators looking to achieve immediate professional-grade results.
To set up this farmhouse planking installation, locate and mark the exact path of all internal ceiling joists across your room using a chalk line running perpendicular to the direction you intend to lay your wood planks. Measure the total length of your ceiling and cut your shiplap boards to size using a circular saw, allowing a tiny one-eighth-inch expansion gap along the outer wall perimeters. Start your installation along the longest straight wall corner, placing the first board with its hidden groove lip facing outward into the room. Apply a thin bead of wood glue along the back of the plank, press it tightly against the ceiling drywall, and drive two-inch brad nails at a forty-five-degree angle directly through the tongue lip into every intersecting ceiling joist. Slide the groove channel of your second board tightly over the installed tongue lip, tapping it gently with a rubber mallet to lock the pieces together without gaps. Continue this repeating assembly pipeline row by row across the ceiling space, and finish by installing a simple one-by-three baseboard molding around the room perimeter to hide the expansion seams.

Idea 5: The Floating Floating Acoustic Panel Cloud
How to Create
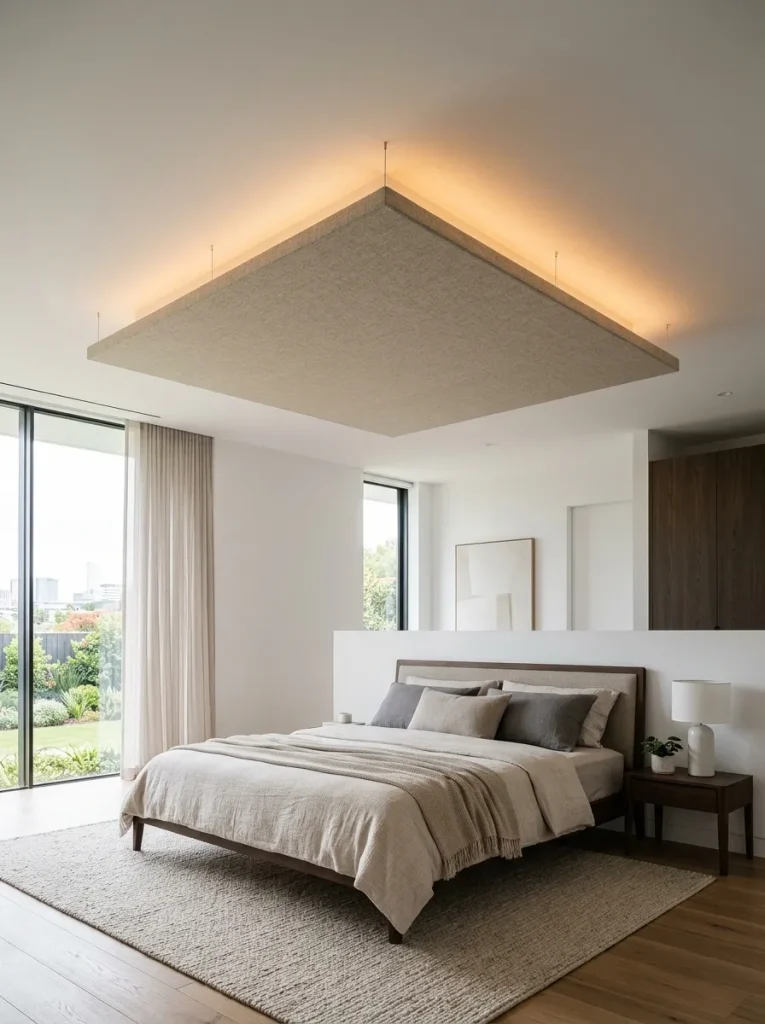
The floating acoustic panel cloud introduces a forward-thinking, highly contemporary design element that combines sophisticated spatial zoning with advanced sound management. This concept involves building a large, rectangular fabric-wrapped architectural panel that hangs suspended a few inches below the main ceiling surface directly over the bed frame. The design philosophy relies on visual weightlessness and modern minimalism, using hidden hardware to make the large panel appear to float effortlessly in mid-air. This setup is highly practical for large master bedrooms with hard wood flooring, where absorbing excess sound reflections and preventing echoes improves sleep comfort and sets a relaxing, quiet tone.
To create this floating cloud feature, construct a lightweight rectangular outer frame measuring six feet wide by eight feet long using straight one-by-three select pine boards. Reinforce the internal corners of the wooden frame using steel L-brackets to ensure the structure remains perfectly square and rigid under light tension. Fill the open interior cavity of the wooden frame completely with dense, fire-rated acoustic mineral wool insulation batts to provide your primary sound-absorption core. Wrap the entire exterior of the frame tightly with a high-durability, breathable linen fabric in a soft neutral tone like oatmeal or charcoal gray, securing the cloth firmly to the back of the wood using a heavy-duty manual staple gun. Mount four heavy-duty steel eye bolts directly into your ceiling joists above the bed zone, and install matching eye hooks into the four corners of your wrapped frame structure. Connect the panel to the ceiling hardware using short, adjustable aircraft cables, allowing the cloud to hang suspended exactly four inches below the ceiling plane while concealing small LED strip lights along its upper surface.
Idea 6: The Dramatic Velvet Midnight Inverted Vault
Step-by-Step Guide
The dramatic velvet midnight inverted vault breaks traditional home decorating rules by bringing a deeply saturated, dark color palette overhead to alter room proportions dramatically. This concept targets the inner central section of a recessed tray ceiling, applying a rich, matte-finish midnight blue or deep charcoal paint texture that mimics the infinite depth of a clear night sky. The design philosophy focuses on total atmospheric enclosure, making the sleeping area feel incredibly secure, quiet, and protective for extended rest cycles. This creative project works beautifully when framed by wide white crown moldings, where the extreme high-contrast boundary accentuates the geometric lines of your architecture effortlessly.
Begin your transformation by erecting a stable scaffolding platform beneath your recessed ceiling vault area, and use premium low-tack painter’s tape to mask off the surrounding white trim lines cleanly. Use a fine-grit sanding block to lightly roughen the existing drywall surface, removing any old glossy clear coats to ensure optimal paint adhesion across the flat overhead plane. Apply a thick, uniform layer of a high-hiding stain-blocking primer over the drywall, allowing a full six hours of drying time to establish an unyielding foundational layer. Select a premium, moisture-resistant acrylic latex paint formulated in an ultra-matte or flat velvet finish sheen, pigmented in an intense midnight navy or ink-black tone. Use a two-and-a-half-inch angled sash brush to cut in along the taped trim perimeters carefully, keeping your brush strokes long and fluid to prevent heavy paint ridges from forming. Saturate a thick-nap microfiber roller cover with the dark paint, and apply it across the open ceiling center using consistent, overlapping vertical passes while maintaining a wet edge to eliminate roller lap marks.
Idea 7: Classic Architectural Plaster Medallion Framing
Setup Method
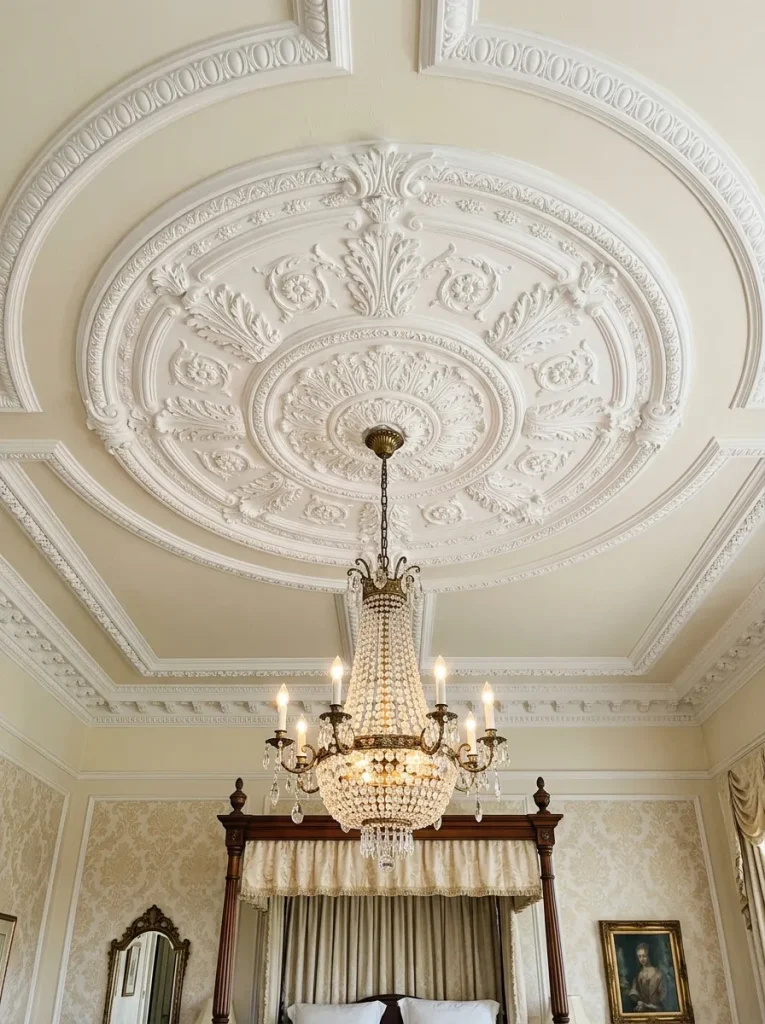
The classic architectural plaster medallion framing concept introduces a timeless, historic European sophistication into plain builder-grade bedrooms using lightweight ornamental reliefs. This concept centers around installing a large, circular molded medallion directly around your central hanging light fixture or crystal chandelier, creating an immediate focal ornament. The design philosophy focuses on symmetrical order and vintage craftsmanship, using the intricate floral, acanthus leaf, or geometric scroll patterns of the molding to draw the eye upward gracefully. This approach is highly beginner friendly because modern medallions are manufactured from high-density polyurethane resin, which provides the deep texture of traditional heavy plaster while remaining incredibly lightweight and easy to install with basic adhesives.
To set up this vintage design element, turn off the electrical power breaker to your bedroom light fixture completely, and disconnect the existing chandelier hardware carefully to expose the ceiling junction box. Sand the ceiling surface surrounding the junction box lightly with medium-grit sandpaper to remove texturing bumps, ensuring a flat plane for the medallion to seat against. Select a twenty-four-inch lightweight polyurethane ceiling medallion that coordinates beautifully with your home’s architectural era, and paint it with two coats of an anti-microbial matte white ceiling paint before installation. Apply a generous, continuous bead of heavy-duty polyurethane construction adhesive across the entire flat back ring of the painted medallion structure. Center the medallion precisely over the exposed electrical junction box, press it firmly upward against the ceiling drywall, and secure it temporarily using four small brad nails driven through open pattern lines into the drywall. Wipe away any excess adhesive that squeezes out along the edges, fill the nail holes with spackling compound, and re-install your elegant hanging light fixture securely.

Idea 8: Asymmetrical Abstract Drywall Level Steps
How to Create
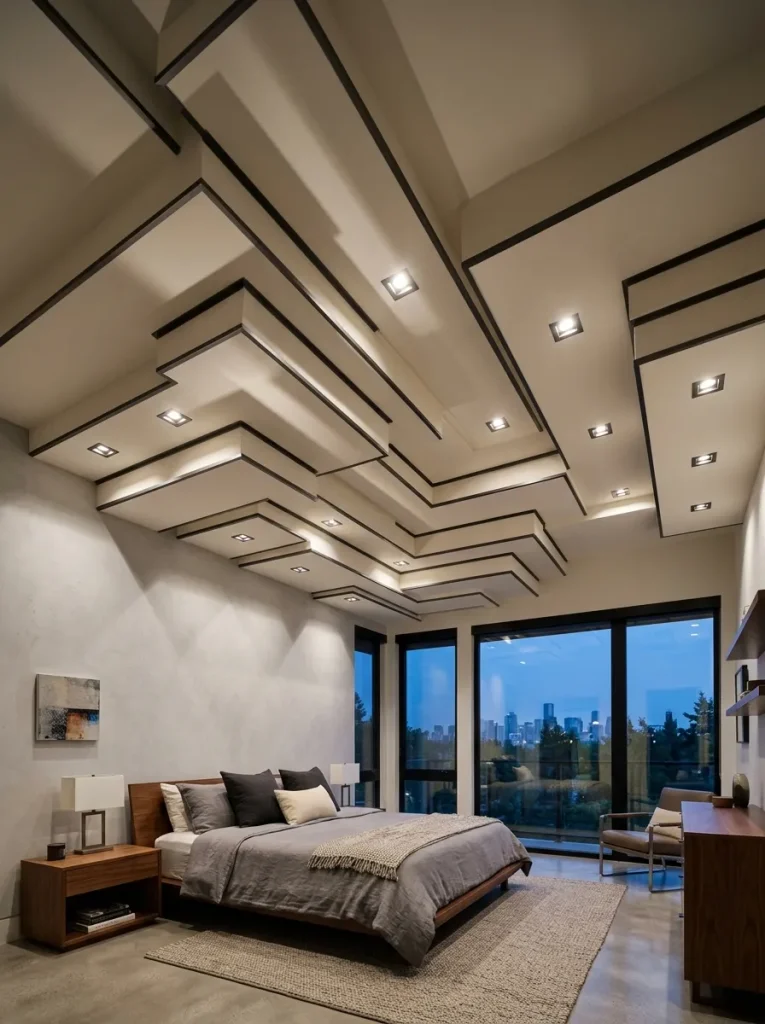
The asymmetrical abstract drywall level steps concept embraces contemporary minimalism, clean geometric shifts, and architectural precision to construct a forward-thinking overhead landscape. This layout moves away from traditional centered tray designs in favor of overlapping, multi-tiered drywall panels installed off-center above specific furniture groupings like a modern lounge chair or a custom vanity station. The design philosophy relies on spatial definition through height variation, using crisp three-inch vertical steps to define different functional zones within an open-concept master bedroom bedroom. This style is an exceptional choice for custom modern design homes where linear shapes and integrated hidden illumination serve as the primary artistic decoration.
To create this modern geometric feature, use your laser level to project a series of intersecting rectangular guidelines directly onto your plain ceiling drywall, mapping out your asymmetrical panel dimensions clearly. Construct a low-profile drop-down framework using light twenty-gauge steel tracking or two-by-two timber slats, screwing the tracks securely through the drywall directly into your internal structural ceiling joists. Run your low-voltage electrical wiring paths inside the open channel framework to establish your future power points for small, square recessed LED pot lights. Cut sheets of quarter-inch lightweight drywall to match the exact dimensions of your steel track framework, and screw them firmly to the supports using standard fine-thread drywall screws spaced every eight inches. Install rigid aluminum corner bead trim along all the newly created exposed vertical steps to guarantee perfectly straight, impact-resistant crisp edges. Apply multiple layers of drywall mud over the joints, sand the seams flush, install your recessed minimalist light fixtures, and apply a premium matte white ceiling paint.
Idea 9: Industrial Exposed Timber Support Beams
Step-by-Step Guide
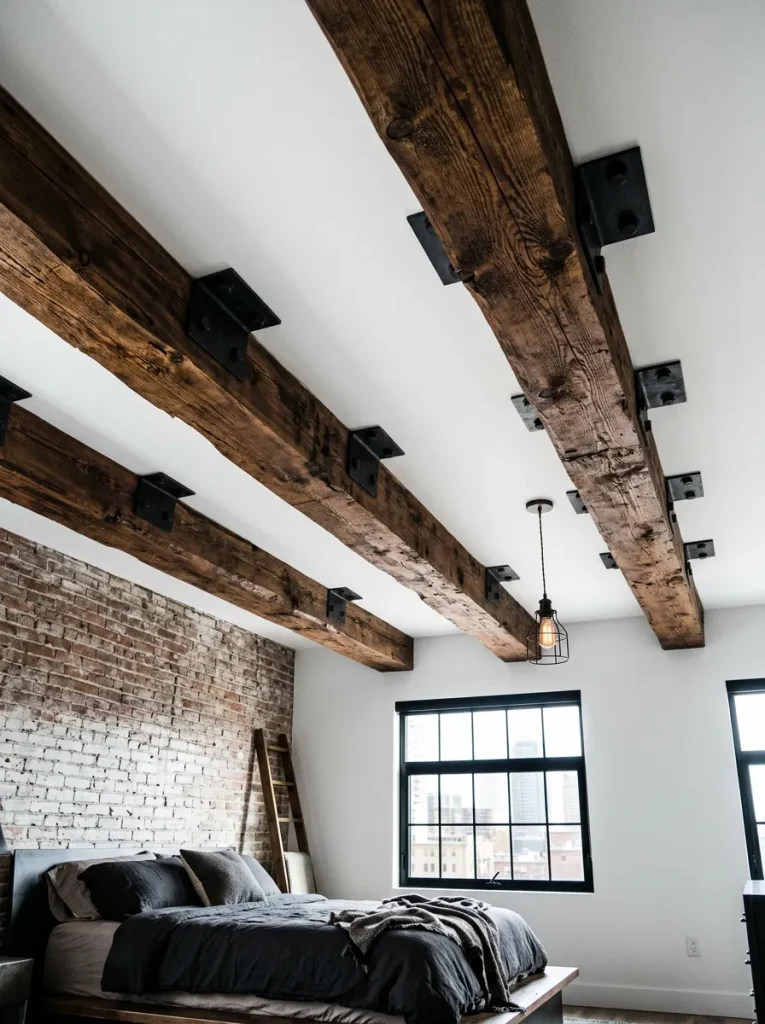
The industrial exposed timber support beams concept combines the rugged, historic character of structural warehouse lofts with the clean, airy lines of contemporary architecture. This concept avoids full-surface ceiling coverings in favor of installing three or four substantial, rough-sawn solid wood beams spaced evenly across your existing white drywall plane. The design philosophy relies on material honesty and high-contrast styling, using the warm, weathered grain lines and rich knots of deep walnut or cedar timbers to break up sterile white rooms. This setup functions as a powerful visual anchor that grounds the bedroom layout, making it an ideal choice for rustic farmhouse extensions or urban industrial home decor renovations.
Begin your installation by using a reliable stud finder to locate your internal ceiling joists, marking their paths clearly from wall to wall across the ceiling using a bright chalk line guide. Purchase high-quality rough-sawn cedar four-by-four timber beams, and cut them to the exact width of your bedroom using a heavy-duty sliding compound miter saw. Use a heavy wire wheel attachment on your power drill to scrub the faces of the cut timbers vigorously, removing loose splinters while accentuating the deep, natural weather valleys and rugged saw marks in the wood grain. Wipe away all fine wood dust, apply two coats of an oil-based dark walnut stain to enrich the timber tones, and finish with a non-reflective matte clear protective sealant. To mount these heavy beams safely, secure structural steel U-channel brackets directly into your ceiling joists along your chalk lines using heavy-duty lag bolts driven deep into the wood. Slide your prepared cedar timbers tightly inside the steel brackets, and lock them permanently in place using structural black oxide lag screws driven through the bracket sides.

Idea 10: Symmetrical Pressed Tin Vintage Tiles
Setup Method
The symmetrical pressed tin vintage tiles concept infuses a glamorous, early-century Victorian elegance into your resting environment using repeating patterned metallic panels. This concept utilizes square, interlocking aluminum or tin tiles embossed with intricate geometric or floral reliefs to form a highly reflective, textured overhead grid layout. The design philosophy centers on historic restoration and light manipulation, leveraging the shiny metallic surfaces to catch and scatter ambient lamp light across the bedroom softly. This approach provides an exceptional way to introduce a high-end custom design feel into plain rooms, turning an ordinary flat ceiling into a striking artistic feature that radiates vintage charm.
To set up this metallic tile installation, locate the absolute center point of your bedroom ceiling by snapping two diagonal chalk lines from opposing room corners, marking the intersection clearly. Install a foundational grid of half-inch thick plywood sheets directly over your existing drywall ceiling, ensuring the wood panels are screwed firmly into the internal framing joists to provide a solid nailing surface. Select twelve-inch square embossed aluminum ceiling tiles finished in a soft brushed nickel, antique copper, or matte white patina that coordinates with your decor. Apply a thin, continuous bead of specialized panel adhesive across the back rim of your first tin tile, and place it precisely at the central chalk intersection point. Secure the tile permanently to the plywood base by driving small, flat-head cone nails through the pre-drilled perimeter holes using a tack hammer. Interlock the matching lip of your second tile tightly into the installed piece, working outward systematically in a concentric grid pattern toward the outer walls, and finish with a coordinating tin cove molding.
Common Beginner Mistakes and How to Avoid Them
When executing a DIY bedroom ceiling project, novice woodworkers and decorators frequently encounter a few critical technical pitfalls that can compromise both the visual finish and long-term structural safety of the installation. The most dangerous error is attempting to mount heavy architectural additions—such as solid wood beams, heavy drywall steps, or plywood backing sheets—directly into thin drywall plaster using standard plastic wall anchors. Drywall cannot support sustained overhead tension loads, and neglecting to anchor your internal support cleats directly into solid structural joists will rapidly result in severe sagging and catastrophic ceiling failure. To completely prevent this hazard, always use a reliable electronic stud finder to identify the exact centers of your internal ceiling joists, and ensure every primary construction screw penetrates at least two inches deep into the structural wood framing. Another common pitfall is ignoring the levelness of your existing ceiling plane before installing straight timber slats or shiplap boards. Older homes frequently feature sloping or warped ceilings, and installing rigid wood strips directly over an uneven surface will highlight the defects, resulting in ugly gaps and crooked alignment lines. Always use a digital laser level to establish a perfectly straight baseline, and slide thin wooden shims behind your framing cleats where necessary to correct any underlying structural warps before installing your final finish boards.
Practical Tips for Achieving Professional Craftsmanship Results
Elevating your handmade bedroom overhead modifications to a professional, showroom standard requires a disciplined dedication to meticulous wood preparation, accurate cutting mechanics, and clever hardware concealment strategies. Always purchase select-grade or cabinet-grade timbers for your exposed design elements, and allow the raw lumber sheets to acclimate inside your bedroom for at least seventy-two hours before making cuts to stabilize internal humidity levels and prevent future warping. When assembling hollow box-beam casings or mitered corner joints, always verify the accuracy of your saw settings using a machinist’s speed square, as even a tiny one-degree cutting error will result in prominent, dark gaps along your seams under room lighting. Use a high-quality pneumatic brad nailer equipped with thin eighteen-gauge finishing nails to secure your face trim, as these small fasteners leave tiny entry holes that can be easily camouflaged. Always countersink your nail heads slightly below the wood surface, filling the small recesses with a premium non-shrinking wood putty that matches your paint or stain color precisely. Finally, apply a high-quality paintable acrylic caulk along all structural joints where your wood molding intersects with the drywall, as crisp caulked borders are what cleanly separate professional interior design from standard amateur craft projects.
Styling, Presentation, and Cohesive Light Source Integration
Styling your newly transformed overhead environment is the creative phase where you integrate your architectural ceiling structures with strategic light fixtures to complete a harmonious home decor narrative. Always coordinate the style and finish of your overhead light attachments directly with the structural theme of your ceiling; pair a sleek modern tray with flush-mounted minimalist LED pots, while anchoring a rustic box-beam grid with a substantial wrought-iron statement chandelier. Position your bedside reading lamps and accent wall sconces carefully to direct soft beams of light upward toward your textured shiplap or linear wood slats, highlighting the physical depth and natural shadow lines of the timber beautifully. Use dimmable smart LED bulbs across all your overhead fixtures, allowing you to transition the room environment seamlessly from a bright, focus-driven morning daylight setting into a soft, warm amber glow for restful evening cycles. If your ceiling layout features a dark vault or saturated paint tone, keep your lower bedding linens and window curtains in soft neutral creams or matching monochromatic tones to unify the spatial boundaries. By balancing your practical illumination requirements with thoughtful architectural styling, you transform your ceiling into an active contributor to your bedroom’s comforting, high-end atmosphere.
Strategic Budget Tracking and Efficient Time Management
Completing a large-scale structural overhead transformation successfully within a strict financial framework requires detailed planning, cost spreadsheets, and realistic management of your physical weekend time blocks. Begin by building a comprehensive shopping list that breaks down every required supply, itemizing lumber quantities, specialized hardware fasteners, drywall joint compounds, and architectural paint gallons down to the exact unit cost to monitor your budget ideas. To keep this creative project highly affordable, purchase your primary lumber materials in bulk contractor quantities from local lumber yards rather than buying individual retail pieces, and look into renting specialized tools like drywall lifts or pneumatic nailers instead of purchasing them outright. Prioritize allocating your funds toward high-quality foundational supplies like premium structural lag screws and mold-resistant primers, as the long-term safety of the installation depends entirely on these hidden components. Manage your labor time effectively by batch-processing your carpentry steps across a single weekend; dedicate your Saturday morning entirely to precise layout marking, locating joists, and installing all your primary structural support tracks. Use Saturday afternoon for cutting and mounting your finish panels or timber slats, leaving your Sunday afternoon completely free for seam caulking, final detail painting, and re-installing your elegant light fixtures.
Creative Expansion and Advanced Architectural Inspiration
Once you have successfully mastered the fundamentals of building standard hollow box beams, installing linear timber slats, and executing crisp recessed trays, you can explore advanced creative variations to customize your space further. Experiment with incorporating advanced multi-tiered lighting controls, installing hidden RGB color-changing LED strips inside your floating cloud panels to allow you to cast dramatic indigo, amber, or violet twilight hues across your ceiling depending on your reading mood. Advanced woodworkers can explore carving intricate decorative geometric patterns directly into the faces of thick solid oak support beams using a plunge router, adding a unique personalized touch that elevates the authentic character of traditional architecture homes. Another highly creative project involves installing thin, natural cork insulation sheets inside your recessed coffer panels, providing a beautiful earthy texture while boosting the room’s thermal efficiency and sound-dampening capabilities dramatically. Consider extending your wooden shiplap ceiling planking down an adjacent accent wall to form a continuous, wrapping L-shaped headboard canopy that visually isolates the sleeping area within an open-concept master bedroom suite layout. By continually expanding your carpentry repertoire and integrating advanced architectural materials, your bedroom ceiling transformations will evolve into stunning works of functional art that provide lasting creative inspiration.