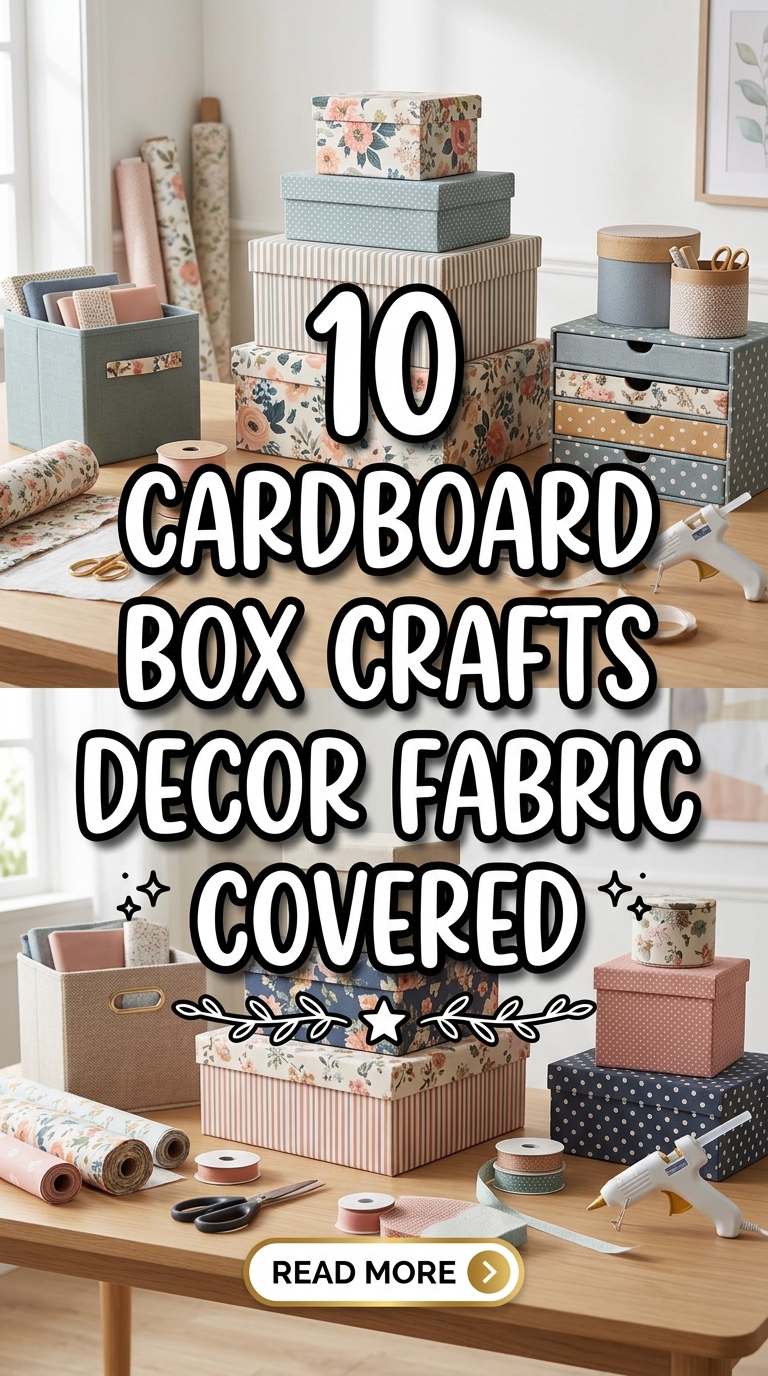
10 Cardboard Box Crafts Decor Fabric Covered

Fabric-covered cardboard box crafts combine practical storage with decorative appeal, making them a popular choice among Pinterest ideas for home organization and handmade decoration. This creative project transforms ordinary cardboard boxes into attractive decorative pieces that can complement many interior styles, including modern design, minimalist style, rustic themes, and cozy home decor settings. By covering cardboard boxes with fabric, it becomes possible to create customized storage solutions while reducing waste and extending the life of everyday materials. This approach supports DIY creativity and offers an accessible project for beginners who want to improve organization without investing in expensive decorative containers.
Readers will learn how to prepare materials, select suitable fabrics, and create ten different fabric-covered cardboard box designs. Each idea includes practical instructions and design inspiration that can be adapted to different rooms and purposes. From decorative storage containers to elegant display pieces, these projects demonstrate how simple materials can be transformed into functional and aesthetic home accessories. The techniques presented are beginner friendly and designed to encourage creativity while maintaining durability and visual appeal. Whether the goal is improving organization, adding decoration, or exploring a handmade hobby, fabric-covered cardboard box crafts offer a practical and rewarding solution.
Why This Idea Is Trending or Useful
Fabric-covered cardboard box projects continue to gain attention among Pinterest ideas because they combine sustainability, creativity, and functionality in a single easy project. Many people are seeking affordable ways to improve organization and home decor while reducing unnecessary waste. Cardboard boxes are widely available, making them an accessible foundation for numerous DIY projects. Covering them with fabric allows complete customization of color, pattern, and texture, helping individuals create storage pieces that coordinate with existing room designs.
Another reason these crafts remain among trending ideas is their flexibility. They can serve as decorative baskets, shelf organizers, closet storage containers, desk organizers, and gift boxes. The project requires relatively simple materials and does not demand advanced crafting experience, making it highly suitable for beginners. Pinterest users are often attracted to projects that offer visible results without requiring specialized tools, and fabric-covered boxes meet that requirement effectively. The combination of practical storage and aesthetic improvement appeals to homeowners, students, renters, and craft enthusiasts alike. These projects also support budget ideas by transforming inexpensive materials into attractive household items. The balance between function and creativity makes fabric-covered cardboard box crafts a valuable source of inspiration for individuals interested in handmade decoration and personalized organization solutions.
Materials and Preparation
Successful fabric-covered cardboard box projects begin with careful preparation and thoughtful planning. Basic materials include sturdy cardboard boxes, fabric, fabric scissors, measuring tape, ruler, craft glue, hot glue, cutting mat, utility knife, pencil, and decorative trims if desired. Choosing strong cardboard helps improve durability, especially for boxes intended for long-term storage. Fabric selection should consider both appearance and practicality. Cotton fabrics are often easier to work with because they fold neatly and adhere well to cardboard surfaces.
Preparation starts by inspecting the cardboard box for damage and reinforcing weak corners with additional glue if necessary. Measurements should be taken carefully before cutting fabric to ensure accurate coverage. It is helpful to leave extra fabric around edges to allow for folding and secure attachment. Cleaning the box surface removes dust and improves glue adhesion. Planning also involves deciding where the finished box will be used and selecting a fabric pattern that complements surrounding decor. For organization projects, labeling areas can be planned in advance. Gathering all materials before beginning helps maintain a smooth workflow and reduces interruptions during the creative process. Proper preparation creates a stronger foundation for a successful DIY tutorial and contributes significantly to achieving professional-looking results.
Idea 1: Classic Linen Storage Box
How to Create
A classic linen-covered storage box offers a timeless appearance that fits naturally into many home decor styles. Linen-textured fabrics create a refined aesthetic while maintaining a simple and versatile look. This project works particularly well for storing office supplies, seasonal decorations, craft materials, or household accessories. The neutral appearance allows the box to blend into living rooms, bedrooms, and workspaces without overwhelming existing decor. Choosing soft beige, gray, cream, or muted earth tones supports a minimalist style while providing warmth and texture. The visual appeal comes from clean lines, smooth fabric application, and carefully finished corners. Because the design focuses on simplicity, attention to detail becomes especially important. Precise measurements and neat folding contribute significantly to the final appearance. This type of storage solution demonstrates how cardboard can be transformed into an elegant decorative item through thoughtful material selection and careful execution. It represents one of the most practical Pinterest ideas because it combines organization and decoration in a straightforward and beginner friendly format. The result is a handmade storage piece that appears significantly more expensive than its actual cost while maintaining useful everyday functionality.
To create this fabric-covered storage box, begin by selecting a sturdy cardboard container with strong corners and a rectangular shape. Measure each side carefully and cut fabric pieces with approximately two inches of additional material around every edge. Apply a thin, even layer of glue to one side of the box and carefully smooth the fabric into place, removing wrinkles as you work. Continue covering each panel individually while maintaining pattern alignment where necessary. Fold excess fabric around edges and secure it inside the box for a clean finish. Reinforce corners with additional adhesive to prevent lifting over time. Once the exterior is complete, line the interior with coordinating fabric or decorative paper for a polished appearance. Allow the adhesive to dry fully before handling the box. Optional additions include fabric-covered labels, ribbon handles, or decorative trim along the upper edge. This step by step method creates a durable storage solution that improves organization while serving as an attractive decorative accent throughout the home.

Idea 2: Floral Fabric Memory Box
How to Create
A floral fabric memory box transforms a simple cardboard container into a decorative keepsake holder suitable for preserving photographs, letters, greeting cards, and meaningful personal items. Floral patterns introduce softness and visual interest while creating an inviting handmade appearance. This design works especially well in bedrooms, craft rooms, and personal spaces where sentimental items are stored. Small-scale floral prints often produce a more elegant result than large patterns because they wrap around corners more smoothly and create balanced visual coverage. The box can also become part of a decorative shelf display while serving a practical purpose. Fabric textures contribute additional depth, making the finished project feel more sophisticated and intentional. Floral-covered boxes remain popular Pinterest inspiration because they combine decorative charm with meaningful organization. The project allows substantial personalization through fabric selection, making each finished piece unique. Soft color palettes create a calming aesthetic, while brighter floral combinations add energy and character. Regardless of the chosen pattern, the goal remains creating a functional storage solution that protects cherished items while enhancing surrounding decoration through thoughtful design and craftsmanship.
Begin the project by selecting a cardboard box with a fitted lid, as secure closure helps protect stored keepsakes. Measure both the box and lid separately to ensure accurate fabric coverage. Cut floral fabric pieces slightly larger than each surface and apply adhesive gradually to avoid wrinkles or bubbles. Cover the main box first, smoothing the fabric carefully along edges and corners. Next, cover the lid using the same technique while ensuring the fabric pattern remains visually balanced. Fold excess fabric inside and secure it firmly for a clean finish. To enhance durability, add a layer of lightweight batting beneath the fabric before attaching it, creating a softly padded appearance. The interior can be lined with coordinating fabric for additional elegance. Decorative labels or fabric-covered tags can be attached to identify contents. Allow all glued surfaces to dry completely before use. This execution process creates a beautiful keepsake box that supports organization while adding a personalized decorative element to shelves, dressers, and storage areas.

Idea 3: Minimalist Fabric Desk Organizer
How to Create
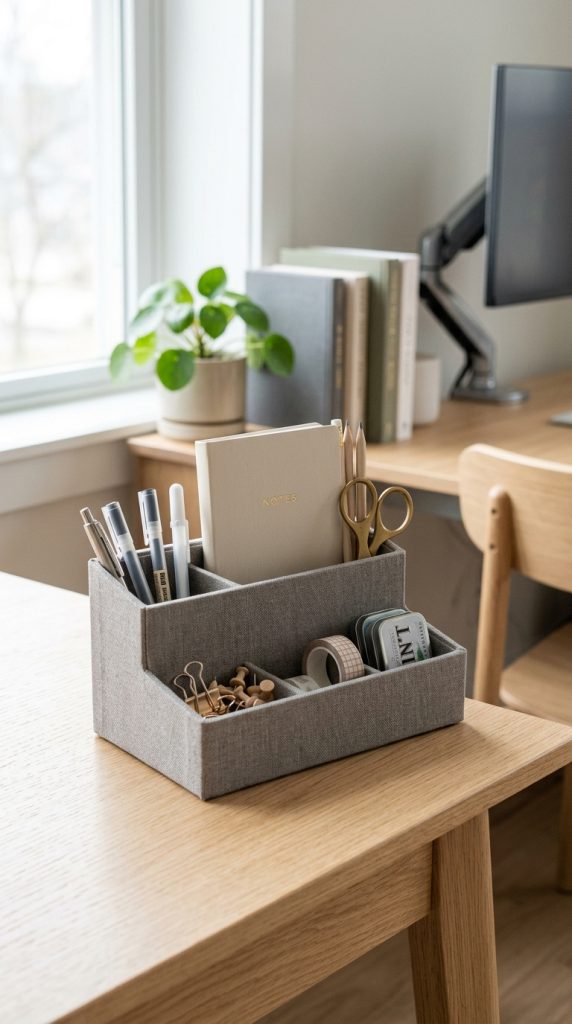
A minimalist fabric desk organizer focuses on simplicity, functionality, and visual clarity. This design supports organization by providing dedicated storage for stationery, notebooks, charging cables, and office accessories. Neutral fabrics, solid colors, and clean geometric shapes define the overall aesthetic. The project aligns closely with modern design principles by reducing visual clutter while improving workspace efficiency. Pinterest users often seek practical solutions that enhance productivity without sacrificing style, making this idea especially relevant. A well-designed organizer can contribute to a more structured environment and encourage better daily habits. Fabric covering softens the appearance of cardboard while creating a cohesive decorative element that blends with contemporary interiors. Choosing fabrics with subtle texture adds visual interest without distracting from the minimalist theme. This project demonstrates how simple materials can support effective planning and organization while maintaining aesthetic appeal. The combination of handmade creativity and functional design makes it suitable for students, remote workers, and anyone seeking an attractive workspace upgrade using affordable materials and beginner friendly techniques.
Create the organizer by selecting several small cardboard boxes of varying sizes that fit together efficiently. Arrange them before covering to determine the most practical layout for storage needs. Cover each box individually using solid-colored fabric, ensuring smooth surfaces and neatly folded corners. Once all sections are covered, secure them together with strong adhesive to form a unified organizer system. Consider creating compartments for pens, scissors, notebooks, and electronic accessories. Reinforce interior joints for additional stability and durability. The inside surfaces may be lined with decorative paper or matching fabric for a refined appearance. If desired, attach fabric-covered dividers to create customized storage sections. Allow adequate drying time before use. This setup method produces an organized workspace accessory that improves efficiency while contributing to a clean and modern visual environment. The finished organizer combines practical storage with handmade craftsmanship, demonstrating how cardboard and fabric can become useful tools for maintaining order and enhancing home office decor.
Idea 4: Decorative Fabric Toy Storage Bin
How to Create
A fabric-covered toy storage bin offers an attractive solution for managing children’s toys while supporting organized living spaces. Traditional plastic containers often appear utilitarian, whereas fabric-covered boxes can coordinate with room decor and contribute to a more cohesive appearance. Bright colors, playful prints, or themed fabrics can be selected to suit different age groups and room styles. The project provides a practical way to reduce clutter while making cleanup easier and more engaging. Large cardboard boxes are particularly suitable because they provide generous storage capacity for stuffed animals, building blocks, books, and games. Fabric covering improves the visual appeal and helps integrate storage into the overall room design. Pinterest inspiration frequently highlights multifunctional solutions that combine organization and decoration, and this project fits that approach perfectly. The ability to customize patterns and colors allows families to create storage that reflects personal preferences while supporting everyday functionality. A well-made toy bin also encourages consistent organization habits by providing a designated place for frequently used items.
Start with a large, sturdy cardboard box capable of supporting regular use. Reinforce the bottom and corners using additional cardboard layers and strong adhesive before applying fabric. Measure and cut fabric panels with sufficient overlap for secure attachment. Cover each exterior side carefully, smoothing the material to eliminate wrinkles and ensuring consistent tension throughout the process. Add fabric handles by creating reinforced loops and attaching them securely to opposite sides of the bin. Consider using washable fabric if the container will experience frequent handling. The interior can be lined with coordinating fabric for a finished appearance. Labels may be attached to identify categories such as books, toys, or art supplies. Allow all glued surfaces to cure completely before placing items inside. This step by step process creates a durable storage solution that simplifies organization while contributing decorative value to playrooms, bedrooms, and family living spaces. The completed bin combines functionality, creativity, and practical household management.

Idea 5: Vintage-Inspired Fabric Hat Box
How to Create
A vintage-inspired fabric hat box introduces classic decorative charm while providing useful storage for accessories, seasonal items, and display pieces. Vintage aesthetics often incorporate floral motifs, muted color palettes, lace details, and textured fabrics that evoke historical craftsmanship. This project adapts those visual qualities to a simple cardboard structure, creating an elegant decorative object suitable for shelves, dressers, or closets. Round or oval cardboard boxes work especially well because they resemble traditional hat boxes and create visual distinction from standard rectangular containers. Fabric selection plays a significant role in establishing the vintage atmosphere. Soft patterns, faded tones, and textured materials contribute authenticity and character. Pinterest users frequently seek creative ideas that blend decoration with practical storage, and this concept achieves both objectives effectively. The finished box can function independently as a decorative accent or become part of a larger collection of coordinated storage containers. Attention to detail, particularly around edges and trim placement, enhances the overall appearance and contributes to a more polished final result.
Begin by selecting a round cardboard box and preparing all surfaces for fabric application. Measure carefully around curved sections and cut fabric with enough excess to accommodate folding and shaping. Apply adhesive gradually in small sections, smoothing the fabric as you move around the circumference of the box. Cover the lid separately, ensuring alignment between the top and side fabric panels. Decorative trim, fabric piping, or lace edging may be added along seams to conceal transitions and reinforce the vintage style. The interior can be lined with coordinating fabric to create a complete decorative presentation. Reinforce frequently handled areas such as the lid edge to improve longevity. Allow all components to dry thoroughly before assembly. This execution process transforms an ordinary cardboard container into a decorative storage piece that reflects traditional design influences while providing practical organization. The completed project offers both visual appeal and functional value, making it an attractive addition to many home decor settings.

Idea 6: Fabric-Covered Closet Organization Box
How to Create
Closet organization often benefits from uniform storage solutions that maximize available space while maintaining visual order. Fabric-covered cardboard boxes provide an affordable method for creating coordinated storage systems for clothing accessories, seasonal items, scarves, belts, and personal belongings. Consistent fabric choices help establish a structured appearance that reduces visual clutter and improves accessibility. Pinterest ideas frequently emphasize efficient organization because it enhances daily routines and supports cleaner living environments. A coordinated collection of fabric-covered boxes creates a sense of intentional design even in utility spaces such as closets. Neutral tones contribute to a minimalist style, while subtle patterns add personality without overwhelming the area. The project offers practical benefits because it allows customization according to specific storage needs and available shelf dimensions. Careful planning ensures that boxes fit efficiently within closet spaces and support long-term organization goals. This combination of function and aesthetics makes fabric-covered storage boxes a valuable creative project for homeowners seeking affordable and attractive organizational solutions.
Create closet storage boxes by measuring shelf dimensions before selecting or cutting cardboard containers. Consistent sizing improves visual harmony and maximizes available storage capacity. Cover each box with durable fabric that complements the surrounding closet design. Apply adhesive evenly and secure all edges carefully to prevent lifting during frequent use. Consider attaching fabric-covered label holders to simplify identification of contents. Reinforce corners and handles if the boxes will contain heavier items. The interiors may be lined with lightweight fabric or paper to improve appearance and protect stored belongings. Arrange completed boxes systematically according to category, season, or frequency of use. This setup method promotes efficient organization while creating a cohesive visual environment. By combining practical planning with decorative finishing techniques, the project transforms simple cardboard materials into useful storage tools. The resulting organization system supports easier access to personal belongings and contributes to a cleaner, more structured closet arrangement that remains attractive over time.
Idea 7: Patchwork Fabric Decorative Box
How to Create
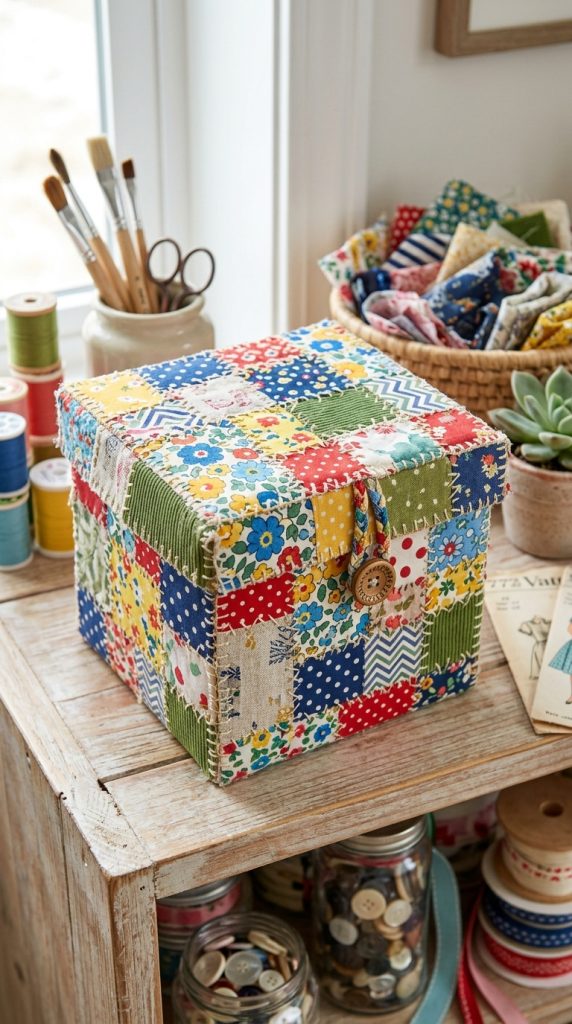
A patchwork fabric decorative box celebrates creativity through the combination of multiple fabric patterns, colors, and textures. Rather than relying on a single fabric design, this project incorporates carefully arranged fabric pieces that create visual variety and artistic interest. Patchwork techniques provide opportunities to use fabric scraps efficiently while producing a unique handmade appearance. Pinterest inspiration often highlights projects that encourage personalization, and patchwork designs offer nearly unlimited possibilities for customization. The finished box can serve as decorative storage, gift packaging, or a display accent within living spaces. Successful patchwork designs balance contrast and harmony by selecting fabrics that coordinate despite their differences. Geometric arrangements often produce the most organized appearance, while more organic layouts create a casual and artistic effect. The project encourages experimentation and creative expression while remaining accessible to beginners. By combining practical storage with decorative craftsmanship, the patchwork box demonstrates how simple materials can be transformed into visually engaging home accessories that showcase individual style.
Begin by sorting fabric scraps according to color, pattern, and scale. Arrange them into a balanced composition before attaching them to the cardboard surface. Fabric pieces can be sewn together into larger panels before application or attached individually depending on the desired appearance. Once the patchwork design is prepared, measure and trim it to fit the box dimensions. Apply adhesive evenly and smooth the fabric carefully across each surface. Fold edges neatly and secure them inside the box for a finished result. Reinforce seams where multiple fabric pieces meet to improve durability. The interior can be lined with a coordinating solid fabric to create contrast and visual balance. Decorative stitching, trim, or labels may be added as finishing touches. Allow sufficient drying time before use. This step by step approach produces a distinctive decorative storage box that highlights creativity while maintaining practical functionality. The completed project serves as both a useful organizational tool and a handmade decorative statement.

Idea 8: Elegant Fabric Jewelry Storage Box
How to Create
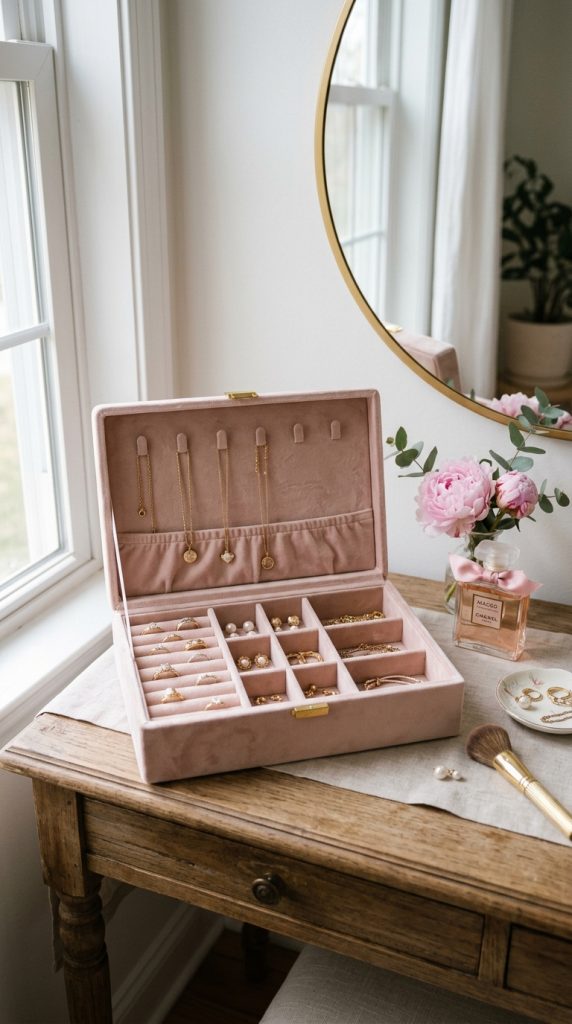
An elegant fabric-covered jewelry box provides organized storage while protecting delicate accessories from dust and damage. Soft fabrics contribute a refined appearance and help create a luxurious presentation without requiring expensive materials. This project focuses on combining decorative appeal with functional compartmentalization. Pinterest users often search for creative ideas that improve organization while enhancing visual presentation, and jewelry storage represents a practical application of fabric-covered cardboard construction. Soft color palettes such as cream, blush, gray, or muted blue create a sophisticated aesthetic suitable for bedrooms and dressing areas. Interior divisions can be customized according to specific storage requirements, including rings, earrings, necklaces, and bracelets. The fabric exterior contributes texture and elegance, transforming simple cardboard into an attractive decorative accessory. Careful attention to proportion, alignment, and finishing details helps elevate the appearance and functionality of the final piece. This project demonstrates how handmade craftsmanship can create practical storage solutions that support organization while complementing personal decor preferences.
Begin with a shallow cardboard box that includes a fitted lid. Measure each section carefully and cut fabric panels with extra allowance for folding around edges. Cover the exterior surfaces first, ensuring smooth fabric placement and secure adhesion. Create interior compartments using cardboard dividers wrapped in matching fabric. Arrange these sections according to intended jewelry categories and secure them firmly inside the box. Line the bottom with soft fabric to provide additional protection for stored items. Decorative trim may be applied around the lid edge to enhance appearance. Reinforce corners and frequently handled areas to improve durability. Allow all adhesive to dry completely before placing jewelry inside. This execution process creates a practical and attractive storage solution that improves organization while displaying thoughtful craftsmanship. The completed jewelry box combines decorative elegance with everyday utility, making it a valuable addition to dressing tables, shelves, and personal storage spaces.
Idea 9: Fabric-Covered Gift Presentation Box
How to Create
A fabric-covered gift presentation box transforms packaging into part of the overall gift experience. Unlike disposable wrapping materials, a decorative fabric box can be reused for storage and organization after the gift has been received. This dual-purpose functionality makes it both practical and aesthetically appealing. Pinterest trends frequently feature reusable packaging ideas because they combine sustainability with creativity. Fabric covering allows complete customization according to seasons, celebrations, or personal preferences. Elegant fabrics create a refined presentation, while colorful patterns introduce excitement and personality. The project emphasizes thoughtful presentation and attention to detail, demonstrating how handmade elements can elevate ordinary packaging. Because the box remains useful after gifting, it extends the value of the project beyond the initial occasion. Decorative trims, bows, and fabric embellishments can further enhance visual appeal while maintaining a cohesive design. This creative project offers a meaningful alternative to conventional wrapping methods and encourages resourceful use of common materials.
Select a cardboard box that matches the size of the intended gift and ensure that it opens and closes smoothly. Measure each surface and cut fabric panels with adequate overlap for folding. Apply adhesive carefully and cover the box methodically to achieve smooth, wrinkle-free results. Pay special attention to corners and lid edges, as these areas contribute significantly to the overall presentation. The interior may be lined with coordinating fabric or decorative paper for a polished appearance. Fabric ribbons, handmade tags, or decorative accents can be added after the covering process is complete. Allow all components to dry thoroughly before placing the gift inside. This setup method creates an attractive reusable container that functions as both packaging and storage. The finished presentation box demonstrates creativity, organization, and craftsmanship while providing lasting utility long after the gift-giving occasion has passed.

Idea 10: Modern Geometric Fabric Storage Cube
How to Create
A modern geometric storage cube combines contemporary design principles with practical organization. Geometric patterns create visual structure and contribute to a clean, organized appearance that complements modern interiors. This project is particularly suitable for open shelving systems where storage containers remain visible as part of the room design. Fabric choices featuring lines, triangles, grids, or abstract geometric motifs support the contemporary aesthetic while introducing subtle visual interest. Pinterest inspiration frequently showcases geometric patterns because they align well with current interior design trends and minimalist style preferences. The cube format maximizes storage efficiency while maintaining a balanced appearance. Consistent dimensions allow multiple cubes to be arranged together, creating coordinated storage systems for books, accessories, toys, and household items. The combination of practical function and modern decoration makes this project highly adaptable to different rooms and organizational needs. Careful fabric placement ensures that geometric patterns remain aligned and visually appealing throughout the finished design.
Start with a square cardboard box and reinforce all corners to support regular use. Measure carefully and cut geometric-patterned fabric panels that align correctly across adjoining surfaces. Apply adhesive evenly and attach each panel with attention to pattern continuity. Fold excess fabric neatly inside the box and secure it firmly to create clean edges. Consider adding a fabric-covered pull handle to improve accessibility when the cube is stored on shelves. Interior surfaces may be lined with coordinating fabric to enhance appearance and durability. Multiple cubes can be created using complementary patterns to establish a cohesive storage collection. Allow all adhesive to cure fully before loading the boxes with contents. This step by step process produces a stylish storage solution that improves organization while contributing to modern home decor. The completed cubes provide practical storage capacity and decorative value, making them suitable for living rooms, offices, bedrooms, and creative workspaces.

Common Beginner Mistakes and How to Avoid Them
One of the most common mistakes in fabric-covered cardboard box projects is inaccurate measuring. Small measurement errors often lead to uneven fabric placement, exposed cardboard edges, and unnecessary wrinkles. Taking careful measurements before cutting fabric helps achieve cleaner results. Another frequent issue involves applying too much adhesive, which can soak through fabric and create visible marks on the surface. Using thin, even layers of glue improves appearance and durability. Beginners also sometimes neglect corner reinforcement, causing boxes to weaken over time. Strengthening structural areas before decorating contributes significantly to longevity. Rushing the drying process can result in shifting fabric and loose edges, so allowing sufficient curing time is important. Poor fabric selection may also create difficulties, especially when working with very thick or highly textured materials that resist smooth application. Planning ahead, testing materials, and working methodically help avoid many common problems. Careful preparation and attention to detail contribute to more professional-looking results and a more enjoyable DIY experience.
Practical Tips for Better Results
Achieving professional-looking results often depends on small details throughout the crafting process. Ironing fabric before application removes wrinkles that might otherwise become permanent after gluing. Using sharp scissors improves cutting accuracy and helps create cleaner edges. When covering corners, folding fabric neatly in consistent patterns creates a more polished appearance. Working from the center outward while smoothing fabric helps prevent air bubbles and wrinkles. Reinforcing high-stress areas such as handles and lids increases durability, particularly for storage boxes that will be used frequently. Selecting fabrics that complement existing home decor improves visual integration within living spaces. Labeling storage boxes can also enhance organization and make contents easier to identify. Testing adhesives on fabric scraps before beginning a project helps prevent unexpected results. Maintaining patience throughout the process contributes significantly to quality outcomes. These practical techniques support better craftsmanship, improved appearance, and longer-lasting performance while making the overall creative project more rewarding and successful.
Styling, Presentation, or Organization Ideas
Fabric-covered cardboard boxes can be arranged creatively to enhance both storage efficiency and decorative presentation. Coordinating fabrics across multiple boxes creates a cohesive visual system that contributes to organized and attractive spaces. Neutral fabrics support minimalist style interiors, while patterned collections introduce personality and visual interest. Stacking boxes of varying sizes can create decorative displays on shelves, desks, and storage units. Open shelving provides opportunities to showcase fabric textures and patterns while maintaining practical organization. Decorative labels help identify contents and contribute to a structured appearance. In living rooms, fabric-covered boxes can store remote controls, magazines, and accessories while complementing surrounding decor. Bedrooms benefit from coordinated storage systems for clothing accessories and personal items. Craft rooms can use color-coded boxes to organize supplies efficiently. Combining functionality with thoughtful presentation transforms simple storage containers into decorative elements that actively contribute to the overall aesthetic of a space while supporting everyday organization needs.
Budget or Time Planning
Fabric-covered cardboard box crafts are excellent budget ideas because many required materials are inexpensive or already available at home. Reusing cardboard boxes reduces project costs while supporting resourceful crafting practices. Planning multiple boxes at the same time often improves efficiency because materials and tools remain readily accessible throughout the process. Grouping similar tasks, such as measuring, cutting, and gluing, can reduce overall completion time. Fabric remnants from previous projects provide another cost-effective material source. Establishing a clear project plan before beginning helps avoid unnecessary purchases and reduces material waste. Beginners may benefit from starting with simple box shapes before attempting more complex designs involving compartments or curved surfaces. Creating a timeline for preparation, assembly, drying, and finishing stages supports smoother project management. By balancing creativity with careful planning, it is possible to produce attractive decorative storage solutions without significant financial investment. Efficient preparation and thoughtful material selection help maximize both time and budget while maintaining quality results.
Creative Expansion and Advanced Inspiration
Once basic fabric-covered box techniques have been mastered, numerous opportunities exist for creative expansion. Decorative embroidery, fabric painting, appliqué designs, and textured embellishments can introduce additional visual interest and personalization. Coordinated collections of storage boxes can be designed for specific rooms or organizational systems. Advanced projects may incorporate hidden compartments, removable dividers, hinged lids, or decorative hardware. Seasonal themes provide another source of inspiration, allowing boxes to complement changing decor throughout the year. Mixing fabrics, textures, and patterns can create distinctive artistic effects while maintaining practical functionality. Larger projects might include coordinated shelf systems, decorative storage walls, or custom organization stations. Combining fabric-covered boxes with other handmade decoration elements creates unified design themes throughout a home. Continued experimentation with materials and techniques encourages skill development while expanding creative possibilities. These advanced variations allow crafters to build upon foundational methods and transform simple cardboard box crafts into increasingly sophisticated decorative and organizational solutions.