10 Dark Bathroom Tiles Ideas

Designing a bathroom around dark tiles shifts the atmosphere of a home from standard utility to a refined, hotel-inspired sanctuary. Dark tiling offers an immersive visual experience, grounding the space while establishing a sophisticated backdrop for fixtures, lighting, and architectural details. This detailed guide explores ten distinct layout concepts designed specifically for homeowners and builders seeking actionable Pinterest ideas to elevate their interior spaces. Readers will learn how to balance deep slate, charcoal, and onyx tones with strategic illumination, material pairing, and grout line execution. Mastering these fundamental design principles provides immense practical utility, allowing individuals to use bold colors without making small spaces feel restricted. This systematic analysis bridges the gap between raw tiling materials and polished residential design, ensuring every reader gains a clear path toward project completion. By focusing on surface finish choices, moisture sealing, and contrast management, creators can establish long-lasting, visually striking environments. The following strategies deliver actionable, beginner friendly insights that blend classic stonework with contemporary layouts.
Why Dark Tile Bathrooms Lead Modern Interior Design Trends
The popularity of dark bathroom tile layouts within digital design communities stems from their practical value and strong aesthetic impact. Dark surfaces naturally obscure water spots, soap scum, and minor surface wear better than white porcelain, providing immediate functional value in high-use environments. From a design perspective, deep charcoal, navy, and black tiles absorb excess light, creating a soothing, low-glare retreat ideal for relaxation. The DIY appeal remains high because tiling a small vanity wall or shower niche allows home crafters to achieve a luxury feel with a manageable amount of materials. Small spaces benefit from dark tiles when paired with large-format cuts or minimal grout lines, which blur the spatial boundaries of a room. This aligns with minimalist style choices that prioritize clean lines, rich textures, and muted color palettes over loud decorative accents. Developing proficiency in choosing finishes—such as matte, honed, or high-gloss—equips builders with a strong understanding of how artificial light interacts with structural surfaces.
Essential Sourcing and Surface Preparation Guidelines
Executing a dark tile installation requires structured preparation and a clear understanding of surface mechanics before laying down mortar. Builders must gather high-grade porcelain or natural stone tiles, modified thin-set mortar, waterproof membranes, tile spacers, and color-matched sanded or unsanded grout. Preparation begins by inspecting the subfloor or drywall for level accuracy, applying cement backer boards in wet zones to prevent structural flexing. Planning considerations must address moisture exposure; applying a continuous liquid waterproofing membrane over shower walls protects underlying framing from water intrusion. Additionally, lighting placement must be finalized early, as dark tiles require focused task lighting and ambient backlighting to highlight surface textures correctly. Proper pre-construction workflow also involves dry-laying tiles on the floor to establish symmetrical cut lines and avoid awkward, narrow tile slivers along visible corners. Investing time into these early structural steps creates a stable environment that prevents cracked tiles and guarantees a professional installation.
Idea 1: The Matte Black Hexagon Statement Floor
How to Create
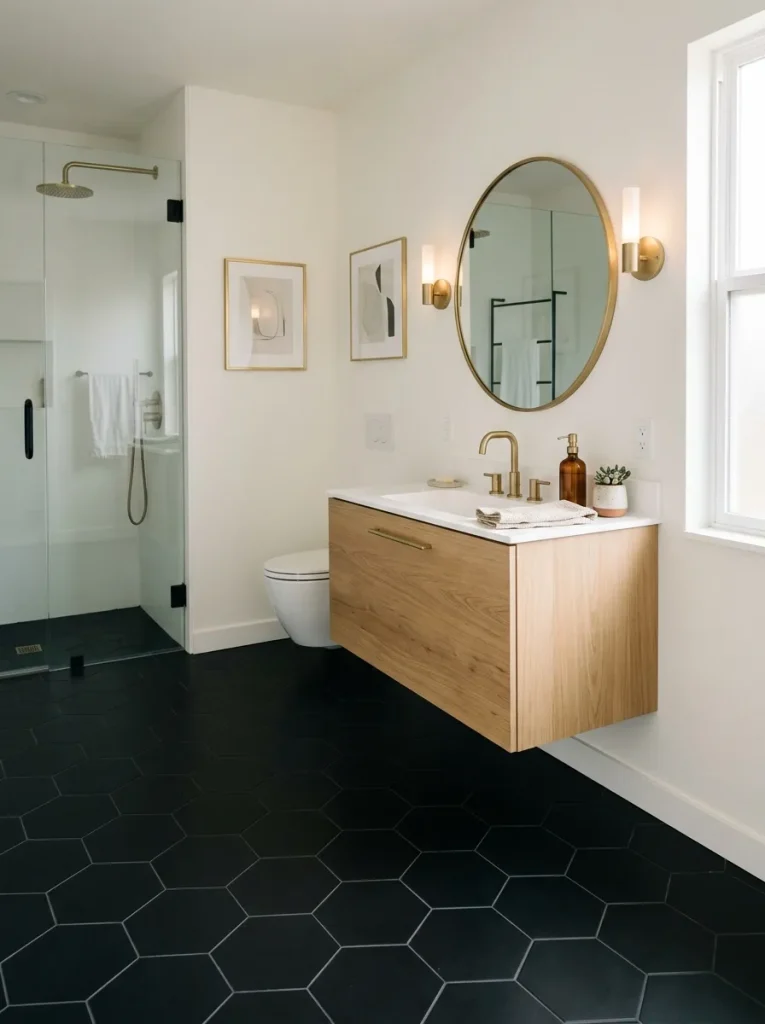
The matte black hexagon statement floor concept combines geometric structure with a smooth, light-absorbing finish to anchor the bathroom layout. This design uses interlocking six-sided porcelain tiles to create visual rhythm across the floor plane without relying on bright colors. The non-reflective matte finish offers a soft, tactile surface underfoot that minimizes slipperiness in wet areas. By pairing dark floor tiles with light-colored or neutral walls, the layout establishes a grounded visual base that makes ceilings appear higher. The repetitive geometric pattern provides natural slip resistance due to the high density of grout lines, making it functional for walk-in showers and main floor areas alike.
To execute this layout step by step, begin by spreading a uniform layer of modified thin-set mortar over a level cement backer board using a notched trowel. Lay the matte black hexagon tile sheets starting from the center of the room, working outward toward the walls to maintain grid symmetry. Insert uniform tile spacers between the sheet edges to keep the grout joints consistent across the entire floor span. Once the mortar cures for twenty-four hours, apply a dark gray or charcoal flexible grout using a rubber grout float, pressing the material firmly into the joints. Sponge away the excess haze from the tile surfaces using clean water before sealing the cured grout lines with a penetrating sealer.
Idea 2: The Vertical Stack Charcoal Subway Wall
How to Create
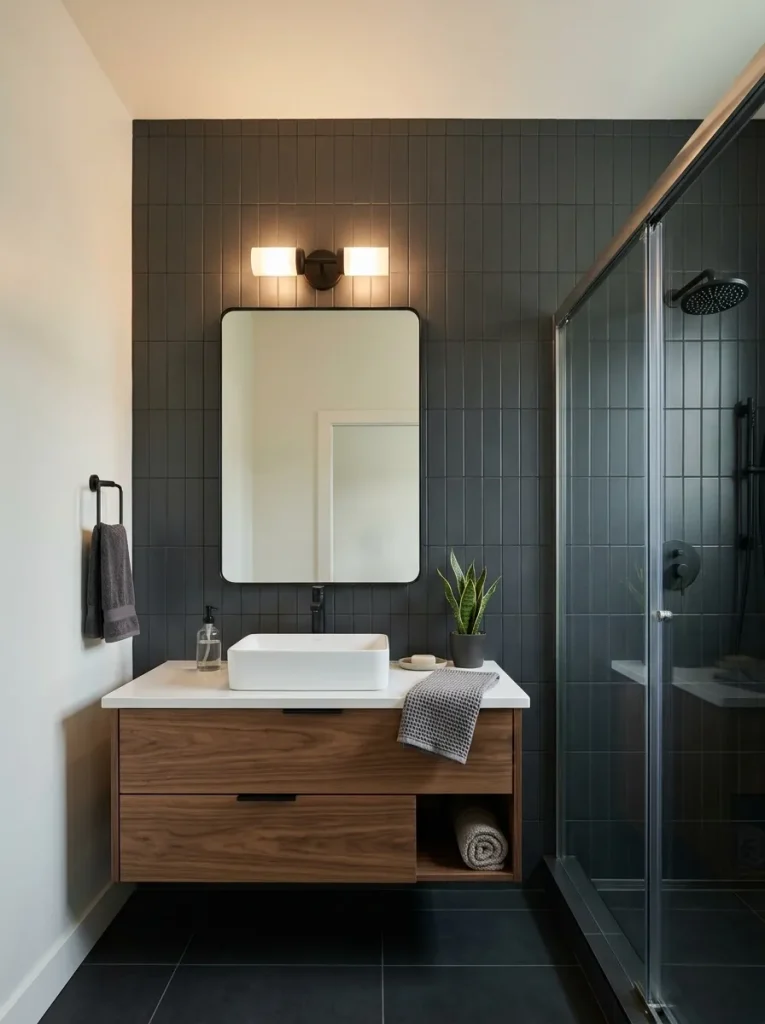
The vertical stack charcoal subway wall layout takes a traditional rectangular tile shape and updates it through a modern, linear installation pattern. Instead of using the classic offset brick bond, this method aligns every subway tile directly above the other to form continuous vertical grout lines. This orientation draws the eye upward, making standard-height bathroom ceilings feel taller and more spacious. The deep charcoal tone offers a softer alternative to pure black, providing rich color depth that pairs exceptionally well with natural timber vanities. Using a satin or semi-gloss finish on vertical subway tiles allows soft light reflections to bounce across the room.
Begin by installing plumb layout lines on the drywall surface using a laser level to guide the vertical tile columns. Apply thin-set mortar to the wall section using a quarter-inch notched trowel, covering only as much area as can be tiled within fifteen minutes. Set the charcoal subway tiles vertically along the laser line, using small plastic spacers to maintain tight, precise two-millimeter grout joints. Continue stacking the tiles upward to the ceiling, checking for flat alignment with a spirit level at every third row. Fill the narrow joints with a non-shrink matching charcoal grout, wipe the surface clean with a damp sponge, and apply a final clear silicone bead along the floor and ceiling perimeters.
Idea 3: The Nero Marquina Marble Feature Wall
How to Create
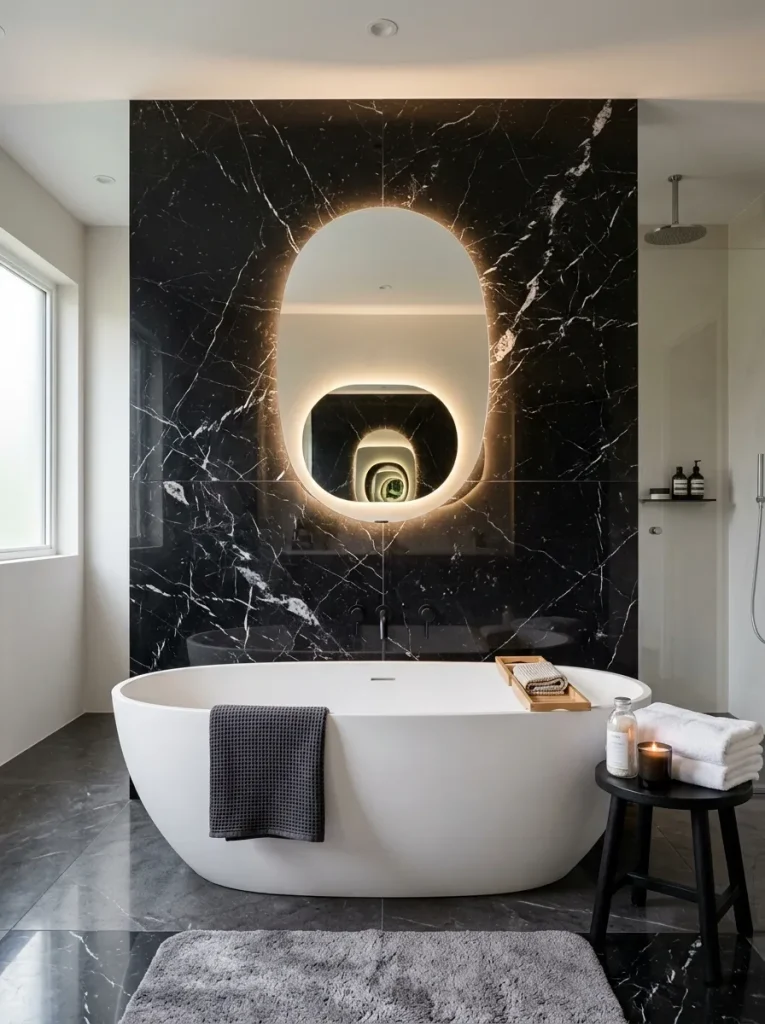
The Nero Marquina marble feature wall layout brings classic opulence to the modern bathroom through deep black natural stone intersected by fine white veining. This design uses large-format polished or honed marble slabs to minimize grout lines, creating an uninterrupted curtain of luxury stone. The natural contrast between the dark stone matrix and the white quartz veins serves as built-in artwork behind a freestanding tub or vanity. Because natural marble is porous, using it as a targeted feature wall keeps maintenance manageable while providing maximum visual impact. The smooth surface reflects ambient vanity lighting, producing a high-end spa aesthetic.
To build this feature wall, verify that the wall studs are reinforced to support the substantial weight of natural marble tiles. Apply a heavy-duty polymer-modified mortar to both the wall surface and the back of each marble tile to guarantee full contact adhesion. Position the large-format marble tiles onto the wall, using leveling clips to keep the tile faces flush with one another. Allow the stone adhesive to set completely before removing the mechanical leveling clips from the joints. Treat the natural marble surface with a stone impregnating sealer to protect the veining from moisture staining, then fill the seams with an unsanded charcoal grout.
Idea 4: The Fluted Slate Accent Zone
How to Create
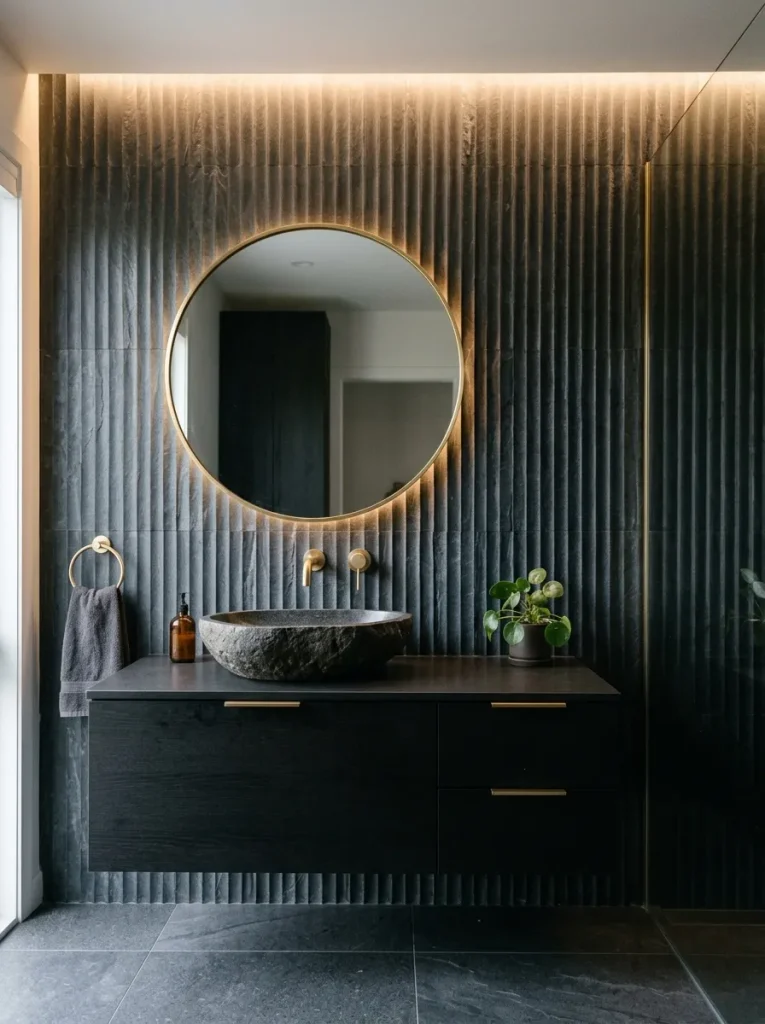
The fluted slate accent zone incorporates three-dimensional texture into the bathroom through ribbed or grooved dark stone tiles. This design style relies on parallel vertical ridges to catch direct and indirect light, casting subtle shadows across the wall surface throughout the day. Using natural dark slate or slate-look porcelain provides an organic, earthy feel that contrasts with smooth glass shower enclosures and polished chrome fixtures. The textured surface works best in focused accent areas, such as behind the main vanity mirror or inside a recessed shower niche, preventing the room from feeling visually overwhelmed.
Start execution by measuring and framing the designated accent zone, ensuring the surrounding drywall is flat and rigid. Apply a layer of tile adhesive with a notched trowel, pressing the fluted slate tiles firmly onto the substrate to lock the rear ridges into the mortar bed. Align the vertical flutes carefully between adjoining tile sheets to maintain a seamless, continuous ridge pattern across the entire installation width. Use a stiff-bristled brush during grout application to push matching dark grout into the deep recessed grooves without distorting the raised tile edges. Wipe away excess grout using a contoured sponge, and finish by illuminating the textured wall from above using raking LED strip lights.
Idea 5: The Glossy Onyx Herringbone Enclosure
How to Create
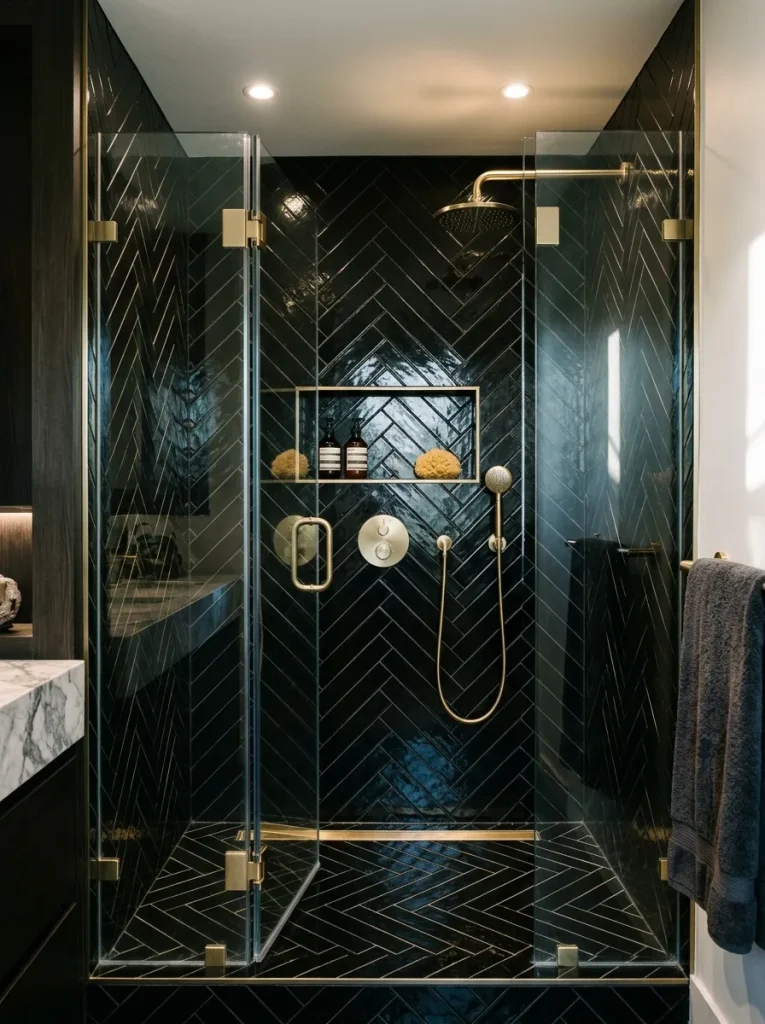
The glossy onyx herringbone enclosure arranges narrow, dark rectangular tiles at alternating forty-five-degree angles to generate dynamic movement within shower stalls. The high-gloss finish reflects light off every angled face, brightening the interior of a dark shower enclosure while maintaining a dramatic color profile. This classic pattern adds detail to small spaces, turning plain shower walls into an engaging architectural feature. The deep black or dark gunmetal tones of the tile contrast sharply with bright water fixtures, emphasizing clean craftsmanship and precise layout planning.
To construct this herringbone enclosure, mark a vertical center reference line down the middle of the waterproofed shower wall using a level. Apply thin-set mortar along the baseline and place the first two glossy rectangular tiles at a ninety-degree angle to one another to establish the herringbone point along the center line. Work outward and upward in a V-shaped pattern, cutting border tiles at precise forty-five-degree angles to fit flush against sidewalls and corners. Use small tile spacers to keep the diagonal grout lines uniform throughout the wall height. Grout the installation with a dark stain-resistant epoxy grout, wiping the glossy faces clean to preserve their reflective, mirror-like quality.
Idea 6: The Dark Terrazzo Modern Wet Room
How to Create
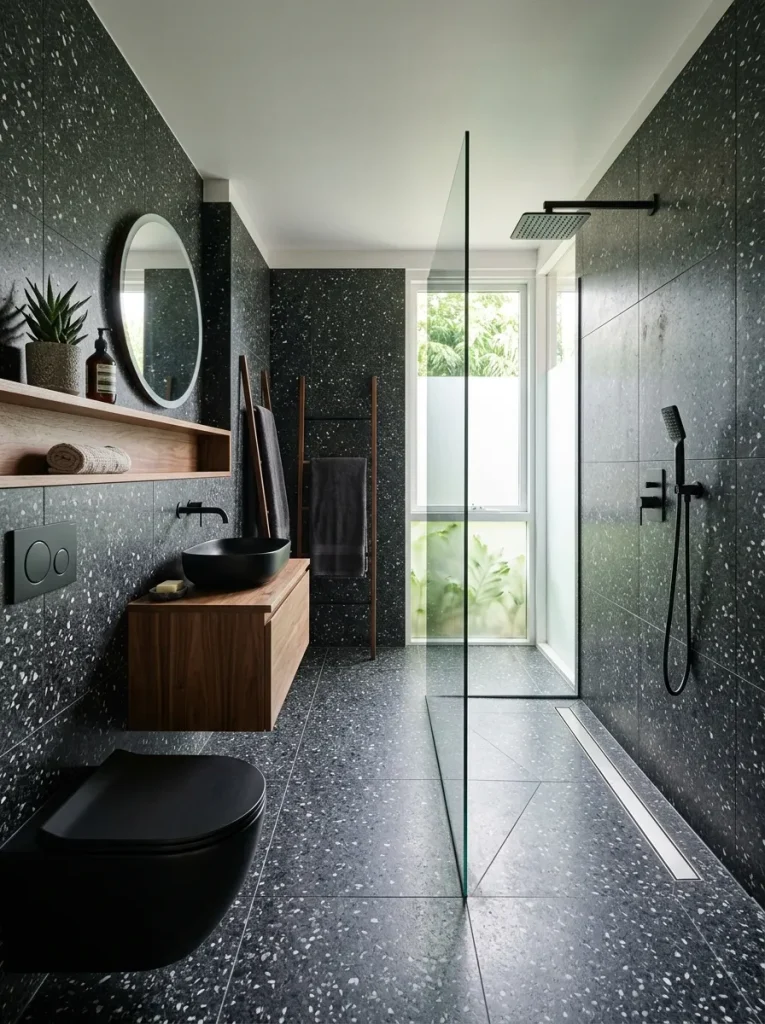
The dark terrazzo modern wet room concept utilizes composite stone tiles containing flecks of marble, quartz, and glass embedded in a dark cement matrix. This design offers a playful, mid-century modern aesthetic that breaks up solid black surfaces with subtle mineral speckles. Terrazzo tiles are durable and water-resistant, making them ideal for seamless transitions from shower floors directly onto main bathroom walk areas. The multi-colored flecks within the dark tile offer built-in accent colors, making it easy to pair the floor with wooden accents, brass hardware, or neutral wall finishes.
Begin installation by constructing a sloped, waterproofed floor pan that drains efficiently toward a linear shower drain system. Spread a high-bond mortar bed over the sloped floor, laying large dark terrazzo tiles across the entire wet room footprint to minimize seam lines. Cut the perimeter tiles accurately using a wet tile saw fitted with a diamond blade suitable for dense stone composites. Ensure the tile joints align smoothly across the shower boundary line to maintain a continuous, open-concept floor plane. Fill the joints with a color-matched grout, and seal the entire floor with a penetrating sealer designed for cementitious terrazzo materials.
Idea 7: The Charcoal Concrete-Look Minimalist Suite
How to Create
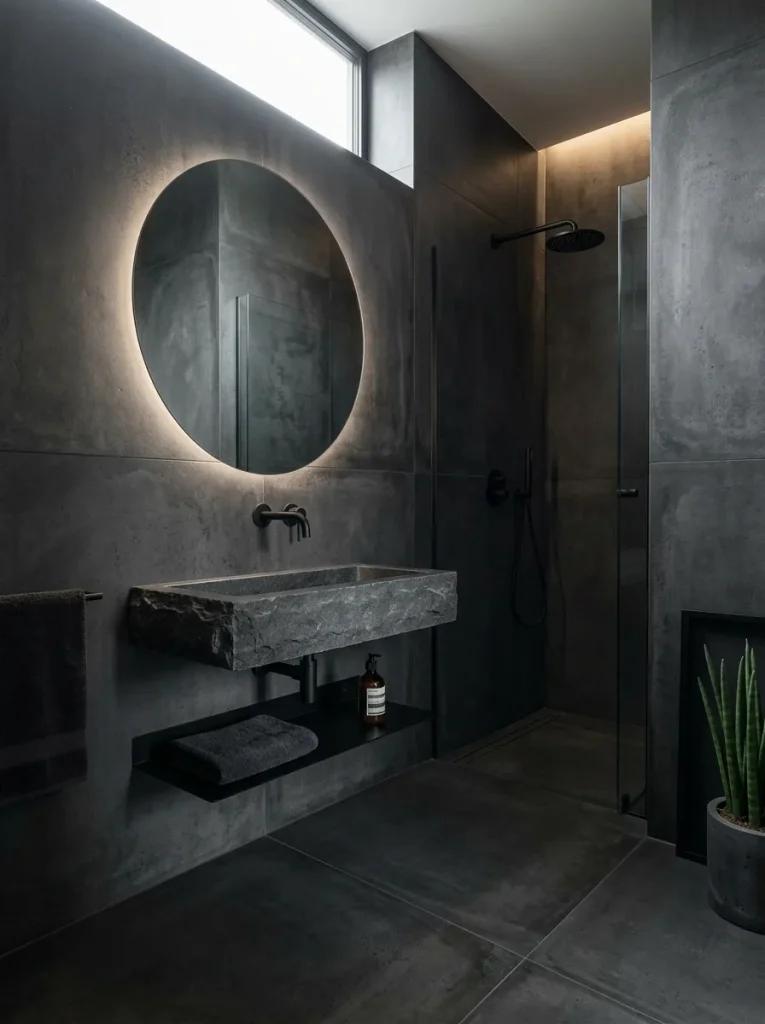
The charcoal concrete-look minimalist suite embraces industrial design through large-format porcelain tiles that mimic hand-poured, raw concrete surfaces. This style relies on muted gray-black tones, subtle surface clouding, and a flat matte finish to establish a calm, uncluttered atmosphere. By applying these large tiles to both walls and floors, the space achieves a monolithic look that feels structured and modern. The low-maintenance nature of concrete-effect porcelain provides the industrial aesthetic without the sealing challenges or moisture absorption issues of real concrete.
To execute this minimalist suite, prepare the floor and wall substrates to ensure they are flat, as large-format concrete-look tiles require a level foundation to prevent lippage. Apply mortar using a large-notch trowel, back-buttering the rear of each tile to achieve full adhesive coverage across the large surface area. Set the tiles with tight, one-and-a-half-millimeter spacers to keep the grout lines thin and unobtrusive. Use heavy-duty tile leveling suction caps to align the tile edges flat across every seam. Fill the narrow joints with a matching matte charcoal grout, creating a clean surface that mimics solid concrete construction.
Idea 8: The Dark Green and Black Botanical Layout
How to Create
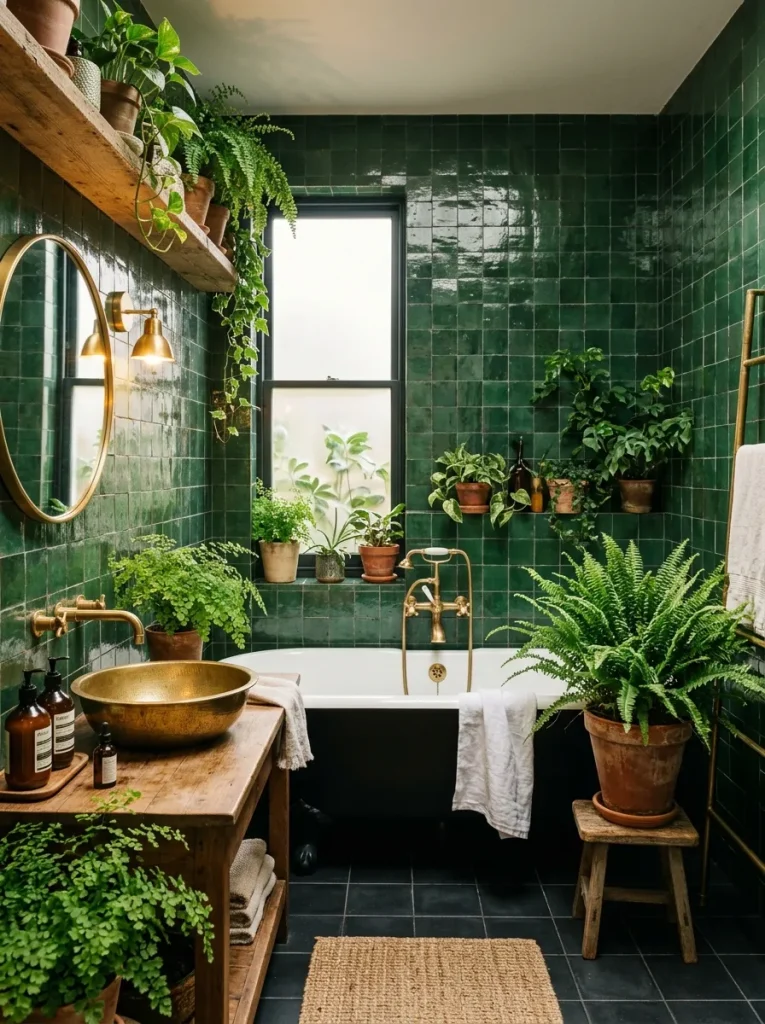
The dark green and black botanical layout blends deep forest green tiles with rich black surrounding surfaces to create a nature-inspired sanctuary. This design pairs dark ceramic or zellige-style tiles with matte black floor borders, bringing organic depth into the home. The subtle tone variations inherent in deep green glazed tiles reflect light, simulating the look of damp forest foliage. Accented with warm brass fixtures and living indoor plants, this color combination prevents dark bathrooms from feeling sterile, introducing warmth and personality.
Start construction by mapping out the wall zones, reserving the dark green glazed tiles for the main vanity or shower feature walls while using matte black tiles on the floor. Apply tile adhesive to the wall, laying the green tiles with minor hand-placed irregularities if using artisan zellige styles to highlight handmade charm. Install the matte black floor tiles using standard grid alignment to ground the colorful wall elements securely. Grout the green wall tiles with a dark olive or black grout to frame each tile clearly, while using matching black grout on the floor. Complete the setup by installing warm 2700K vanity lights to bring out the green undertones.
Idea 9: The Dark Wood-Look Porcelain Retreat
How to Create
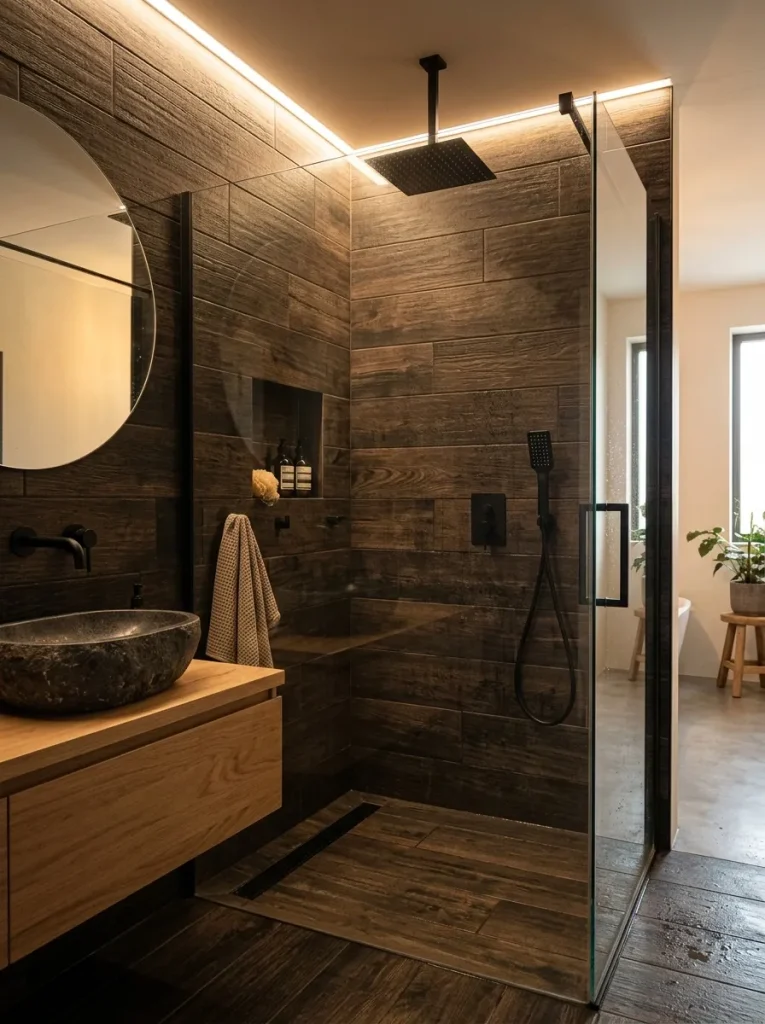
The dark wood-look porcelain retreat offers the visual warmth of rich walnut or charred timber combined with the waterproof durability of porcelain tile. This design utilizes long plank-format tiles featuring realistic wood grain textures, printed in deep espresso or charcoal tones. Placing these wood-effect planks on shower walls or floor areas introduces tactile comfort without the rot, warping, or moisture sensitivity of natural timber. The dark wood aesthetic transforms a utilitarian bathroom into a cozy, spa-like sauna environment that pairs effortlessly with matte black fixtures and stone basins.
To create this timber-inspired space, prepare the subfloor or wall backer board to ensure a flat, rigid substrate for the long plank tiles. Apply modified mortar using a trowel, staggering the plank tiles in a random, natural offset pattern (never exceeding a one-third overlap to avoid plank bowing issues). Maintain small two-millimeter gaps between the plank edges using spacers to keep the floor looking like authentic hardwood boards. Fill the joints with a dark brown or charcoal unsanded grout that matches the darkest grain line in the wood print. Clean the tile face thoroughly and finish by installing warm LED accent lighting along the baseboards.
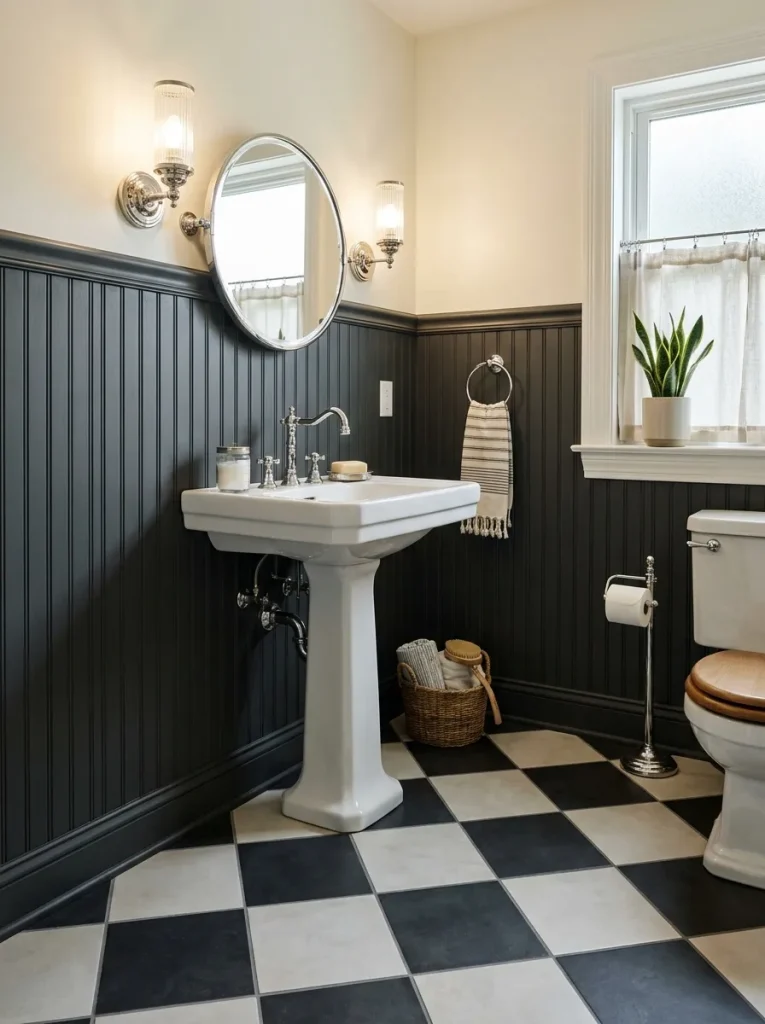
Idea 10: The Geometric Black and White Checkered Floor
How to Create
The geometric black and white checkered floor updates a classic vintage pattern by utilizing matte black tiles paired with muted off-white or soft gray accents. This high-contrast design adds character to compact bathrooms, using diagonal grid lines to make narrow floor plans appear wider. By selecting matte finishes instead of high-gloss polished surfaces, the traditional checkerboard pattern feels contemporary, grounded, and understated. The dark tiles anchor the layout, while the lighter alternating squares bounce light upward, keeping the room balanced and open.
To execute this classic floor, establish the room’s diagonal center points using chalk lines snapped from opposing corners. Spread thin-set mortar along the reference lines and begin laying square matte black and off-white porcelain tiles alternately at a forty-five-degree angle to the walls. Use precision spacers to ensure the corners of every four-tile intersection meet cleanly. Trim perimeter tiles along the walls using a tile cutter, maintaining a small expansion gap along the baseboard edge. Grout the entire floor with a medium gray grout to soften the transition between black and white tiles, then seal the surface against foot traffic wear.
Common Beginner Mistakes and How to Avoid Them
Installing dark bathroom tiles presents unique challenges that can impact the final look if not managed correctly during construction. A frequent error is selecting bright white grout for dark tiles without a clear design reason, which creates a high-contrast grid that distracts from the tile texture. To avoid this, choose grout colors that match or sit one shade lighter than the dark tile for a cohesive look. Another mistake is underestimating light absorption; dark tiles require carefully planned artificial lighting to prevent the bathroom from feeling dim. Incorporating a mix of overhead recessed lights, backlit vanity mirrors, and wall sconces ensures functional illumination. Additionally, using improper cleaning products on dark natural stone can strip sealers and leave white mineral hazing behind. Always use pH-neutral cleaners specifically formulated for dark porcelain or stone tiles to maintain their deep color.
Practical Tips for Better Results
+-------------------------------------------------------------------------+
|                  DARK TILE INSTALLATION CHECKLIST                       |
+-------------------------------------------------------------------------+
| [ ] Substrate leveled and backer boards secured before mortar application.|
| [ ] Waterproof membrane applied in all shower and wet zones.            |
| [ ] Dark or color-matched grout selected to minimize grid distraction.   |
| [ ] Tile leveling clips used on large-format tiles to prevent lippage.   |
| [ ] pH-neutral stone sealer applied to porous tile materials.           |
+-------------------------------------------------------------------------+
Achieving a high-end finish with dark tiles requires attention to detail during installation and surface sealing. Using tile leveling systems is essential when laying large-format dark tiles, as even minor lip variations catch light and cast unwanted shadows across flat walls. When tiling inside wet areas, ensure the underlying waterproof membrane cures completely before applying mortar to prevent trapped moisture from turning grout lines white. Matching metal trim pieces—such as matte black or brushed brass tile edge trims—creates clean corner transitions without exposing unglazed tile edges. Installing warm-toned light sources (2700K to 3000K) prevents dark black and slate tones from appearing cold or industrial. Finally, applying a penetrating sealer over grout lines immediately after curing protects dark grout from fading or discoloration caused by soap minerals over time.
Styling, Presentation, and Organization Ideas
Styling a dark tile bathroom relies on balancing deep background tones with reflective fixtures, warm wood elements, and organized counter surfaces. Pairing charcoal or black tiles with light oak or walnut floating vanities brings natural warmth into the space, breaking up dark vertical planes. Brushed gold, warm brass, or matte black faucets provide clear focal points against dark tiled backsplashes. Keep vanity countertops tidy by using clear glass canisters, dark stone soap dispensers, and folded waffle-weave towels in cream or charcoal tones. Installing LED backlighting behind vanity mirrors casts a halo effect across dark wall tiles, emphasizing surface textures. Adding indoor plants—such as ferns or pothos—introduces organic color that contrasts naturally against dark stonework.
Budget and Time Planning
| Project Phase | Estimated Time | Percentage of Total Budget | Key Materials and Deliverables |
|---|---|---|---|
| Surface Prep & Waterproofing | 1 – 2 Days | 15% | Cement backer boards, liquid waterproof membrane, tape |
| Tile Layout & Cutting | 2 – 3 Days | 45% | Dark tiles, modified thin-set mortar, leveling clips |
| Grouting & Sealing | 1 Day | 15% | Stain-resistant dark grout, penetrating sealer, sponges |
| Fixture & Trim Installation | 1 – 2 Days | 25% | Vanities, light fixtures, faucets, edge trims |
Completing a dark tile bathroom project efficiently requires careful budgeting and a structured timeline to avoid delays. Allocate roughly forty-five percent of your budget to high-quality dark porcelain or natural stone tiles, as durable materials directly influence the room’s lifespan. Do not rush the surface preparation phase; ensuring walls and floors are flat and waterproof saves time during tiling. Plan tile deliveries early to inspect shipments for color consistency, as dark tile production runs can show slight shade variations between boxes. Allow proper drying intervals between waterproofing, tiling, and grouting to ensure adhesives cure fully. Following a systematic schedule keeps the project on track and within budget.
Creative Expansion and Advanced Inspiration
Once you master basic dark tile installation, you can explore advanced layout concepts that add architectural interest. Consider creating a fully tiled wet room where dark floor tiles transition up the walls and across the ceiling, forming an immersive shower zone. Experiment with custom tile niches that feature contrasting metallic or textured dark tiles illuminated by waterproof LED strip lights. Combining different tile finishes—such as pairing matte black floor tiles with glossy black subway wall tiles—adds subtle texture without introducing new colors. You can also explore floor-to-ceiling dark tile backsplashes behind wall-mounted vanities to create a dramatic focal point. Sharing these completed projects on visual platforms offers fresh inspiration to home design communities looking to incorporate dark tile aesthetics.