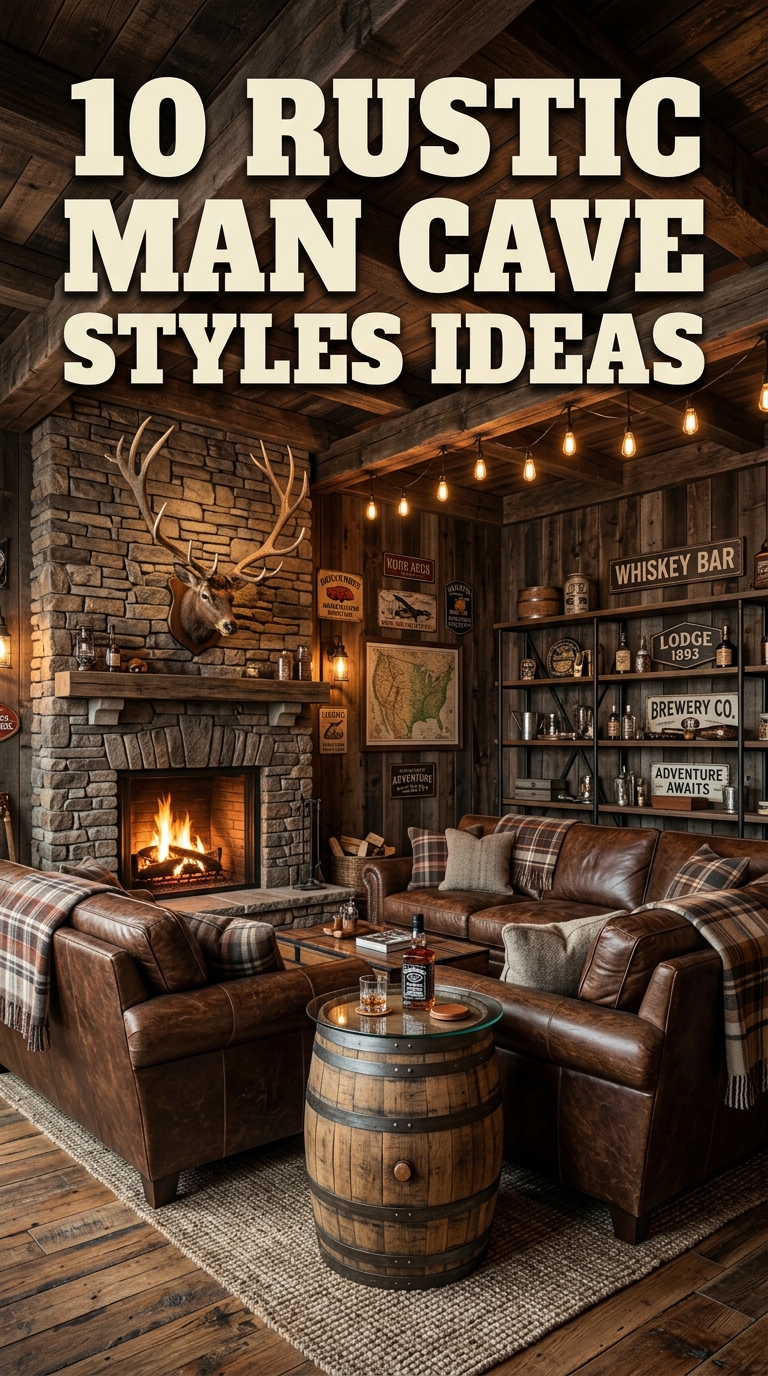
10 Rustic Man Cave Styles Ideas

Establishing a dedicated personal retreat within a home, commonly referred to as a man cave, offers a unique opportunity to express personal interests while showcasing refined architectural style. Incorporating rustic design principles into this space creates an immediate sense of warmth, historical character, and functional comfort. This comprehensive DIY guide delivers ten distinct, highly practical rustic man cave concepts to transform underutilized basements, spare bedrooms, or garages into beautifully organized sanctuaries. Readers will discover how to work with natural wood grain, exposed iron pipes, distressed leather textures, and ambient lighting arrays to construct a cohesive theme. Implementing these structured concepts addresses the typical challenges of modern interior styling, such as managing light in windowless rooms, organizing heavy electronic components, and matching personal hobby displays with elegant home decor. Each featured project provides clear, step-by-step guidance to ensure high structural stability and a professional, aesthetic final presentation. By building these stylistic elements yourself, you gain complete control over the materials, scale, and color saturation of the room, turning a basic room into an artfully curated environment that reflects personal style.
Why Mountain and Timber Aesthetics Dominate Modern Space Planning
The ongoing popularity of timber-focused personal retreats within contemporary Pinterest ideas highlights their exceptional ability to blend practical household value with expressive, cozy interior styling. In modern home planning, families view dedicated hobby rooms not merely as isolated utility spaces, but as key visual assets that enhance the property’s overall character. These rustic handmade updates carry massive DIY appeal because they break complex structural remodeling down into manageable, surface-level alterations that require zero advanced carpentry credentials. From a design perspective, introducing textured natural elements like aged barn wood, copper details, and stone veneers brings physical depth to flat, plain walls. These trending ideas emphasize resourcefulness and high-impact styling, demonstrating how simple budget ideas can drastically shift the visual mood of an entire house. This specific creative project focus provides beginners with an achievable entry point into home improvement, building essential hands-on skills with basic materials while producing a highly visible, premium asset that enhances the daily living experience and sparks continuous visual inspiration.
Materials Procurement and Structural Space Preparation
Achieving a clean finish on an easy project requires systematic material preparation and a highly organized workspace before applying any paint, stain, or adhesive. The primary supplies for these rustic transformations include reclaimed wood planks, corrugated metal sheets, industrial iron pipes, heavy-duty masonry anchors, matte black polyurethane sealers, and warm-toned LED light fixtures. Essential tools for these builds include a miter saw, a cordless drill with driver bits, a laser level, a pocket hole jig, and high-density foam brushes. To prepare the workspace safely, clear the selected room entirely and cover the flooring with heavy canvas drop cloths to capture fine sawdust, adhesive drips, or wood stain splatters. Thoroughly clean all raw wooden boards to remove surface dirt, and sand any rough splinters to ensure a safe, smooth finish that maintains its organic texture. Proper planning involves evaluating the structural integrity of your walls, locating support studs with a reliable finder, and ensuring the room has adequate air ventilation before using any heavy chemical sealers.
Idea 1: The Reclaimed Barn Wood Accent Feature Wall
Setup Method
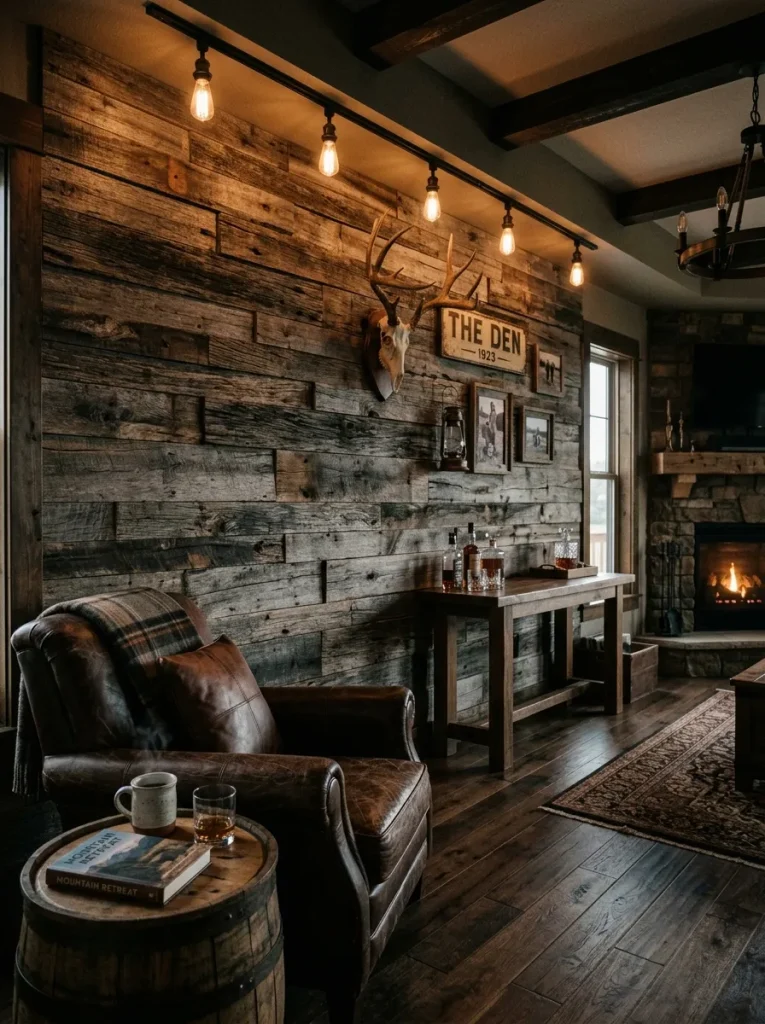
The reclaimed barn wood accent wall establishes a sophisticated, historic cabin atmosphere by focusing entirely on organic wood textures, weathered grains, and natural color variations. This concept relies on using salvaged lumber planks arranged in a staggered horizontal pattern, creating a rich visual backdrop that grounds the entire room’s furniture layout. The natural grey, brown, and charcoal tones of the aged boards coordinate beautifully with neutral leather seating and warm industrial lighting, providing a textured surface that reduces echo. This classic style fits perfectly into basement media rooms, rustic home offices, and attic dens, offering a durable design that looks elegant throughout the year. The simple layout is exceptionally practical because it uses inexpensive, repurposed materials that protect your underlying drywall from scuffs and impact damage.
The execution process begins by measuring the height and width of your selected focus wall to calculate the total square footage of lumber required. Source authentic reclaimed barn wood planks or aged shipping pallets, ensuring you sand each piece lightly with a hundred-grit sanding block to remove loose dirt while preserving the weathered character. Apply a solid coat of dark grey or black primer to the existing drywall to ensure any small gaps between the wood planks do not reveal bright white drywall underneath. Locate the vertical wall studs using a reliable stud finder, marking their positions clearly from the ceiling to the floor with a chalk line. Apply a heavy-duty polyurethane construction adhesive to the back of each board, pressing them firmly onto the wall and securing them to the studs with a brad nailer. Stagger the end joints of the boards systematically across the rows to create an organic, professional layout that mirrors historical cabin construction.
Idea 2: Industrial Iron Pipe and Raw Timber Shelving
How to Build
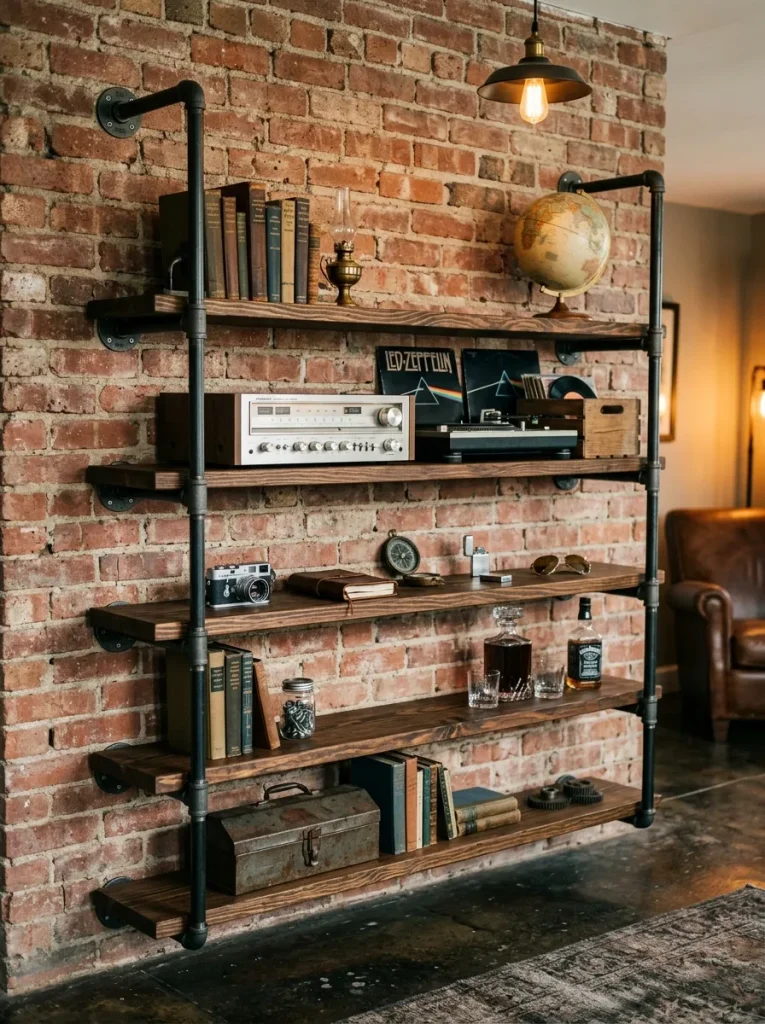
The industrial iron pipe and raw timber shelving system brings a clean, functional workspace element into your den, combining heavy metallic hardware with thick wooden slabs. This design uses structural black steel pipes as the main vertical support frames, holding wide, dark-stained pine boards that provide plenty of storage space for books, media, and collectibles. The open-shelf design keeps the walls looking light and airy, preventing narrow rooms from feeling cramped or cluttered. This style pairs beautifully with industrial-themed home decor, offering a strong, durable shelving unit that can easily support heavy stereos, solid wood organizers, and vintage decorative items.
To build this industrial shelving system, purchase eight-foot lengths of one-by-twelve-inch pine boards and cut them down to match your desired shelf width. Sand the wooden boards thoroughly with fine-grit sandpaper, then apply two coats of a dark walnut wood stain, sealing the surface with a matte clear coat. Assemble the vertical support towers using three-quarter-inch black industrial steel pipes, elbow joints, T-connectors, and circular wall flanges, ensuring the pipe heights are identical. Position the assembled pipe frames against the wall, using a spirit level to ensure the shelves will sit perfectly level and flat. Secure the circular metal flanges directly into your wall studs using heavy-duty lag screws, or use toggle bolts if studs are not available in those specific spots. Slide the finished pine boards across the horizontal pipe supports, securing the wood to the metal brackets with small pipe straps screwed into the underside.
Idea 3: Cozy Backwoods Cabin Fireplace Retreat
Step-by-Step Guide
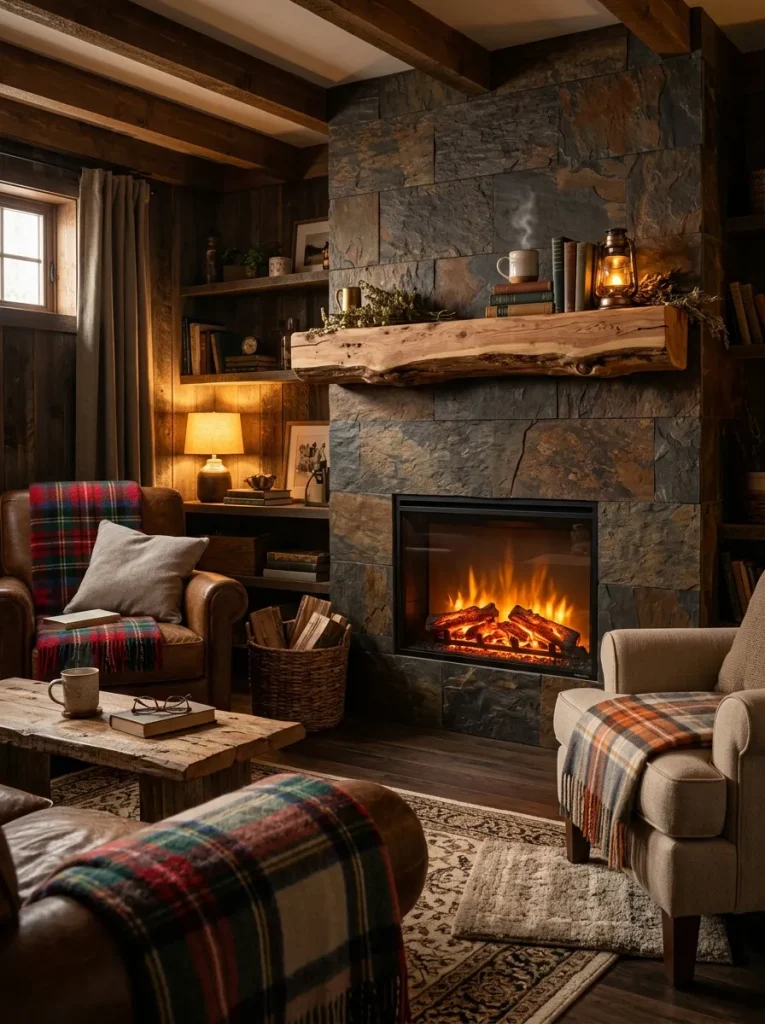
The cozy backwoods cabin fireplace retreat combines warm stone elements with ambient firelight to create a relaxing focal point for cold-weather gatherings. This design uses lightweight, easy-to-install stone veneer panels to cover a plain fireplace surround, mimicking the look of a traditional hand-built river rock fireplace. The natural grey, beige, and charcoal tones of the stone add a rich, organic color palette to the room that coordinates with comfortable plaid throw blankets and log cabin styling. This project is highly practical for basements, as a realistic electric fireplace insert can be built into the stone surround to bring warmth without needing complex chimney flues.
The setup method starts by building a simple rectangular fireplace frame out of standard two-by-four lumber studs, ensuring the frame matches the dimensions of your electric insert. Cover the exterior of the wooden stud frame with half-inch cement backer board, securing the sheets tightly with corrosion-resistant screws every six inches. Apply a thick, even layer of modified polymer mortar tile adhesive across the backer board using a notched trowel, working in small, manageable sections. Press the individual stone veneer panels firmly into the wet mortar, starting from the bottom corners and working your way upward to ensure a stable fit. Allow the mortar to cure for a full day, then slide your electric fireplace insert into the central opening, securing the safety brackets. Place a thick, natural-edged cedar slab on top of the stone surround to serve as a beautiful mantelpiece for displaying vintage photos and decor.
Idea 4: Vintage Sports Memorabilia and Beer Tap Den
Execution Process
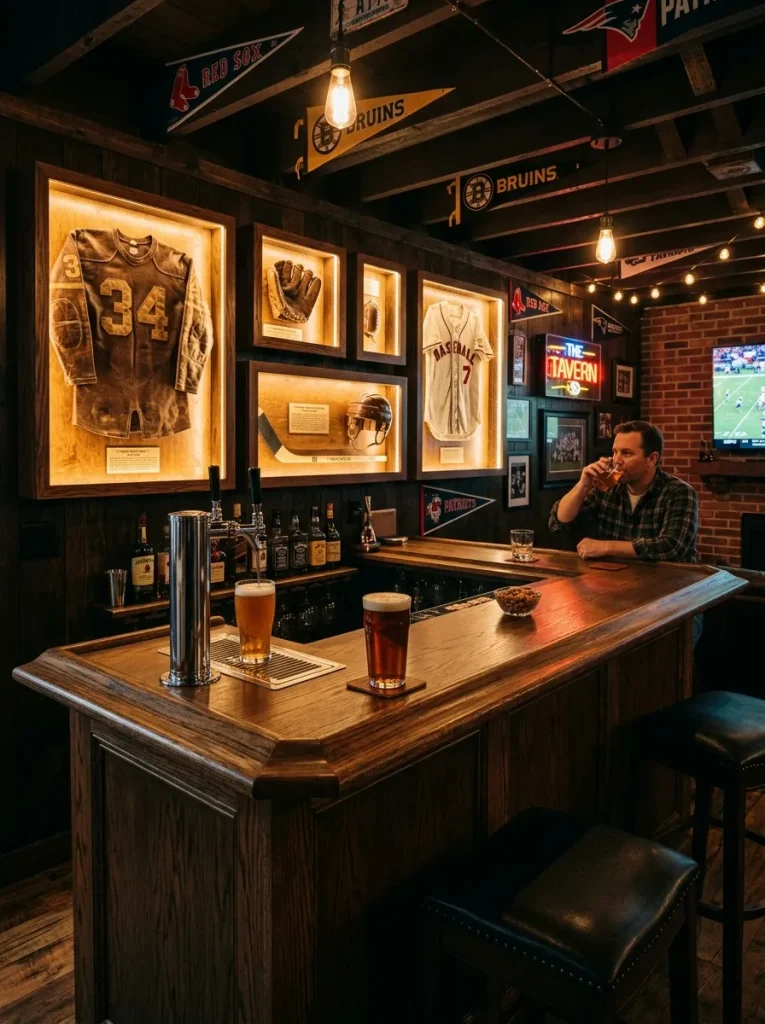
The vintage sports memorabilia and beer tap den offers a highly personalized, energetic entertainment space designed to showcase personal collections and host weekend game nights. This concept utilizes a custom corner bar counter made of dark oak wood, paired with custom wall-mounted shadow boxes that display prized jerseys, antique equipment, and historic game tickets. The addition of a working, built-in draft beer tap system brings a premium tavern feel to the space, creating an engaging social hub for family and friends. This design is highly practical, as the organized wall displays keep valuable collectibles clean, safe from dust, and neatly sorted away from high-traffic floor pathways.
The construction process begins by building a sturdy L-shaped bar counter frame using two-by-four-inch construction studs, securing the base plate directly to your floor. Sheathe the front face of the bar frame with vertical beadboard panels, painting them a rich hunter green or navy blue to establish a classic tavern style. Install a solid oak butcher block countertop over the wooden frame, sealing the surface with four coats of food-safe polyurethane to protect against spills. Mount a twin-tap draft beer tower to the center of the bar counter, routing the beverage lines through the countertop into a small keg refrigerator hidden beneath. Construct deep wooden shadow boxes to mount on the wall behind the bar, using low-voltage LED strip lights inside the frames to illuminate your vintage sports jerseys. Arrange comfortable leather barstools along the front of the bar counter, adjusting the spacing to ensure your guests have plenty of room to relax.
Idea 5: The Distressed Leather and Iron Library
How to Create
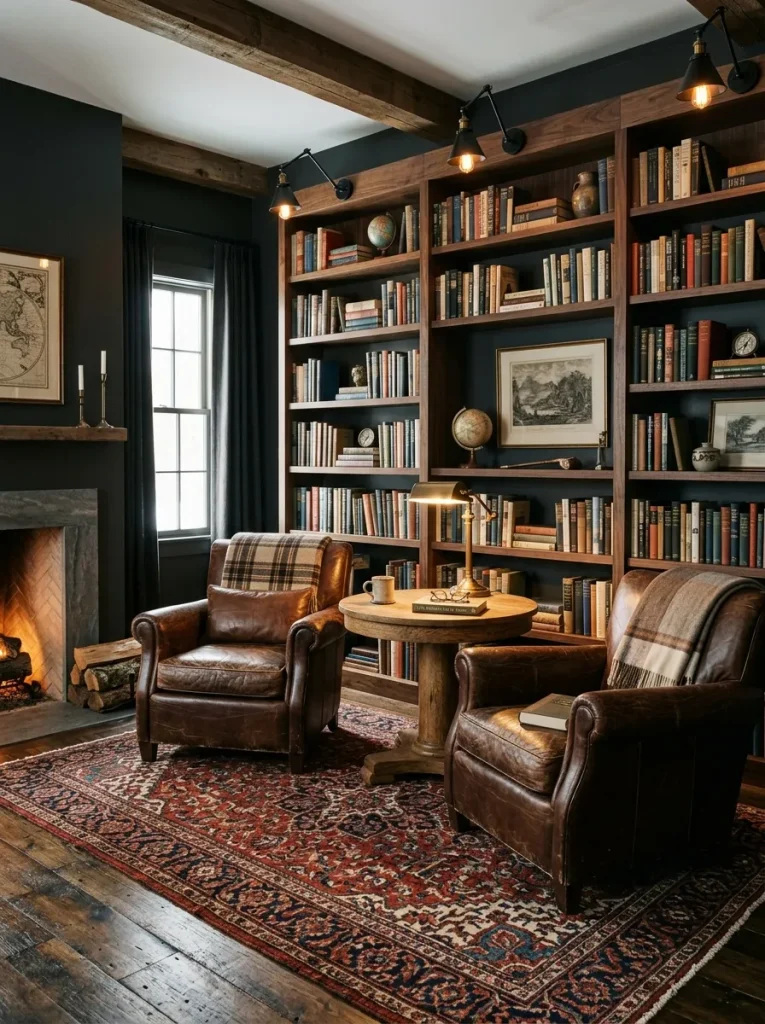
The distressed leather and iron library establishes a quiet, sophisticated study space focused on rich textures, classic literature, and comfortable relaxation. This design concept places two oversized, deep chocolate brown leather club chairs on a thick, patterned wool rug, surrounded by floor-to-ceiling wooden bookshelves. The addition of industrial iron floor lamps and dark metal bookends creates a beautiful contrast against the warm, organic wood grains and soft leather upholstery. This project is highly practical for converting a quiet spare bedroom into a dual-purpose home office and reading den, providing a peaceful, distraction-free environment for daily work.
The execution process begins by painting the library walls with a rich, matte paint color like deep charcoal, forest green, or navy blue to create a cozy, study-like feel. Build several matching open-shelf bookcases from three-quarter-inch birch plywood, staining the units with a rich mahogany or dark oak wood finish to match the desk. Arrange the heavy wooden bookcases symmetrically along the main wall of the room, securing each unit tightly to the wall studs using metal L-brackets for safety. Position two distressed leather armchairs in the center of the space, placing a low wooden coffee table between them to hold books and mugs. Install warm-toned, dimmable LED Edison bulbs inside your metal floor lamps, casting a soft, relaxing glow across the reading nook at night. Organize your books on the shelves by genre or cover color, adding vintage brass globes, antique maps, and leather-bound journals to complete the classic design.
Idea 6: Reclaimed Timber Home Bar Nook
Installation Method
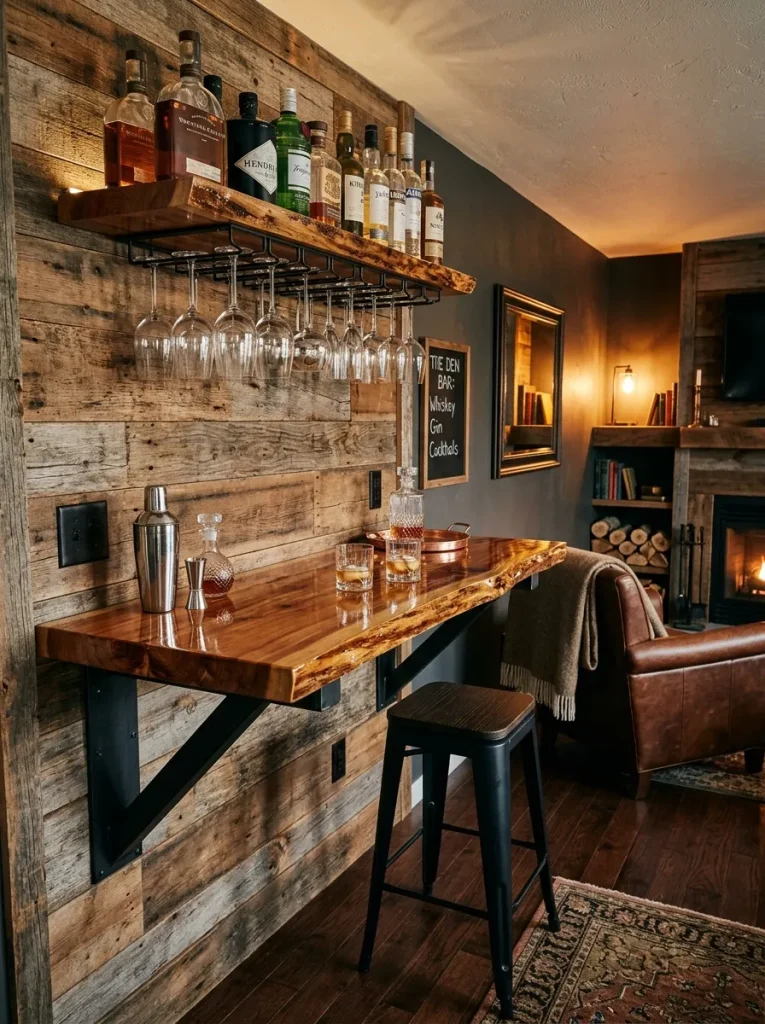
The reclaimed timber home bar nook provides an organized, visually stunning entertainment station that uses thick wood slabs and rustic textures to create a custom pub feel. This space-saving design fits perfectly into a small corner or unused wall section, utilizing a wall-mounted glass rack and a sturdy, bar-height counter to maximize space. The natural knots and raw edges of a live-edge cedar or pine slab add a beautiful design element to the room that coordinates with warm copper mugs and glassware. This project is highly functional for smaller basements, keeping your entertaining supplies organized in one spot without taking up valuable floor space.
The installation process begins by cutting a thick, live-edge cedar slab to your desired bar counter length, ensuring the raw bark edge faces forward. Sand the top surface of the cedar slab with progressively finer sandpaper until the wood feels smooth, then apply three coats of clear epoxy resin to create a durable, waterproof bar finish. Mount heavy-duty, industrial steel triangular brackets directly into your wall studs at a standard bar height of forty-two inches from the floor. Lower the finished cedar slab onto the steel brackets, securing the wood firmly from the underside using heavy-duty wood screws. Install a matching floating shelf twelve inches above the bar counter to hold liquor bottles, adding a hanging under-shelf metal stemware rack for wine glasses. Place two minimalist wooden barstools beneath the counter, and hang a vintage, warm-toned tin sign on the wall behind the bar to complete the look.
Idea 7: Backwoods Hunting Lodge with Taxidermy Displays
How to Make
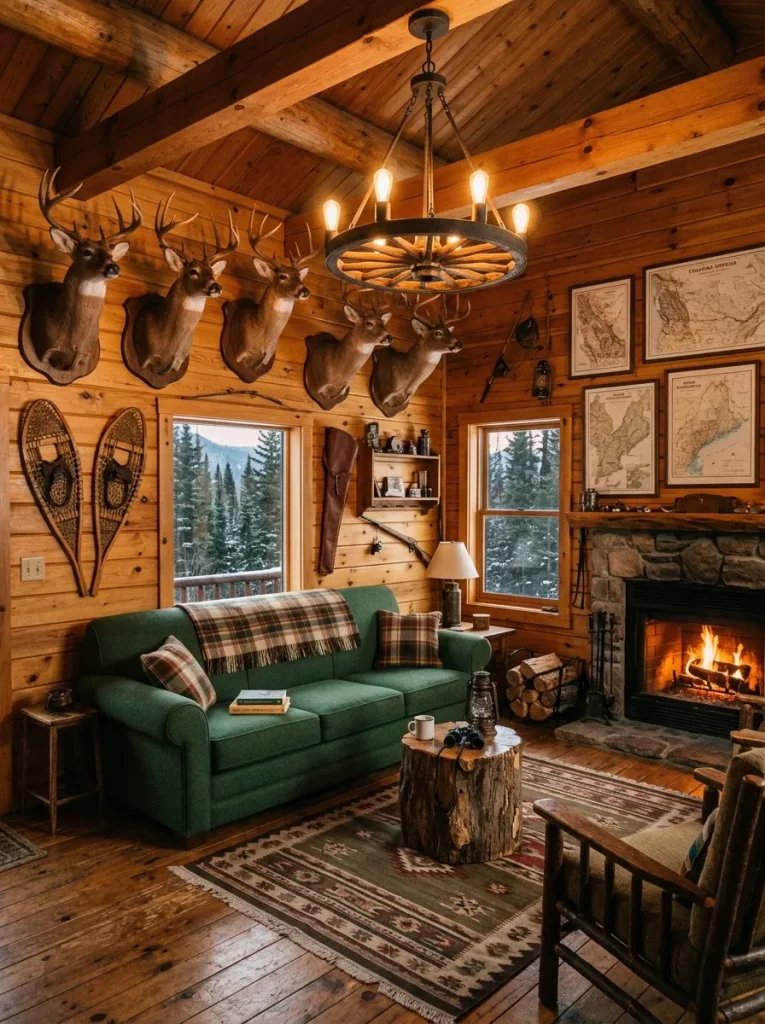
The backwoods hunting lodge design brings a rugged, outdoor cabin feel to your home, combining rich taxidermy mounts, antique hunting gear, and warm log cabin textures. This style uses natural wood paneling and warm wool fabrics to create a cozy shelter that feels like a remote mountain cabin. The display of vintage fishing rods, antique bows, and carefully arranged taxidermy mounts creates an interesting, historic look that celebrates outdoor hobbies. This project is exceptionally practical for turning detached garages or backyard sheds into rustic retreats, giving outdoor enthusiasts a dedicated space to store and display their gear.
To build this rugged hunting lodge den, cover the walls with rough-sawn pine tongue-and-groove planks, nailing them horizontally to the wall studs to mimic solid log walls. Apply a light golden oak stain to the pine paneling, keeping the coat thin to highlight the natural wood knots and grain variations. Mount your taxidermy pieces securely to the wall studs using heavy-duty masonry anchors or toggle bolts, ensuring the mounts are balanced and safe from high-traffic paths. Arrange a collection of vintage wooden snowshoes, antique fishing reels, and historic outdoor maps on the surrounding walls to create a coordinated gallery look. Place a deep, forest-green wool sofa in the center of the room, layering it with heavy plaid throw blankets and comfortable corduroy pillows. Install a rustic, circular wagon-wheel chandelier fitted with warm LED candle bulbs to cast a soft, welcoming glow across the lodge.
Idea 8: Live-Edge Slab Wood Board Game and Card Table
Crafting Process
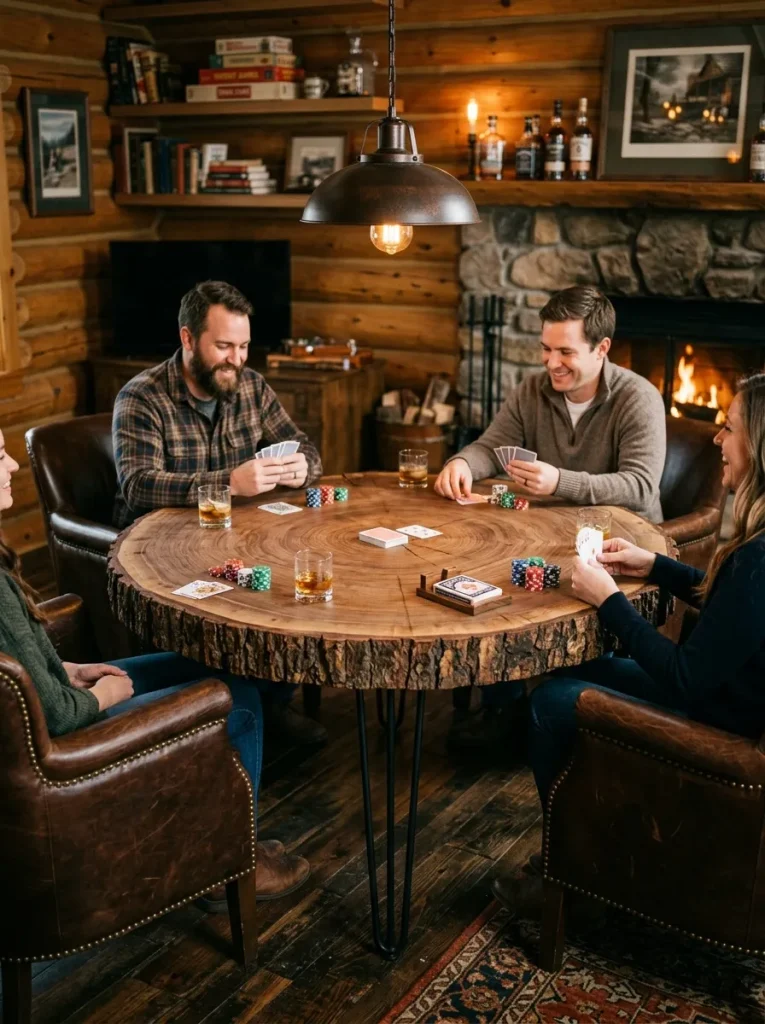
The live-edge slab wood board game and card table offers a highly functional, beautiful centerpiece designed to host weekly game nights and family gatherings. This project uses a single, thick cross-section of a natural hardwood tree trunk—such as oak, walnut, or maple—retaining its raw, organic bark edge as the main design feature. The unique, flowing lines of the live-edge wood make the table a true conversation piece, bringing a touch of nature’s design into your home. This sturdy, handmade table is highly durable, designed to handle heavy board game setups, card tournaments, and casual dining without scratching or wear.
The crafting process begins by sourcing a dry, three-inch-thick cross-cut hardwood slab with a uniform diameter of roughly forty-eight inches to serve as your tabletop. Scrape away any loose bark from the outer edges using a wire brush, then sand the live-edge rim thoroughly to ensure the wood is smooth and splinter-free. Sand the top and bottom flat faces of the slab with an orbital sander, working from eighty-grit up to two-hundred-and-twenty-grit paper for a glass-like finish. Apply three coats of a premium, water-resistant oil sealer across the wood surfaces to highlight the natural grain colors and protect against drink spills. Flip the slab over and attach four heavy-duty matte black steel hairpin table legs to the underside corners using a drill and strong wood screws. Flip the table upright, place a set of matching leather chairs around the perimeter, and add a low-hanging pendant light directly above the center.
Idea 9: Mountain Peak Geometric Timber Panel Display
Decoration Guide
The mountain peak geometric timber panel display turns a plain, flat wall into a beautiful mountain landscape using simple wooden slats and shades of a single color family. This style uses thin, diagonal wood strips to create an artistic, three-dimensional geometric design of overlapping mountain peaks across your media room wall. The raised wooden lines add physical depth and shadow, breaking up the flat look of painted drywall while giving the room a modern, artistic touch. This project is exceptionally easy for beginners, using basic wood cutting and nailing to build a beautiful feature wall that coordinates with minimalist style rooms.
The decoration process begins by painting the selected wall a solid background color like deep charcoal grey or a soft forest green, letting it dry completely. Measure the wall’s total width and sketch out a balanced series of overlapping triangular mountain peaks directly onto the wall surface using a pencil. Cut several one-by-two-inch select pine boards into diagonal slats of varying lengths, using a miter saw to cut the connecting end joints at forty-five-degree angles. Lay the cut wooden slats flat on your floor, arranging them to match your sketched mountain design before mounting them on the wall. Apply a thin line of construction adhesive to the back of each pine slat, pressing them onto your pencil lines and securing them with a brad nailer. Sand the mounted wooden frames lightly, then stain the mountain slats with a warm golden oak finish to create a beautiful, textured landscape display.

Idea 10: Heavy Timber Beam Mechanical Workshop Cabin
Assembly Process
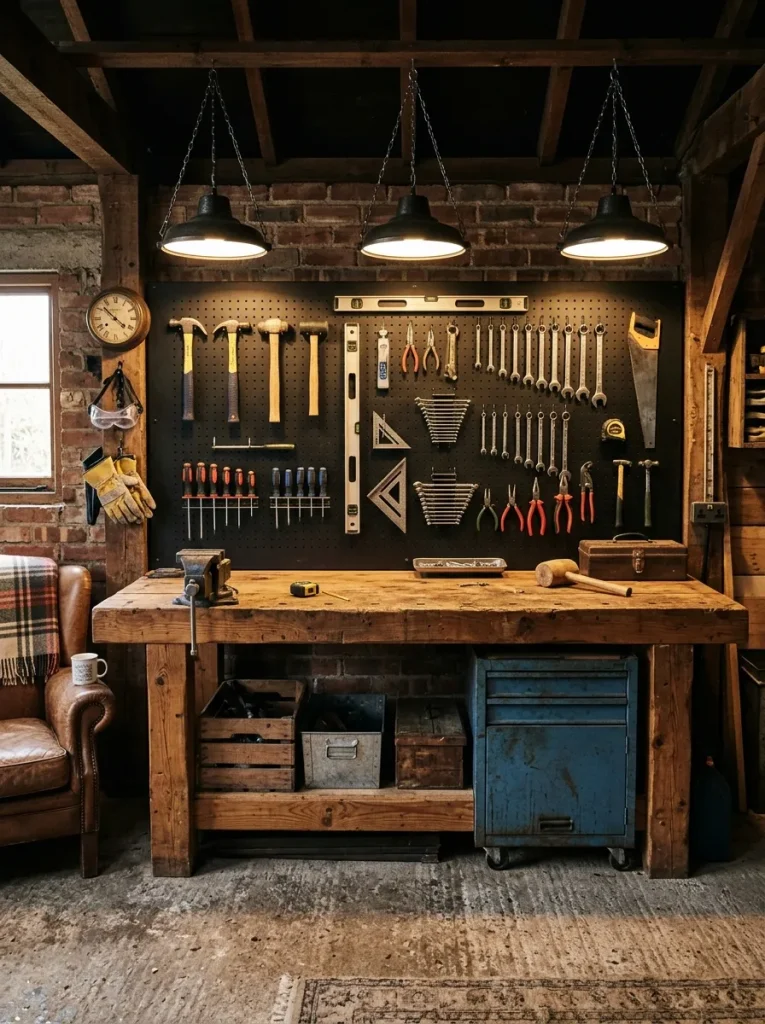
The heavy timber beam mechanical workshop cabin combines rugged workshop elements with cozy cabin textures, making it ideal for gearheads, carpenters, and DIY enthusiasts. This concept features a solid, heavy-duty wooden workbench running along the main wall, paired with dark metal tool organizers and raw wood beam accents. The combination of black steel tool pegboards and thick, industrial-sized timber beams gives the room a strong, functional look that handles messy projects easily. This design is highly practical, as it provides a dedicated, organized workspace for mechanical repairs, model building, or leather crafting right inside your personal retreat.
To construct this rugged workshop-themed den, mount heavy-duty matte black steel pegboards along your main work wall, securing them tightly to the studs with wood screws. Build a solid, heavy-duty workbench using four-by-four-inch construction timber for the frame legs and a thick double-layered plywood sheet for the tabletop. Sand the workbench top smooth, then apply a heavy coat of clear oil-based sealer to protect the wood from grease, paint, and solder drips. Install a series of bright, directional LED shop lights directly above the workbench, ensuring you have plenty of clean, clear light for detail work. Organize your tools on the metal pegboard using matching black steel hooks, keeping your wrenches, screwdrivers, and drills neatly arranged and easy to reach. Place a comfortable, adjustable steel shop stool in front of the bench, and add a rugged industrial rug to capture dust and metal shavings.
Common Beginner Mistakes and How to Avoid Them
When managing a DIY rustic man cave renovation, avoiding common styling and installation errors ensures a safe, durable, and visually pleasing environment that stays looking great for years. The most frequent and dangerous mistake is mounting heavy wooden bar counters, iron shelving units, or taxidermy pieces using simple plastic drywall anchors rather than securing them directly into solid structural wood studs. Rustic decor elements are inherently heavy; as you load shelves with books, media, and glass decanters, drywall anchors are prone to breaking under the sudden weight, risking damage and injury. Always use a reliable stud finder to locate the center of wood studs, fastening all heavy wall decor with heavy-duty two-inch wood screws. Another common pitfall is using standard interior wall paints with a high gloss finish, which reflects light harshly and ruins the cozy, soft look of rustic woods and natural stones. Always select flat, matte, or satin finishes for your painted walls, as these sheens absorb light beautifully to create a warm, relaxing cabin environment. Finally, rushing the drying and curing times of wood stains and polyurethane sealers can cause the finish to remain sticky, trap dust, and smudge; always allow forty-eight full hours of drying time in a well-ventilated room before bringing furniture back into your newly decorated space.
Practical Tips for Achieving Professional Design Results
| Renovation Challenge | Recommended Practical Solution | Expected Aesthetic Outcome |
|---|---|---|
| Wood stain blotching on soft pine | Apply a thin coat of pre-stain wood conditioner to the sanded boards before applying your main stain color | A perfectly even, smooth stain application with zero blotchy spots or dark streaks across the wood grain |
| Heavy shelves sagging under books | Space your vertical iron pipe or steel bracket supports no more than thirty-two inches apart | A rock-solid, professional shelving unit that will not sag, warp, or pull away from the wall studs |
| Heavy wood odor and chemical smells | Install a low-profile window exhaust fan or run a high-grade HEPA air purifier during the active painting phase | Fresh, clean indoor air quality that makes your new space comfortable and safe to use immediately |
| Wall-mounted decor looking cluttered | Group small vintage signs, photos, and collectibles together inside a structured wood gallery frame | An organized, visually balanced display that feels like an intentional art gallery rather than a messy wall |
Styling, Presentation, and Wall Organization Ideas
Presenting your finished rustic man cave beautifully involves styling the surrounding furniture and walls to create a cohesive, balanced, and visually peaceful layout. Group separate art pieces together, such as hanging three vintage metal signs side-by-side in a horizontal row over your bar counter, keeping exactly three inches of open space between the frames to maintain an organized look. Use low-profile wall-mounted storage racks to hang your favorite hobby gear, turning functional everyday items like fishing rods or vintage tools into part of the room’s decoration. Arrange your seating around a central focal point like a stone fireplace or a live-edge wooden card table, keeping pathways open and inviting for daily use. Pair your heavy timber elements with soft, woven fabrics like wool blankets and natural jute rugs to soften the hard lines of the wood and metal. Keeping the floor space open and choosing a limited color palette of three grounding earth tones ensures your handmade craft projects remain the true visual focus of the room.
Strategic Budget and Time Planning
| Project Management Phase | Key Action Items & Milestone Tasks | Estimated Time Investment | Allocated Budget Requirements |
|---|---|---|---|
| Phase 1: Dimension Mapping | Measure wall surfaces, locate wood studs with a finder, and purchase non-toxic certified supplies | 1 hour total planning time | Low cost using basic raw wood and pipe fittings |
| Phase 2: Surface Preparation | Sand raw timber planks down smooth, prime drywall with dark colors, and clean rusty iron pipes | 2 hours active prep work | Economical investment for sandpapers and base primers |
| Phase 3: Active Construction | Install reclaimed wood walls, assemble iron pipe shelving, and mount stone fireplace veneer | 4 hours active creation | Variable cost depending on choice of stone veneer or live-edge slabs |
| Phase 4: Styling & Safety Curing | Screw wooden ledges into studs, arrange cozy furniture, and allow all paint coatings to cure safely | 48 hours passive curing | Minimal cost for heavy-duty mounting fasteners and hardware |
Creative Expansion and Advanced Design Inspiration
Once you feel comfortable with basic rustic woodworking, iron assembly, and stone placement, you can take your home improvement skills further by exploring advanced upgrades that add long-term value and style. Consider building a custom hidden door bookcase that swings open on a heavy-duty pivot hinge, concealing a private storage closet or a secondary media room behind a seamless wall of books. Experiment with advanced lighting installations, routing low-voltage LED strip lights into routed grooves along the underside of your timber shelves to create clean, indirect accent lighting that highlights your collectibles. You can also upgrade standard flat wood walls by installing a custom-fitted sliding barn door, using a heavy-duty black steel tracking rail to divide your man cave from the main hallway in a beautiful, rustic way. For an impressive modern touch, look into installing smart home automation switches that control your warm-toned Edison bulb lighting and fireplace insert with simple voice commands, creating a cozy evening setup instantly. These advanced adjustments turn simple weekend projects into premium home renovations, creating a beautiful, supportive space that adapts effortlessly to your lifestyle over the years.