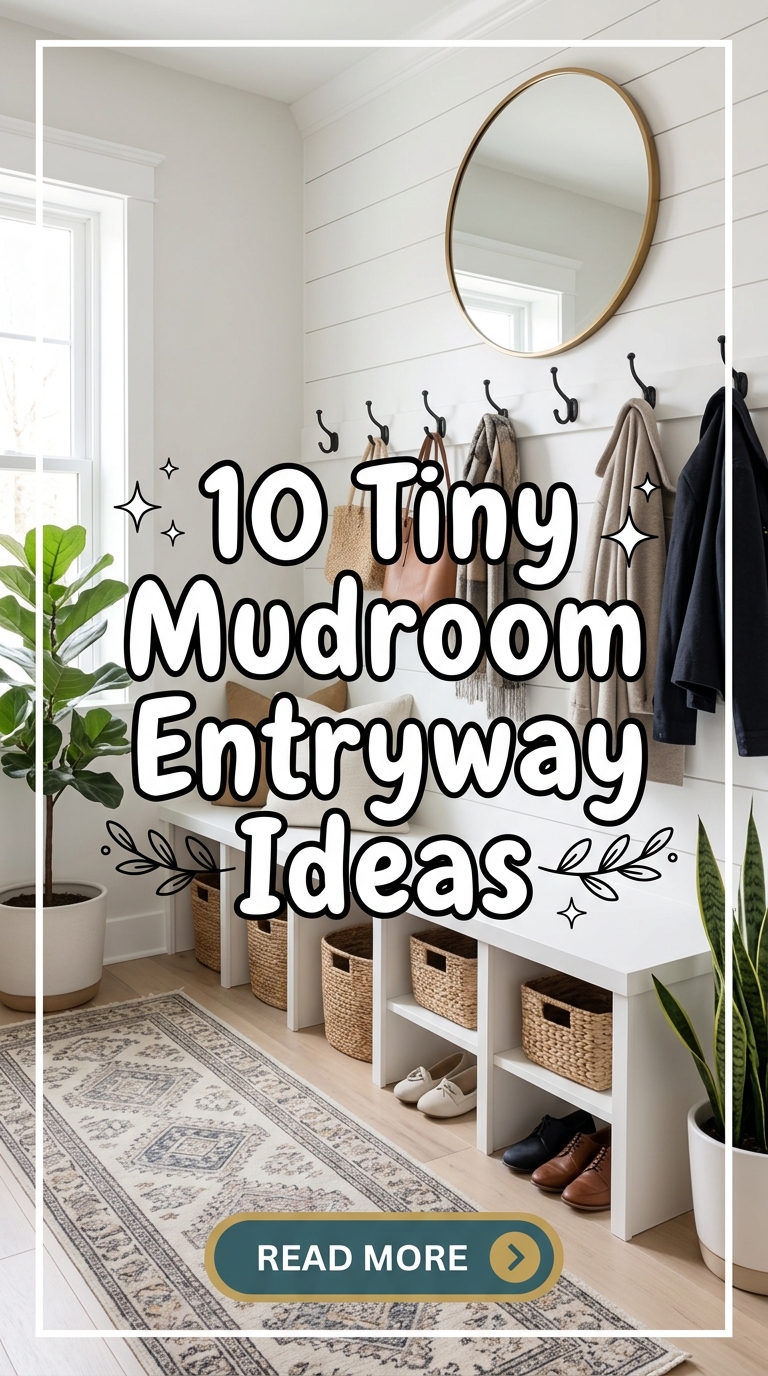
10 Tiny Mudroom Entryway Ideas

A small entryway often suffers from clutter, shoe piles, and scattered coats, but a dedicated mudroom zone can transform this chaotic area into an organized and welcoming transition space. This comprehensive tutorial explores how to establish an efficient, structured mudroom within a limited footprint, offering practical inspiration for homeowners and renters alike. Creating a functional entryway does not require a sprawling room; instead, it demands strategic planning, smart furniture choices, and intentional design. Readers will learn how to maximize vertical wall space, select appropriate multi-purpose furniture, and implement organizational systems that keep daily essentials accessible yet tidy. By understanding the core principles of small-space optimization, anyone can convert a cramped front door area or a narrow hallway into a high-functioning mudroom zone. This guide focuses on accessible, budget-friendly updates that enhance the daily flow of a household. Implementing these creative ideas allows you to establish an aesthetic, clutter-free environment that serves as a beautiful introduction to the rest of your home while keeping daily utility at the forefront of the design.
Why Tiny Mudroom Concepts Are Leading Modern Design Trends
Compact organization systems are trending heavily among modern Pinterest ideas because contemporary living spaces require clever footprint optimization. As homes incorporate open-plan layouts or smaller urban footprints, the traditional, expansive mudroom is frequently replaced by streamlined entryway zones. This shift has fueled a demand for DIY projects that offer high aesthetic value without sacrificing essential utility. These compact entryway solutions appeal to beginners because they rely on simple, modular components rather than complex, expensive structural renovations. Property owners and renters increasingly seek minimalist style arrangements that blend seamlessly into existing home decor while providing dedicated storage for shoes, bags, and outerwear. The visual appeal of an organized entryway enhances the initial impression of a home, making small mudrooms a popular focal point for interior design enthusiasts. Furthermore, these compact setups encourage a minimalist lifestyle by limiting storage to daily essentials, preventing the long-term accumulation of unnecessary clutter. By focusing on smart, scaled-down designs, anyone can create an orderly hub that looks professional, clean, and intentional.
Materials and Preparation Essentials
Executing a successful entryway transformation requires systematic planning and the gathering of proper materials before starting construction or assembly. The basic toolkit for a beginner-friendly mudroom project typically includes standard measuring tapes, a level, a stud finder, wall anchors, heavy-duty mounting screws, and a drill. Depending on the chosen concept, materials may range from prefabricated wooden storage benches and metal floating shelves to solid wood coat hooks and woven baskets. Precise measurement is the most critical step in the preparation phase; builders must record the exact height, width, and depth of the available wall space, factoring in door clearance angles and baseboard thicknesses. Before purchasing any furniture or hardware, sketch a layout plan to ensure that walking paths remain entirely unobstructed. Additionally, analyze the wall construction to locate studs for secure mounting, ensuring that the installation can support the weight of heavy winter coats and loaded bags. Proper prep work prevents structural damage and ensures the longevity of your customized entryway organization system.
Idea 1: The Floating Shelf and Hook Combination
How to Create
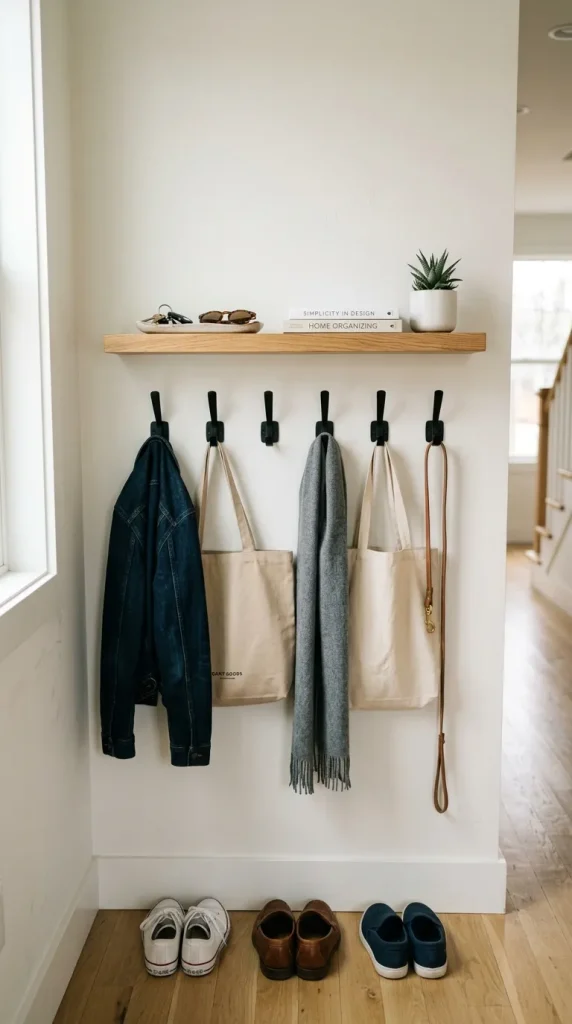
The floating shelf and hook system relies on vertical wall space to deliver maximum storage without occupying any valuable square footage on the floor. This clean, minimalist style setup uses a solid wood or composite floating shelf positioned at eye level, paired with a row of heavy-duty coat hooks mounted directly underneath. By raising the storage components off the ground, the entryway maintains an open, airy feel that makes narrow hallways appear significantly larger. This concept is ideal for storing mail, keys, and decorative items on top of the shelf, while bags, jackets, and umbrellas hang securely below. The design can stretch across the entire width of a small accent wall or fit neatly behind a front door, making it highly versatile for various architectural layouts.
To implement this easy project, begin by selecting a sturdy shelf and a set of matching hooks that complement your existing home decor. Use a stud finder to locate the structural framing within the wall, as securing the mounting brackets to studs is essential for carrying heavy daily loads. Mark a perfectly level line at your desired height, usually around sixty to sixty-five inches from the floor, to ensure comfortable reach. Drill pilot holes, secure the floating shelf brackets with heavy-duty screws, and mount the shelf according to the manufacturer instructions. Next, measure and mark even intervals for the coat hooks directly below the shelf, ensuring they are aligned properly before screwing them securely into the wall studs or heavy-duty drywall anchors.
Idea 2: The Slim Storage Bench with Open Under-Seat Cubbies
How to Create
A slim entryway bench equipped with open lower cubbies provides a comfortable seating surface while simultaneously serving as a dedicated shoe storage station. This practical furniture piece anchors the tiny mudroom zone, establishing a clear boundary for the entryway while keeping footwear neatly tucked away but easily accessible. The open cubby design eliminates the need for swinging cabinet doors, which can block tight pathways and restrict movement in small hallways. By keeping the lower compartments open, family members can quickly slide shoes in and out, promoting consistent organization and preventing piles from forming around the doorway.
To build or assemble this setup, look for a bench with a depth of no more than twelve to fourteen inches to maintain clear walkways. Position the bench flat against the primary entryway wall, ensuring it does not interfere with the radius of the front door when it opens. Once the bench is in position, measure the dimensions of the lower cubby spaces precisely to source matching fabric, wire, or woven storage baskets. These baskets fit tightly inside the compartments to hide smaller items like sandals, pet leashes, and shoe cleaning kits from view. For added functionality, place a durable, low-profile utility mat directly inside the shoe cubbies to catch dripping water or dirt, preserving the condition of the bench material over time.

Idea 3: Vertical Pegboard Organization Panels
How to Create
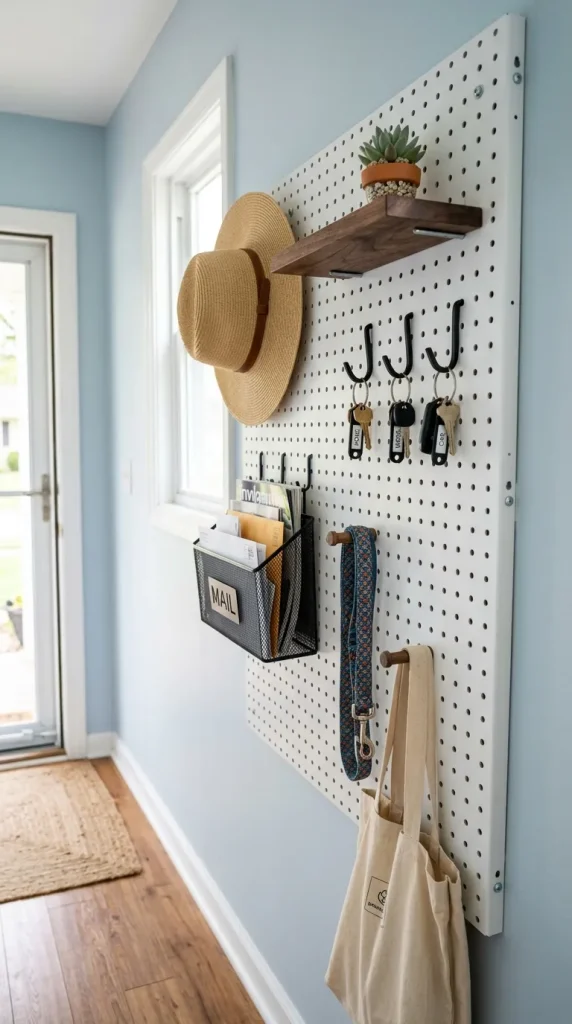
Utilizing a heavy-duty wooden or metal pegboard panel transforms an empty wall into a fully customizable, modular mudroom system. This creative project allows you to rearrange hooks, shelves, and baskets instantly as storage needs shift through different seasons. A pegboard covers wall scuffs while creating a highly functional visual grid that keeps everyday items organized and off the floor. The flat profile of the board takes up virtually zero physical space in a room, making it one of the most efficient trending ideas for exceptionally narrow entryways or small apartment corridors.
To execute this installation, purchase a high-quality pegboard panel along with an assortment of compatible pegs, straight hooks, and hanging bins. Mount wooden furring strips to the wall studs first to create a small, necessary gap behind the pegboard, allowing the hooks to insert correctly. Align the pegboard over the furring strips, check for level accuracy, and secure the panel using heavy-duty wood screws. Once the panel is firmly mounted, arrange the larger components first, such as small floating display shelves or deep baskets for incoming mail. Finish the layout by inserting heavy coat pegs at varying heights, ensuring lower rows are accessible for children to hang their school bags and jackets independently.
Idea 4: Recessed Wall Niche Inset Mudroom
How to Create
For homes with narrow hallways where standard furniture blocks traffic, utilizing the interior space between wall studs creates a completely recessed mudroom. This advanced DIY tutorial involves opening a section of drywall to build storage cavities directly inside the wall frame, resulting in a flush finish that preserves every inch of floor space. The recessed niche can house flush-mounted hooks, small storage ledges, and even a built-in key drop station. This structural approach yields a highly sophisticated, integrated look that enhances modern design aesthetics while providing hidden utility.
Begin by scanning the target wall with a stud finder to locate two adjacent studs, ensuring there is no plumbing or electrical wiring running through the selected bay. Carefully cut away the drywall section between the studs to expose the internal cavity, framing out the top and bottom of the opening with structural lumber. Cut and assemble a custom wooden insert box that matches the exact depth of the studs, typically three and a half inches, and slide it into the opening. Secure the wooden box to the studs with countersunk screws, then apply trim molding around the exterior edges to hide the raw drywall cuts. Paint the interior of the niche, install low-profile hooks, and add a small bottom ledge to complete the flush-mount mudroom unit.

Idea 5: Corner Bench and Accent Hook Matrix
How to Create
Unused corners are frequently overlooked in entryway planning, but a dedicated corner mudroom setup capitalizes on dead space without impeding room flow. This configuration uses a triangular or L-shaped corner bench paired with a matching angled hook arrangement on the intersecting walls above. By concentrating storage into a single corner, you leave the main walls open, creating a more spacious feel in the entryway. This layout is highly effective for square foyers or rooms where the front door opens directly into a main living area rather than a structured hallway.
To execute this concept, source or construct a sturdy corner bench that fits snugly into the intersection of the two walls. Secure the back frames of the bench to the wall studs using small L-brackets to prevent any shifting or tipping during daily use. Next, measure upward from the bench surface on both walls to map out a symmetrical grid for your wall hooks. Install a row of three hooks on one wall and another row of three hooks on the adjacent wall, staggering the heights slightly if you need to accommodate long coats alongside short shoulder bags. This intersecting layout doubles the hanging capacity of a standard flat wall while maintaining a compact, contained footprint.

Idea 6: Shiplap Backing with Integrated Ledge and Bench
How to Create
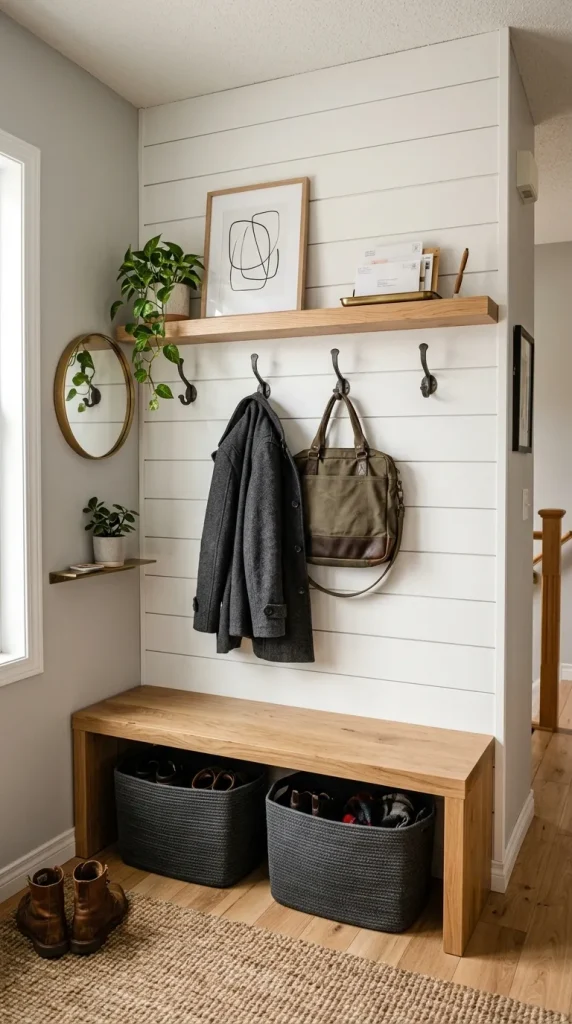
Adding a structural shiplap backing panel from the floor to the ceiling defines a distinct mudroom zone within a larger room while protecting walls from scuffs. This beginner friendly decoration project combines vertical wooden planks with an integrated top ledge and a matching base bench to create a unified built-in look. The continuous vertical lines of the shiplap draw the eye upward, creating the illusion of higher ceilings and a grander entryway. Beyond its aesthetic appeal, the solid wood backing provides a durable, easy-to-clean surface that shields the underlying drywall from wet coats, muddy bags, and dirty shoes.
To create this built-in look, measure the width of your designated mudroom zone and purchase interlocking shiplap planks or a pre-cut plywood beadboard panel. Secure the planks horizontally or vertically directly to the wall studs using construction adhesive and finishing nails, working from the baseboard upward. Once the backing board is secure, mount a thick horizontal trim board at the top to act as a structural anchor for your upper shelf ledge. Paint the entire wood structure with a durable, semi-gloss paint that resists moisture and stains. Finally, slide a coordinating storage bench against the bottom of the shiplap panel, and mount heavy-duty iron hooks through the shiplap directly into the wall studs for maximum weight support.
Idea 7: The Industrial Pipe and Reclaimed Wood Rack
How to Create
An industrial pipe rack offers an exceptionally robust, high-weight-capacity mudroom solution that fits perfectly into modern design schemes. This DIY project utilizes black iron plumbing pipes and thick planks of reclaimed wood to construct a wall-mounted garment rail with integrated shelving. The open frame design allows light to pass through freely, preventing the entryway from feeling dark or enclosed. It is a highly practical solution for households that need to hang heavy winter gear, sports equipment, or large backpacks daily without worrying about traditional bracket failure.
To build this industrial rack, purchase lengths of black iron pipe, matching elbows, tees, floor flanges, and treated wood planks. Clean the pipes thoroughly to remove any manufacturing oil, then apply a clear coat of protective finish to prevent rust over time. Assemble the pipe framework by screwing the pieces together to create a top hanging bar supported by vertical legs that anchor into the floor and wall. Drill matching holes through your wood planks to thread them onto the pipe supports, creating solid shelves above or below the hanging rail. Position the assembled unit against the wall, check for plumb alignment, and secure the flanges firmly into wall studs and floor joists using heavy-duty lag bolts.

Idea 8: The Minimalist Mirror and Console Hub
How to Create
Combining a large round mirror with a ultra-slim console table creates a sophisticated, multi-functional mudroom hub tailored for tight spaces. This minimalist style approach focuses on visual expansion; the reflective surface of the mirror bounces light around the dark entryway, making the space feel instantly larger and brighter. The console table, requiring a depth of only ten inches, provides a surface for sorting mail and storing daily accessories without encroaching on the physical walkway. This setup bridges the gap between high-end home decor and practical mudroom utility.
To install this setup, mount a substantial, framed wall mirror at eye level, ensuring it is centered on your primary entryway wall using heavy-duty wall anchors. Position the slim console table directly beneath the mirror, anchoring the back of the frame to the wall to prevent accidental tipping. Place a small, shallow decorative tray on top of the console to serve as a designated drop zone for keys, wallets, and sunglasses. To handle shoe storage, slide a low-profile, open metal shoe rack completely underneath the table frame, keeping footwear organized and out of sight while maintaining a clean appearance.

Idea 9: High-Density Double Row Hook Rail
How to Create
When wall space is extremely limited but hanging capacity is a priority, a staggered double-row hook rail offers a high-density storage solution. This easy project involves mounting a thick finish-grade wooden board to the wall, which acts as a heavy-duty mounting plate for two parallel rows of hooks. By offsetting the top row of hooks from the bottom row, you double the amount of clothing and bags you can hang in the exact same footprint. This method prevents jackets from overlapping excessively, which ensures that items dry quickly and remain easy to grab.
To construct this high-density rail, select a piece of solid oak or pine board measuring roughly six inches wide and the length of your available wall space. Sand the board smooth and apply a coat of paint or wood stain that matches your entryway style. Screw a row of large double-pronged coat hooks along the top edge of the board, spaced roughly eight inches apart. Next, mount a second row of smaller single hooks along the bottom edge of the board, positioning each lower hook exactly halfway between the top hooks. Mount the completed wood rail horizontally across the wall studs using long wood screws, providing a rock-solid foundation that can handle dozens of items simultaneously.

Idea 10: The Repurposed Vintage Ladder Wardrobe
How to Create
Using a wooden ladder suspended horizontally or leaned flat against the wall provides an eco-friendly mudroom option rich in character. This creative project repurposes a vintage or replica wooden ladder into an overhead hanging matrix or a vertical tiered shelf system. When mounted horizontally against a high ceiling or upper wall, the rungs of the ladder serve as built-in slots for coat hangers, while the top surface can hold lightweight storage baskets. This design introduces unique textures to home decor while keeping floors completely clear of furniture.
To install a leaning vertical ladder setup, secure the top feet of a clean wooden ladder to the wall using sturdy metal straps to eliminate any sliding hazards. Fit custom-cut wooden planks across the rungs to create flat, stable shelves for holding shoes, folded hats, and organized storage bins. Alternatively, for a horizontal ceiling mount, attach heavy-duty eye bolts into the ceiling joists and suspend the ladder using thick natural rope or decorative metal chains. Ensure the ladder hangs level and at a safe clearance height, then use standard S-hooks hung over the rungs to create instant, movable hanging points for jackets, bags, and umbrellas.

Common Beginner Mistakes and How to Avoid Them
The most frequent error when planning a tiny mudroom is failing to account for the clearance radius of the front door. Homeowners often purchase beautiful benches or thick wall units only to find that the door hits the furniture when opened fully, causing dents and restricting entry. To avoid this issue, always measure the entry space with the front door pinned wide open against the wall, and restrict your furniture placement to the dead space behind or beside that swing arc. Another prevalent mistake is mounting coat hooks using simple plastic drywall anchors rather than securing them directly into wall studs. Daily use by family members pulling down heavy backpacks can cause plastic anchors to pull loose, destroying drywall and creating costly repair projects. Always use a stud finder during the planning phase, or install a solid wood backing board anchored to studs first to provide a reliable foundation for your hardware. Lastly, avoid using open shoe storage without a washable mat or liner beneath it. Mud and water from outdoor footwear will quickly stain floors or ruin furniture finishes, making a waterproof tray an absolute necessity for long-term protection.
Practical Tips for Better Results
To achieve professional-grade results with your DIY entryway project, always prioritize high-quality, commercial-grade hardware over cheap decorative options. Standard utility hooks may look appealing, but choosing heavy-duty cast iron or solid brass hardware ensures your mudroom can manage the weight of damp winter garments and heavy utility gear without bending. When organizing shoes, implement a strict “one-in, one-out” rule for family members to prevent the small cubby spaces from overflowing with seasonal footwear that belongs in a bedroom closet. Utilize uniform storage baskets across all shelves and cubbies; using identical containers creates a clean, cohesive visual line that instantly reduces the perception of clutter. For exceptionally dark entryways, install battery-operated motion-sensor LED puck lights underneath shelves or inside deep cubbies. These low-profile lighting solutions illuminate the storage zones automatically when someone enters the house, making it easy to locate items without searching in the dark. Finally, remember to clean and wipe down the entryway surfaces weekly with a damp microfiber cloth to keep dust, outdoor dirt, and grit from accumulating on the furniture.
Styling, Presentation, and Organization Ideas
An effective tiny mudroom must balance practical utility with cohesive styling to ensure it blends naturally into your overall home decoration theme. Choose a unified color palette for your baskets, hooks, and bench cushions that echoes the tones used in the adjacent living spaces. For a modern design look, combine matte black metal hardware with natural light oak woods and soft cream-colored woven storage baskets. If your entryway opens directly into a bright living room, paint the mudroom wall a sophisticated accent color, such as charcoal gray or deep navy, to visually separate the transition hub from the relaxation zones. Introduce small elements of nature by placing a low-maintenance potted plant, like a snake plant or a pothos trailing down from an upper floating shelf. Use closed storage containers for unsightly items like dog leashes, flashlights, and umbrellas, while reserving open hooks for visually appealing items like structured canvas tote bags and tailored jackets. This careful curation ensures your entryway remains highly functional while looking like a professionally styled space worthy of a design magazine.
Budget and Time Planning
Completing a tiny mudroom transformation does not require an extensive budget or weeks of labor; most of these ideas can be executed over a single weekend with proper preparation. Start by allocating a realistic budget, splitting your funds between structural stability components and decorative storage solutions. Prioritize spending on heavy-duty wall anchors, high-quality wood, and robust hooks, as these parts endure constant mechanical stress. To save money, source vintage benches or solid wood shelves from secondhand markets, then refresh them with a fresh coat of leftover interior paint or wood stain to match your home aesthetic. Break the project down into manageable steps across two days: use Saturday morning for precise measuring, wall stud locating, and purchasing materials. Dedicate Saturday afternoon to sanding, painting, or finishing raw wood components so they can dry completely overnight. Spend Sunday mounting the main structures, installing hardware, and arranging storage baskets. This disciplined timeline prevents your home entryway from remaining chaotic for extended periods, ensuring a smooth, stress-free DIY experience from start to finish.
Creative Expansion and Advanced Inspiration
Once you master the basics of a simple mudroom setup, consider expanding the installation with advanced features that elevate its convenience and value. Installing a dedicated low-voltage charging station inside an upper cubby allows family members to plug in smart devices, phones, and wireless headphones the moment they step through the door. This layout eliminates charging cable clutter from kitchen counters and keeps essential devices ready for the morning commute. Another advanced modification involves integrating a small chalkboard, magnetic whiteboard, or cork panel into the center of the wall hook grid to serve as a family communication hub. This surface works perfectly for tracking weekly schedules, posting grocery lists, and securing important paper reminders where they cannot be overlooked. For homes with pets, you can extend the lower section of a custom bench to house built-in, pull-out food and water bowls that slide away smoothly when guests arrive. These thoughtful upgrades transform a simple coat rack into a comprehensive home command center, proving that even the smallest entryway can deliver massive lifestyle benefits when designed with creativity and precision.