10 Low Bun Tutorial Short Hair Ideas
Low bun hairstyles continue to appear across modern Pinterest ideas because they combine simplicity, elegance, and practicality in one easy project. Short hair can sometimes feel difficult to style into polished updos, yet low bun techniques offer flexible solutions that work for casual routines, office settings, formal events, and everyday organization of hair. A well-structured low bun also supports minimalist style trends, aesthetic presentation, and DIY beauty inspiration that fits modern design preferences. Many people search for beginner friendly hairstyles that require limited materials, simple planning, and realistic execution methods, making low bun tutorials highly popular in creative ideas collections and beauty-focused home decor inspiration boards.
This article explains how to create ten different low bun tutorial short hair ideas using practical step by step methods designed specifically for shorter hair lengths. Readers will learn preparation techniques, styling methods, sectioning approaches, texture enhancement ideas, and decoration options that improve the finished hairstyle. Every tutorial focuses on realistic styling that can be completed without professional salon experience. The guide also covers materials, organization strategies, common mistakes, budget ideas, and creative project expansion methods that help improve final results. Each hairstyle idea balances aesthetic presentation with functionality, making the designs useful for daily wear while remaining visually polished for Pinterest inspiration collections.
Why This Idea Is Trending or Useful
Low bun hairstyles for short hair remain trending ideas because they solve a common styling challenge while supporting modern aesthetic preferences. Many people with shorter hairstyles assume they cannot create elegant buns without extensions or complicated techniques. Pinterest inspiration boards increasingly highlight easy project solutions that simplify beauty routines while still producing polished results. Low buns meet this need by offering versatile styling methods that work with layered cuts, shoulder-length hair, and textured hairstyles. Their flexibility allows them to fit both minimalist style trends and more decorative handmade beauty looks.
Another reason these tutorials remain popular is their strong DIY appeal. Most low bun styles require only simple materials such as elastics, clips, combs, and texture products. The preparation process is beginner friendly and accessible for people learning basic hair organization techniques. These hairstyles also support practical daily routines because they help keep hair controlled while maintaining a soft and modern design appearance. Many Pinterest users prefer hairstyles that transition easily from work environments to social events without requiring complete restyling. Low buns achieve this balance through adaptable structure and simple decoration methods.
The visual appeal also contributes to their popularity. Low buns create clean neck lines, balanced facial framing, and elegant shape control that photograph well for Pinterest boards and social media inspiration collections. Their soft structure complements casual fashion, wedding styling, seasonal trends, and everyday decoration aesthetics while remaining practical and achievable for beginners.
Materials and Preparation
Successful low bun hairstyles begin with proper preparation, organization, and material selection. Short hair often requires additional structure compared to longer hair because smaller sections need secure placement to maintain the bun shape. Basic materials include elastic bands, bobby pins, sectioning clips, a tail comb, texture spray, light hold hairspray, and a soft brush. These materials help improve grip, control flyaways, and create a more stable foundation for the hairstyle. Choosing neutral-colored pins that match hair color also improves the finished aesthetic presentation.
Preparation starts with clean but slightly textured hair. Freshly washed hair may become too soft and slippery, making the bun difficult to secure. Applying dry texture spray or lightweight styling cream improves grip and makes step by step styling easier for beginners. Hair should be brushed gently to remove tangles while maintaining natural volume. Planning the bun placement before styling also improves balance and organization. A low bun generally sits near the nape of the neck, but positioning may vary depending on hair length and facial structure.
Sectioning is another important preparation method. Dividing the hair into upper and lower areas helps control shorter layers during the DIY process. Small clips can temporarily hold loose sections while the base structure forms. Mirrors placed at multiple angles also help monitor symmetry and pin placement. These planning techniques support smoother execution and reduce styling frustration, especially for beginner friendly low bun tutorials focused on short hair organization and practical results.
Idea 1: Textured Twisted Low Bun
How to Create
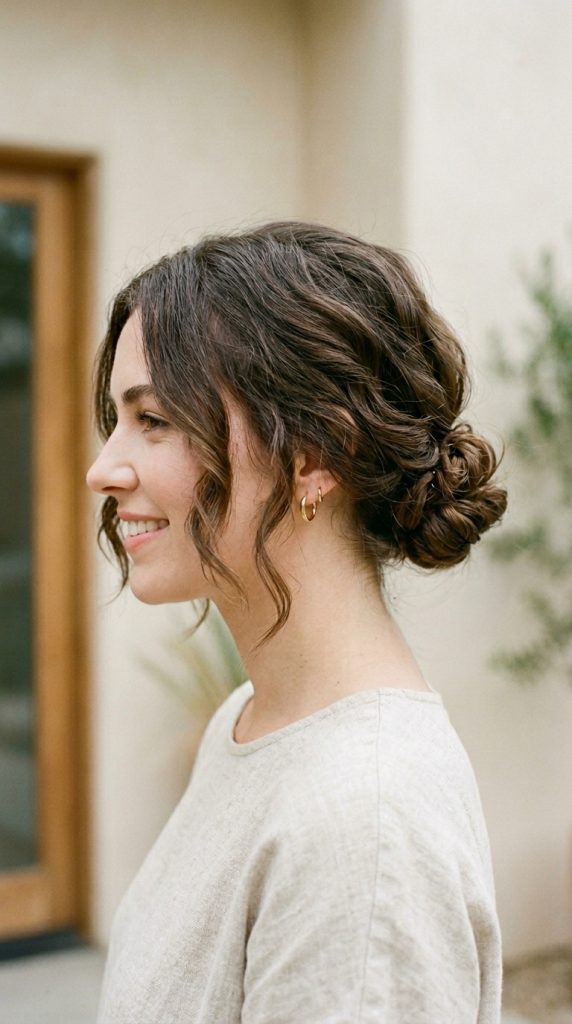
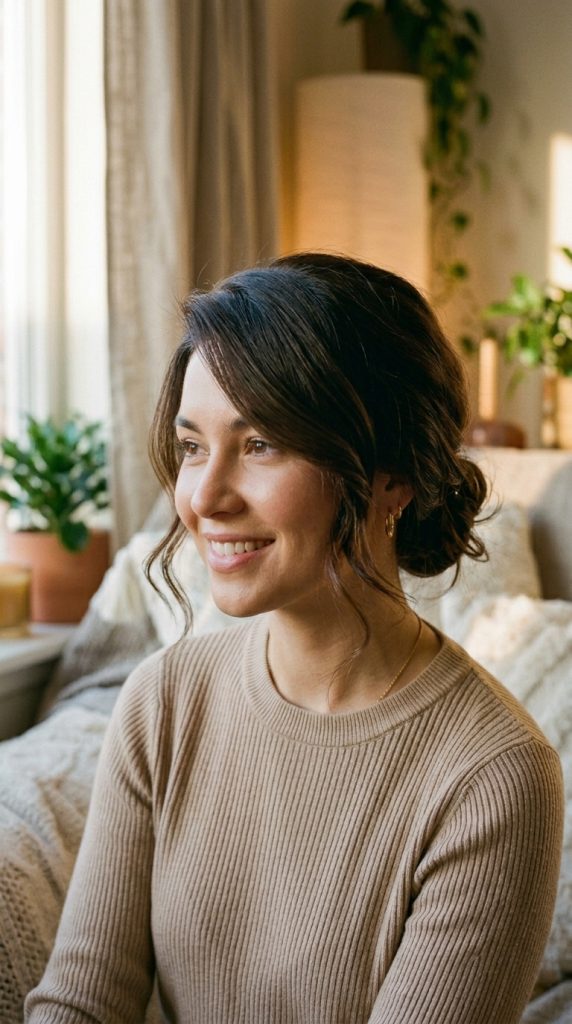
The textured twisted low bun creates soft movement while making short hair appear fuller and more dimensional. This Pinterest inspiration hairstyle works especially well for layered cuts because the twists naturally blend shorter pieces into the overall structure. The design combines casual softness with organized shape control, making it useful for both daily routines and special events. Texture plays an important role in this modern design because it prevents the bun from appearing flat or overly tight. A slightly undone finish also supports minimalist style trends that focus on natural beauty and effortless presentation.
Begin by applying texture spray throughout dry hair to improve grip and create separation between layers. Divide the hair into two equal side sections and gently twist each side toward the back of the head. Secure the twists together at the nape using a small elastic band. Instead of pulling the ponytail completely through on the final wrap, leave a small loop to form the bun foundation. Shorter ends can be pinned underneath using bobby pins that match the hair color. Pull small sections slightly outward to create fullness and softer volume. Light hairspray helps maintain structure while preserving natural movement. This DIY tutorial works well for beginner friendly styling because the twists naturally disguise uneven layers while creating an elegant handmade appearance suitable for aesthetic Pinterest ideas and creative project inspiration boards.
The practical process focuses on balance and pin placement rather than perfect symmetry. Begin by creating loose texture around the crown using a comb or fingertips. This prevents the hairstyle from appearing overly flat against the scalp. The side twists should remain soft rather than tightly wound because relaxed tension helps create a fuller low bun shape. After securing the looped bun, distribute loose ends evenly around the base before pinning them carefully underneath. This organization method helps maintain a cleaner structure without exposing short pieces.
For additional decoration, thin face-framing sections can remain loose around the front hairline. This styling technique softens the overall design and improves the aesthetic presentation for photographs and Pinterest inspiration collections. Small pearl pins or minimalist clips may also be added near the twists without overwhelming the hairstyle. The bun can remain compact for office settings or expanded slightly for a more romantic appearance. Because the structure relies on twists instead of complicated braiding, the hairstyle remains accessible for beginners while still producing professional-looking results. The combination of texture, softness, and controlled organization makes this one of the most adaptable low bun tutorial ideas for short hair.
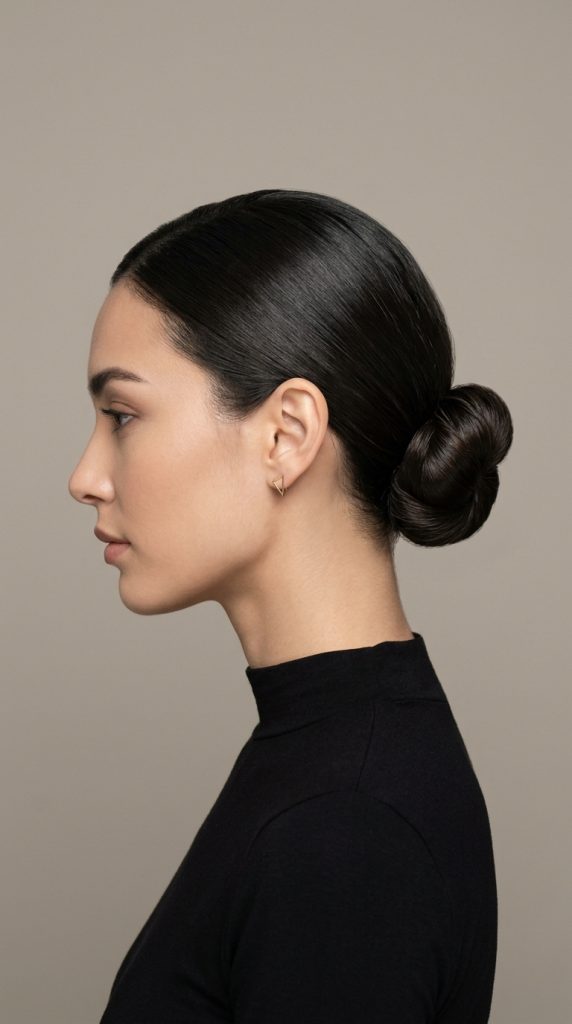
Idea 2: Sleek Center-Part Low Bun
Step-by-Step Guide
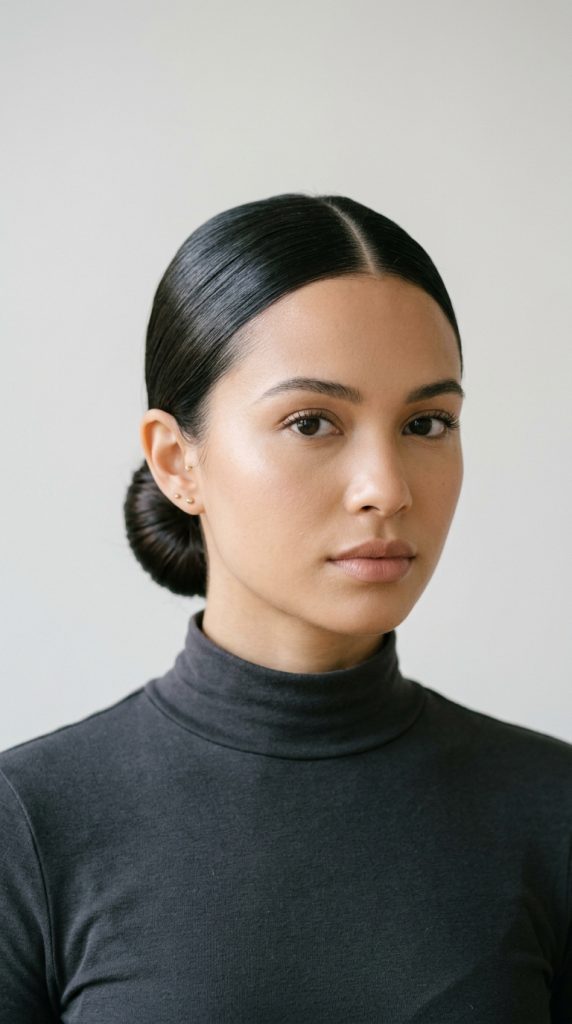
The sleek center-part low bun focuses on clean structure, polished lines, and minimalist style organization. This hairstyle frequently appears in Pinterest ideas because it complements modern fashion trends while remaining practical for everyday wear. Short hair benefits from sleek styling because controlled smoothness reduces the appearance of uneven layers and creates a refined silhouette. The center part adds balance and symmetry, making the hairstyle visually structured without appearing overly formal. This design works especially well for professional environments, evening events, and aesthetic beauty photography.
Start by creating a precise center part using a tail comb. Apply lightweight smoothing cream or styling gel from roots to mid-lengths to control flyaways and improve shine. Brush the hair downward toward the nape of the neck and secure it into a low ponytail using a small elastic band. Twist the ponytail tightly around itself to form a compact bun, then secure it with bobby pins underneath the structure. Short layers that escape can be smoothed using a small amount of styling product applied with fingertips or a soft brush. Light hairspray maintains the sleek finish while preventing stiffness. The clean organization and simple execution process make this a beginner friendly DIY tutorial that supports modern design inspiration and elegant Pinterest hairstyle collections.
The styling process depends heavily on preparation and smooth application techniques. Hair should be thoroughly detangled before product application to avoid uneven texture or visible bumps. Applying product gradually rather than heavily helps maintain natural movement while still controlling frizz. During the ponytail stage, brushing in small sections improves overall symmetry and creates a cleaner low bun foundation. Pins should be inserted vertically underneath the bun to strengthen hold without becoming visible from the sides.
This hairstyle also adapts well to different decorative approaches. For minimalist style inspiration, the bun can remain completely smooth with no visible accessories. For more decorative Pinterest ideas, metallic clips or simple ribbon ties may be added near the bun base. The sleek finish also photographs well under natural lighting because the smooth surface reflects shine evenly. Short hair that struggles to remain secured may benefit from light teasing near the ponytail base before twisting. This easy project combines organization, practical structure, and aesthetic simplicity, making it one of the most useful low bun tutorial styles for modern short hair routines.
Idea 3: Loose Braided Low Bun
How to Make
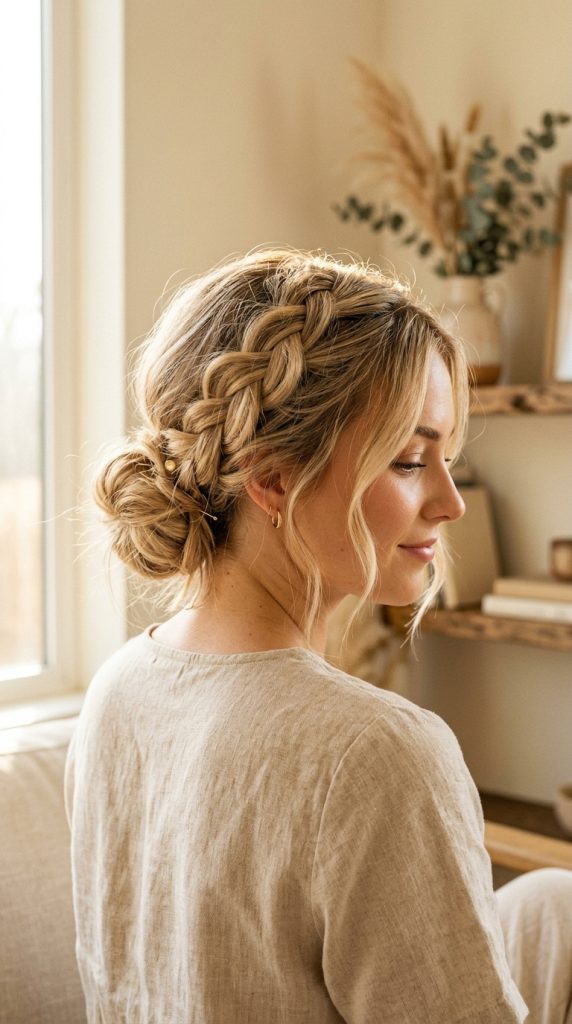
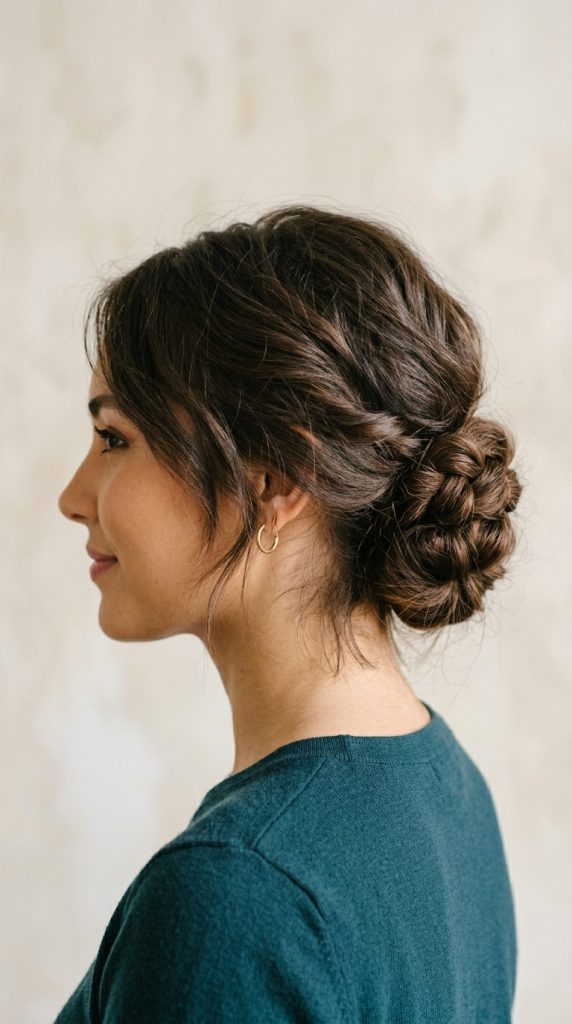
The loose braided low bun combines texture, softness, and handmade detail in a way that suits many Pinterest inspiration trends. Braiding helps secure shorter layers while adding visual interest to the hairstyle without requiring complicated techniques. This low bun variation creates a relaxed appearance that works well for weddings, casual gatherings, seasonal styling, and aesthetic photography. The braid acts as both structural support and decorative detail, making the hairstyle feel more intricate than standard buns while remaining beginner friendly.
Start by applying texture spray or dry shampoo to improve grip and volume. Create a loose side braid beginning near one temple and continue braiding toward the nape of the neck. Gather the remaining hair into a low ponytail and combine it with the braid using a small elastic band. Twist the ponytail into a loose bun shape and pin it securely underneath. The braid can either wrap partially around the bun or remain visible along one side for additional dimension. Pull gently on sections of the braid to create softness and fuller texture. Loose strands around the face enhance the relaxed aesthetic while improving overall balance. This step by step DIY method creates a polished but approachable hairstyle suitable for modern design inspiration and practical beauty organization.
Execution depends on maintaining soft structure rather than perfect tightness. Braids that are too tight can expose short layers and reduce the relaxed aesthetic that makes this hairstyle visually appealing. Gentle tension allows the braid to appear fuller while helping it blend naturally into the bun. During the bun formation process, wrapping the hair loosely creates better texture and volume for shorter lengths. Pins should secure the bun underneath while preserving visible softness along the outer edges.
This hairstyle supports many decoration and styling variations. Small flowers, pearl pins, or ribbon accents can be inserted near the braid for seasonal Pinterest ideas and event styling inspiration. The design also adapts well to both straight and wavy textures because the braid creates additional visual structure. For people with layered cuts, small loose sections can remain intentionally visible to support the handmade aesthetic. The balance between organization and softness makes this low bun tutorial highly practical for beginners while still producing elegant results suitable for creative project collections and aesthetic hairstyle inspiration boards.
Idea 4: Rolled Nape Low Bun
Execution Process
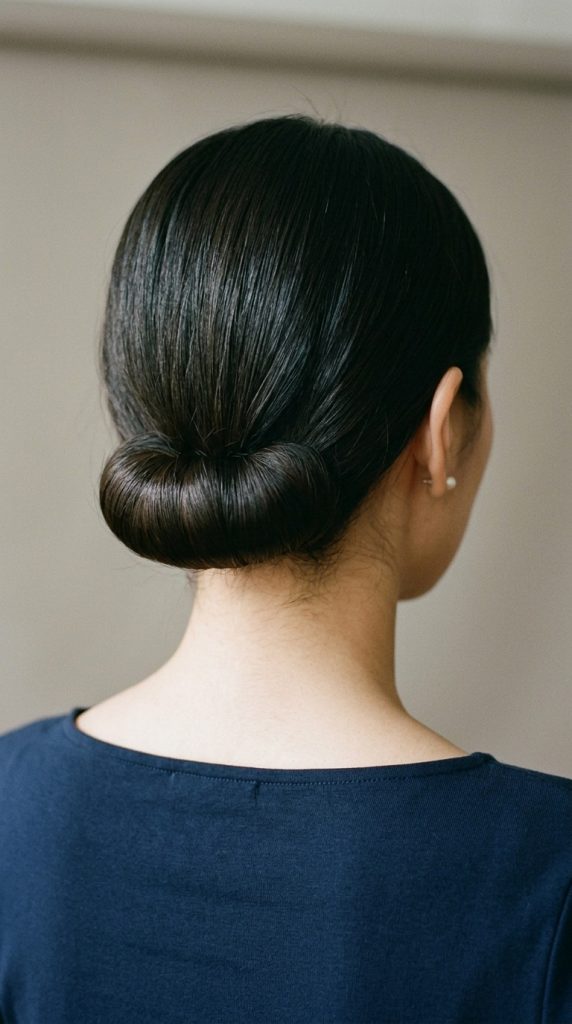
The rolled nape low bun focuses on smooth organization and hidden structure, making it ideal for short hair that struggles with traditional twisting methods. This hairstyle creates the illusion of fuller volume while maintaining a clean and elegant appearance. Pinterest inspiration boards frequently feature rolled hairstyles because they provide polished results using relatively simple DIY techniques. The rolled structure also helps contain shorter layers more effectively than loose buns, making it practical for active schedules and long wear periods.
Begin by brushing the hair smoothly toward the nape and securing it into a low ponytail. Create a small opening directly above the elastic and flip the ponytail upward through the gap to form an inward roll. Continue rolling the remaining length upward against the head until the hair forms a compact tucked shape near the nape. Secure the roll using multiple bobby pins inserted horizontally along the edges. Apply light hairspray to maintain smoothness and control flyaways. Shorter layers can be tucked gently inside the roll using the pointed end of a comb. This beginner friendly tutorial creates a refined modern design that works well for office settings, formal events, and minimalist Pinterest hairstyle inspiration.
The success of this hairstyle depends on careful rolling technique and balanced pin placement. Rolling the hair too tightly may create discomfort or expose short layers, while rolling too loosely can reduce stability. Maintaining moderate tension helps preserve comfort while supporting the clean aesthetic. Pins should cross each other internally for stronger hold without visible hardware. Using texture spray before rolling can also improve grip, especially for very smooth or freshly washed hair.
This easy project supports multiple styling variations. Decorative combs, metallic pins, or fabric accessories can be added near the side of the roll for enhanced presentation. Face-framing sections may remain loose to soften the structure and improve balance around the cheeks and jawline. The rolled design also works well with side parts, curtain bangs, or subtle waves. Because the hairstyle focuses on inward organization rather than external volume, it remains one of the most practical low bun tutorial ideas for shorter hair lengths that require additional control and long-lasting structure.
Idea 5: Messy Volume Low Bun
How to Create
The messy volume low bun emphasizes relaxed texture, airy fullness, and soft structure. This hairstyle remains highly popular in Pinterest ideas because it combines casual comfort with visually balanced styling. Short hair often lacks natural bun volume, so teasing and texture techniques become important tools for creating fuller shapes. The messy aesthetic also helps disguise uneven layers and makes the hairstyle appear intentionally relaxed rather than overly structured. This design works especially well for casual fashion inspiration, weekend styling, and modern aesthetic photography.
Begin by applying volumizing spray or dry shampoo at the roots and mid-lengths. Lightly tease the crown area using a comb to build height and fullness. Gather the hair loosely at the nape without flattening the volume at the top. Secure it into a low ponytail, then twist and wrap the hair into a loose bun shape. Allow small sections to remain slightly separated instead of tightly smoothing everything together. Pin the bun underneath while preserving texture along the outer edges. Pull a few strands loose near the temples and neckline for a softer finish. This DIY step by step method creates a beginner friendly hairstyle that balances organization with relaxed movement and creative handmade styling.
The practical styling process focuses on texture control rather than precision. Excessive brushing can remove volume and make the hairstyle appear flat, so finger styling often works better after the initial preparation stage. The bun should remain slightly loose to maintain the airy appearance that defines this aesthetic. Pins placed at different angles improve support without compressing the structure. Texture spray may also be reapplied lightly after styling to enhance separation and movement.
This hairstyle supports seasonal decoration and creative project variations. Soft scarves, fabric ribbons, or decorative clips can complement the messy texture without making the design appear overly formal. The hairstyle also pairs effectively with oversized sweaters, casual fashion styling, and minimalist beauty aesthetics often featured in Pinterest inspiration collections. Because perfection is not required, the messy volume low bun reduces styling pressure for beginners while still creating visually appealing results suitable for everyday wear and aesthetic presentation.

Idea 6: Side-Part Soft Low Bun
Setup Method
The side-part soft low bun creates asymmetrical balance and gentle facial framing that complements many short hairstyles. Side parts add dimension and visual softness while helping create a more romantic and relaxed aesthetic. Pinterest inspiration boards frequently highlight side-part hairstyles because they suit both casual and formal settings while remaining beginner friendly. The low bun placement also supports comfortable wear and practical organization throughout the day.
Start by creating a deep side part using a tail comb. Apply light texture spray to improve grip and add subtle fullness near the roots. Brush the larger side section diagonally toward the nape while maintaining natural softness around the face. Gather all hair into a low ponytail slightly off-center beneath the heavier side of the part. Twist the ponytail loosely into a bun and secure it with pins underneath. Short pieces near the front can remain loose or lightly curled for additional softness. Finish with flexible hold hairspray to preserve movement while controlling flyaways. This step by step DIY hairstyle creates elegant asymmetry suitable for aesthetic Pinterest ideas and modern design inspiration.
Execution depends on preserving softness throughout the styling process. Over-tightening the side sections may reduce the gentle shape that makes this hairstyle visually balanced. Finger styling helps maintain natural movement while allowing small imperfections to enhance the relaxed aesthetic. The off-center bun placement also improves visual interest by preventing the hairstyle from appearing overly symmetrical or rigid. Pins should remain hidden beneath the bun while supporting the outer shape.
This hairstyle adapts easily to decorative styling and seasonal inspiration themes. Pearl accessories, floral clips, or minimalist metal accents can be added near the bun or side part without overwhelming the overall design. The hairstyle also works effectively with layered cuts because the asymmetrical structure naturally blends varying lengths together. For additional texture, soft waves can be added before styling. The combination of relaxed organization, practical structure, and aesthetic softness makes this low bun tutorial ideal for beginners seeking versatile short hair inspiration.
Idea 7: Mini Double Bun Fusion
How to Make
The mini double bun fusion combines two small low buns into one cohesive hairstyle designed specifically for short hair lengths. This approach improves stability while creating the appearance of a fuller bun structure. Pinterest ideas frequently feature creative organization methods like this because they solve practical styling challenges while maintaining aesthetic appeal. The divided structure also distributes hair more evenly, making it easier to secure shorter sections without excessive pinning.
Begin by dividing the hair horizontally into upper and lower sections. Secure the lower section into a small low ponytail and twist it into a compact bun at the nape. Pin it securely underneath. Gather the upper section and bring it downward over the first bun, then twist it into a second small bun that overlaps partially with the lower structure. Pin both buns together so they visually merge into one fuller shape. Gently loosen sections near the crown for soft volume and balance. Light hairspray helps maintain structure while preserving texture. This DIY tutorial creates a practical beginner friendly hairstyle that supports creative project inspiration and modern Pinterest aesthetics.
The styling process depends on strategic layering and pin placement. The lower bun acts as a support base while the upper bun provides visible fullness and dimension. Keeping the buns slightly loose improves comfort and prevents the hairstyle from appearing overly tight or formal. Pins inserted diagonally between both buns help lock the structures together securely. Texture spray can also improve grip and reduce slipping, especially for silky or freshly washed hair.
This hairstyle supports many decorative and styling possibilities. Minimalist clips can be placed between the buns to emphasize the layered structure, while soft face-framing strands maintain balance around the front. The style works especially well for casual events, creative beauty inspiration, and everyday organization routines. Because the design uses smaller sections rather than one large bun, it remains highly practical for shorter hair lengths that cannot easily wrap into traditional low buns. The result is visually fuller, stable, and suitable for Pinterest inspiration collections focused on easy project styling and handmade beauty ideas.
Idea 8: Twisted Rope Low Bun
Step-by-Step Guide
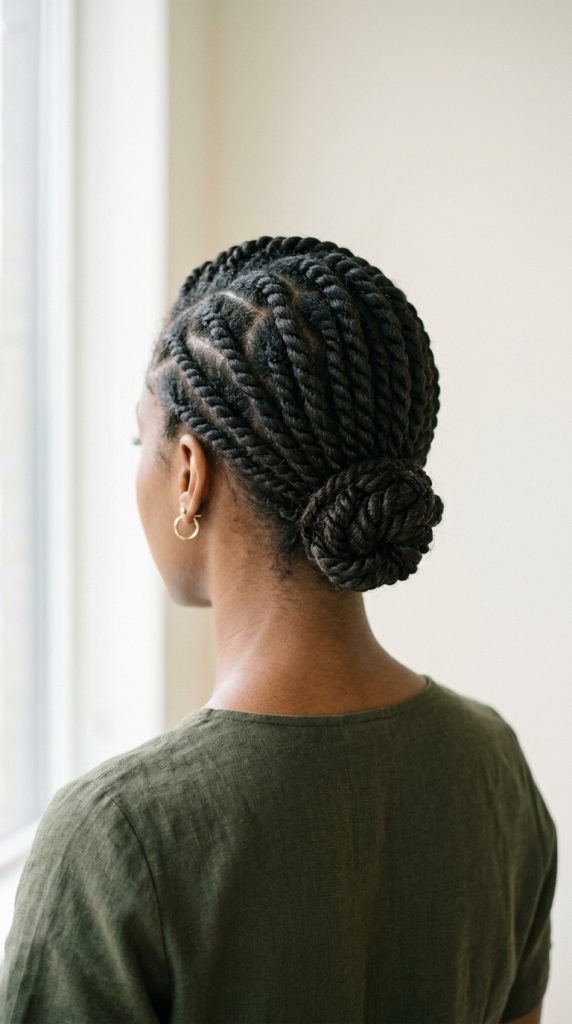
The twisted rope low bun uses rope-style twisting techniques to create texture and structure while helping shorter hair remain controlled. Rope twists differ from traditional braids because they involve wrapping two sections around each other repeatedly, creating a clean and modern appearance. Pinterest inspiration collections often feature rope twist hairstyles because they appear intricate while remaining relatively simple for beginners. The texture also adds visual movement that enhances minimalist and aesthetic styling trends.
Start by dividing the hair into two equal sections from the center back. Split each section again into two smaller strands and twist them around each other tightly to create rope twists. Secure the ends temporarily with small elastics if needed. Bring both rope twists together at the nape and wrap them into a compact low bun shape. Pin the structure carefully underneath while preserving the visible twisted texture. Gently loosen the twists slightly for softness and dimension. Apply flexible hold hairspray to maintain organization without stiffness. This beginner friendly tutorial creates a polished handmade appearance suitable for modern design inspiration and creative Pinterest hairstyle boards.
The execution process relies on maintaining even tension throughout the twisting stage. Uneven twisting may cause sections to unravel or create inconsistent texture. Working slowly while holding each strand firmly helps preserve the rope pattern. During bun formation, overlapping the twists slightly improves fullness and creates a more balanced silhouette. Pins should anchor the inner structure while allowing the outer texture to remain visible.
This hairstyle adapts well to decorative accessories and event styling. Thin ribbons can weave through the rope twists, or pearl pins can accent the bun edges for aesthetic presentation. The hairstyle also works with subtle waves or straight textures because the rope pattern creates its own dimension. For additional volume, teasing near the crown before styling helps balance the compact bun structure. The twisted rope low bun combines practical organization with elegant detail, making it one of the most versatile Pinterest ideas for short hair DIY styling.
Idea 9: Low Bun With Curtain Bangs
Execution Process
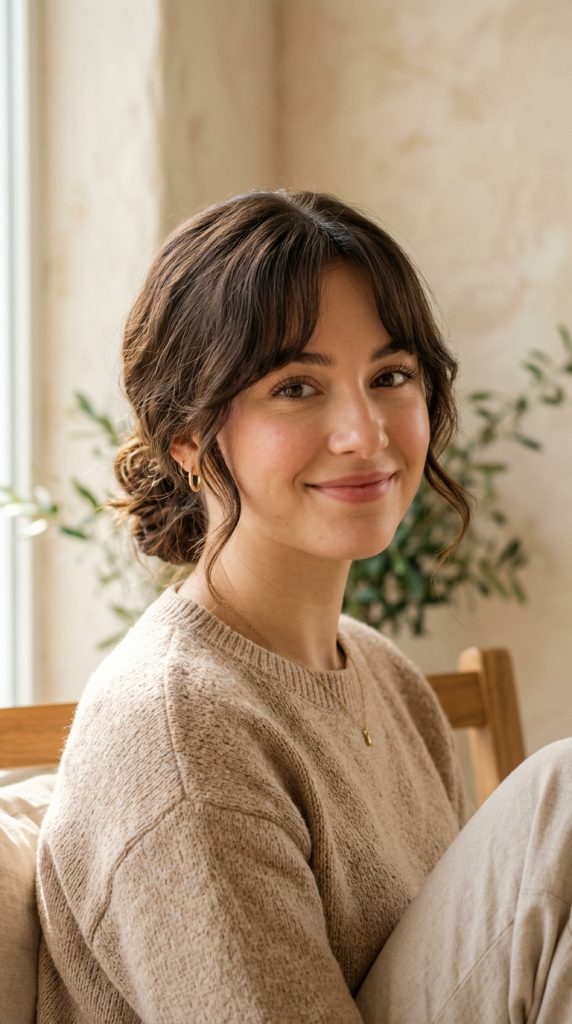
The low bun with curtain bangs creates soft framing around the face while maintaining a clean organized structure at the back. Curtain bangs remain highly popular in Pinterest inspiration because they add movement and softness without overwhelming the hairstyle. Combining them with a low bun creates balance between relaxed front detailing and polished back organization. This hairstyle suits many face shapes and supports both casual and formal styling aesthetics.
Begin by separating the curtain bangs from the rest of the hair before styling. Apply light texture spray throughout the remaining hair and gather it into a low ponytail at the nape. Twist the ponytail loosely into a bun and secure it underneath using pins. Keep the bun slightly relaxed to maintain softness and natural movement. Style the curtain bangs using a round brush or light curling technique so they frame the face gently on both sides. Small sections near the ears can remain loose for additional softness. Finish with flexible hold hairspray to preserve movement while controlling frizz. This beginner friendly DIY tutorial supports modern design trends and aesthetic Pinterest hairstyle inspiration.
The styling method depends on balancing the front and back sections carefully. Curtain bangs should maintain natural separation rather than appearing overly stiff or heavily curled. The low bun should also remain compact enough to avoid overwhelming the soft facial framing. Pins placed internally improve support while preserving the relaxed outer appearance. Texture products applied lightly help maintain grip without reducing movement.
This hairstyle works especially well for seasonal inspiration collections, casual events, and daily beauty routines. Decorative clips or minimalist pins may accent the bun without distracting from the curtain bangs. The hairstyle also photographs well because the front framing creates dimension around the face while the bun maintains clean organization. For layered short hair, loose sections near the neckline can remain slightly textured to support the relaxed aesthetic. The combination of practical structure and soft framing makes this low bun tutorial highly adaptable for Pinterest ideas focused on beauty inspiration and beginner friendly styling.
Idea 10: Minimalist Wrapped Low Bun
How to Create
The minimalist wrapped low bun focuses on clean lines, controlled wrapping techniques, and understated elegance. This hairstyle reflects modern design preferences that prioritize simplicity, organization, and balanced structure. Pinterest ideas often feature minimalist hairstyles because they complement many clothing styles and remain practical for everyday routines. Short hair benefits from wrapped techniques because they create smoother silhouettes while helping conceal shorter layers.
Start by brushing the hair smoothly toward the nape and securing it into a low ponytail. Divide the ponytail into two sections. Twist one section into a compact bun shape and pin it securely underneath. Wrap the second section smoothly around the outside of the bun to conceal the elastic and create a polished finish. Tuck the ends underneath and secure them with hidden pins. Apply light smoothing cream to control flyaways and maintain clean lines. The final structure should appear simple, compact, and balanced. This DIY step by step tutorial creates an elegant beginner friendly hairstyle suitable for minimalist Pinterest inspiration and practical everyday styling.
The execution process depends on careful wrapping and hidden pin placement. Keeping the outer wrap smooth creates the refined appearance that defines this hairstyle. Overusing product may reduce natural movement and create stiffness, so lightweight application works best. Pins inserted underneath the bun help preserve the clean outer silhouette while improving durability. Gentle tension during wrapping also prevents the structure from loosening throughout the day.
This hairstyle pairs effectively with minimalist accessories, neutral fashion styling, and modern aesthetic presentation. Thin metallic clips or subtle fabric ties can enhance the appearance without overwhelming the simplicity of the design. The hairstyle also transitions easily between work environments and evening events because of its balanced organization and understated elegance. For people seeking practical low bun tutorial ideas that prioritize clean structure and realistic execution, the minimalist wrapped low bun offers reliable results suitable for Pinterest inspiration collections and beginner friendly beauty routines.
Common Beginner Mistakes and How to Avoid Them
One common mistake when creating low buns for short hair is using overly tight tension during styling. Tight pulling can expose shorter layers, reduce comfort, and make the hairstyle appear flat instead of balanced. Maintaining moderate tension creates a softer and more natural aesthetic while helping the bun remain visually fuller. Another frequent problem involves skipping texture preparation. Smooth freshly washed hair often slips out of pins easily, reducing hairstyle stability. Applying texture spray or dry shampoo before beginning the DIY process improves grip and organization.
Incorrect pin placement also affects the final result. Many beginners place pins only around the outside of the bun, which weakens support and exposes hardware. Pins should secure internal sections underneath the bun structure for cleaner presentation and stronger hold. Ignoring sectioning methods can also create uneven balance, especially for layered short hair. Dividing the hair into manageable areas improves control throughout the styling process.
Using excessive hairspray is another issue that reduces movement and creates stiffness. Flexible hold products maintain organization while preserving softness and texture. Finally, many beginners attempt overly complicated Pinterest ideas before mastering basic techniques. Starting with simple low bun tutorials and gradually introducing braids, twists, or decorative elements helps build confidence and improves long-term styling results.
Practical Tips for Better Results
Preparation significantly improves low bun hairstyle quality, especially for short hair. Applying texture products before styling creates better grip and reduces slipping throughout the day. Dry shampoo can also increase volume near the roots while helping finer hair maintain structure. Gentle teasing at the crown creates balanced fullness that improves the overall silhouette without requiring complicated techniques. These small preparation methods support more professional-looking Pinterest inspiration results.
Lighting and mirror placement also affect styling accuracy. Using natural lighting helps identify uneven sections, exposed pins, or flyaways more clearly. A second mirror positioned behind the head improves organization during pin placement and bun shaping. Working slowly during the wrapping and twisting stages also creates cleaner structure and stronger hold. Many beginner friendly hairstyles become unstable when rushed.
Hair accessories should complement the bun rather than dominate the design. Minimalist clips, pearl pins, and soft ribbons often work better than oversized decorative pieces. Matching accessories to clothing or seasonal themes also improves aesthetic presentation. For additional softness, leaving a few face-framing sections loose creates more balanced proportions around the cheeks and jawline.
Practicing on slightly textured second-day hair can also improve results because the hair holds shape more effectively. Taking reference photos during the styling process helps track improvement and identify techniques that work best for specific hair lengths and textures. Consistent practice strengthens organization skills and increases confidence with creative DIY hairstyles.
Styling, Presentation, or Organization Ideas
Presentation plays an important role in making low bun hairstyles appear polished and visually balanced. Coordinating the hairstyle with clothing textures, accessories, and makeup creates stronger overall aesthetic harmony. Minimalist style outfits pair effectively with sleek low buns, while relaxed clothing complements textured or messy variations. Pinterest inspiration boards often highlight this balance between hairstyle organization and complete visual styling.
Hair accessories should remain proportional to the bun size. Small metallic clips, pearl accents, and neutral ribbons support modern design trends without overpowering short hairstyles. Placement also matters. Accessories positioned near the side of the bun or along twists and braids create more balanced decoration than large center placements. Seasonal styling can also influence presentation ideas. Soft fabrics and floral accents suit spring inspiration collections, while sleek metallic accessories support winter aesthetics.
Texture coordination improves the final appearance as well. Soft waves pair naturally with messy buns and braided styles, while straight textures complement sleek minimalist buns. Keeping facial framing consistent with the hairstyle structure also improves balance. Loose strands should appear intentional rather than accidental.
Photography organization is another useful consideration for Pinterest content creation. Natural lighting, neutral backgrounds, and simple clothing help emphasize hairstyle details more clearly. Capturing side angles and back views highlights texture, wrapping techniques, and decorative placement. These styling and presentation strategies strengthen the visual impact of low bun tutorials while maintaining practical everyday usability.
Budget or Time Planning
Low bun hairstyles remain practical because they require minimal materials and limited preparation time. Most beginner friendly tutorials use inexpensive items such as elastic bands, combs, bobby pins, and texture products that last through multiple styling sessions. Organizing these materials in one small container simplifies daily routines and reduces preparation time. Purchasing neutral-colored accessories also improves versatility because they coordinate with multiple hairstyles and outfits.
Time planning becomes easier with practice and consistent preparation methods. Simple low buns can often be completed within ten to fifteen minutes once the basic techniques become familiar. More decorative Pinterest ideas involving braids or twists may require additional time, especially during early practice sessions. Preparing materials before beginning the hairstyle helps maintain smoother workflow and reduces interruptions during styling.
Choosing hairstyles that match specific schedules also improves practicality. Sleek buns often work well for professional environments because they require limited adjustment throughout the day. Messy or textured buns may suit casual routines where softer structure remains acceptable. Practicing new techniques during free time rather than before important events also reduces stress and improves confidence.
Budget ideas can include reusing accessories creatively or repurposing fabric ribbons into handmade decorative ties. Many aesthetic styling results depend more on organization and technique than expensive products. Careful planning, proper preparation, and realistic time management help maintain efficient beauty routines while supporting creative Pinterest inspiration and practical DIY hairstyling goals.
Creative Expansion and Advanced Inspiration
After mastering basic low bun tutorials, more advanced creative project ideas can expand styling possibilities significantly. Combining multiple techniques such as braiding, rope twisting, and wrapped structures creates unique variations suitable for seasonal Pinterest inspiration collections. Experimenting with asymmetrical placement, layered textures, or decorative accessories also introduces more personalized design elements while maintaining practical organization.
Color and texture variation can dramatically change the appearance of low buns. Soft waves create romantic movement, while sleek straight textures support minimalist style aesthetics. Temporary decorative elements such as scarves, floral pins, or fabric wraps also allow the hairstyle to adapt for weddings, seasonal events, or themed photography projects. These additions help transform simple DIY hairstyles into more advanced aesthetic presentations.
Hair sectioning methods may also become more complex with experience. Combining hidden braids underneath buns or creating layered twisted foundations adds visual depth without requiring extensions. Learning how to balance volume distribution improves overall shape control, especially for shorter layered cuts. Pinterest ideas frequently showcase these advanced combinations because they create professional-looking results while remaining achievable with practice.
Creative expansion can also include coordinating hairstyles with makeup themes, clothing palettes, or seasonal inspiration boards. Building a personal collection of hairstyle references helps identify preferred textures, accessories, and organization methods. Continued experimentation strengthens styling confidence while encouraging more advanced handmade beauty designs that remain practical, realistic, and visually refined.