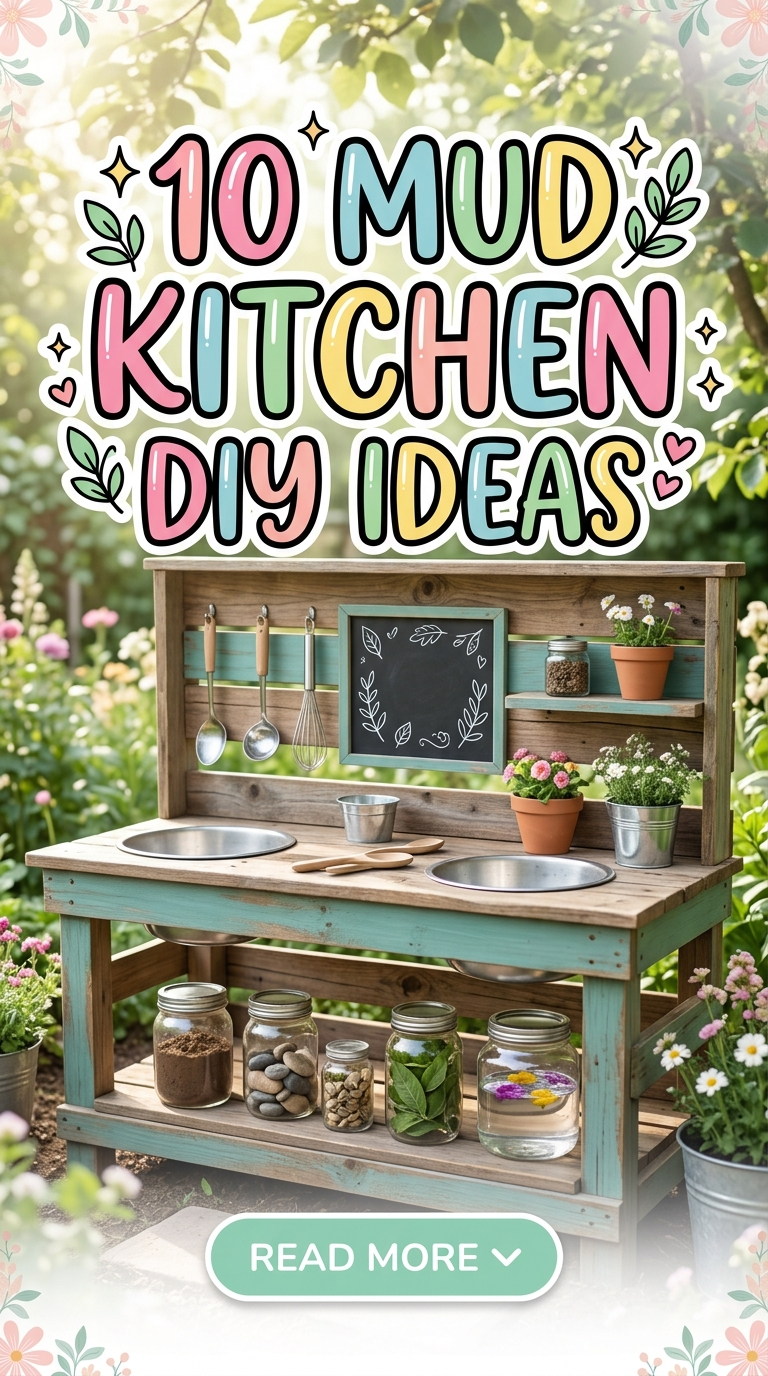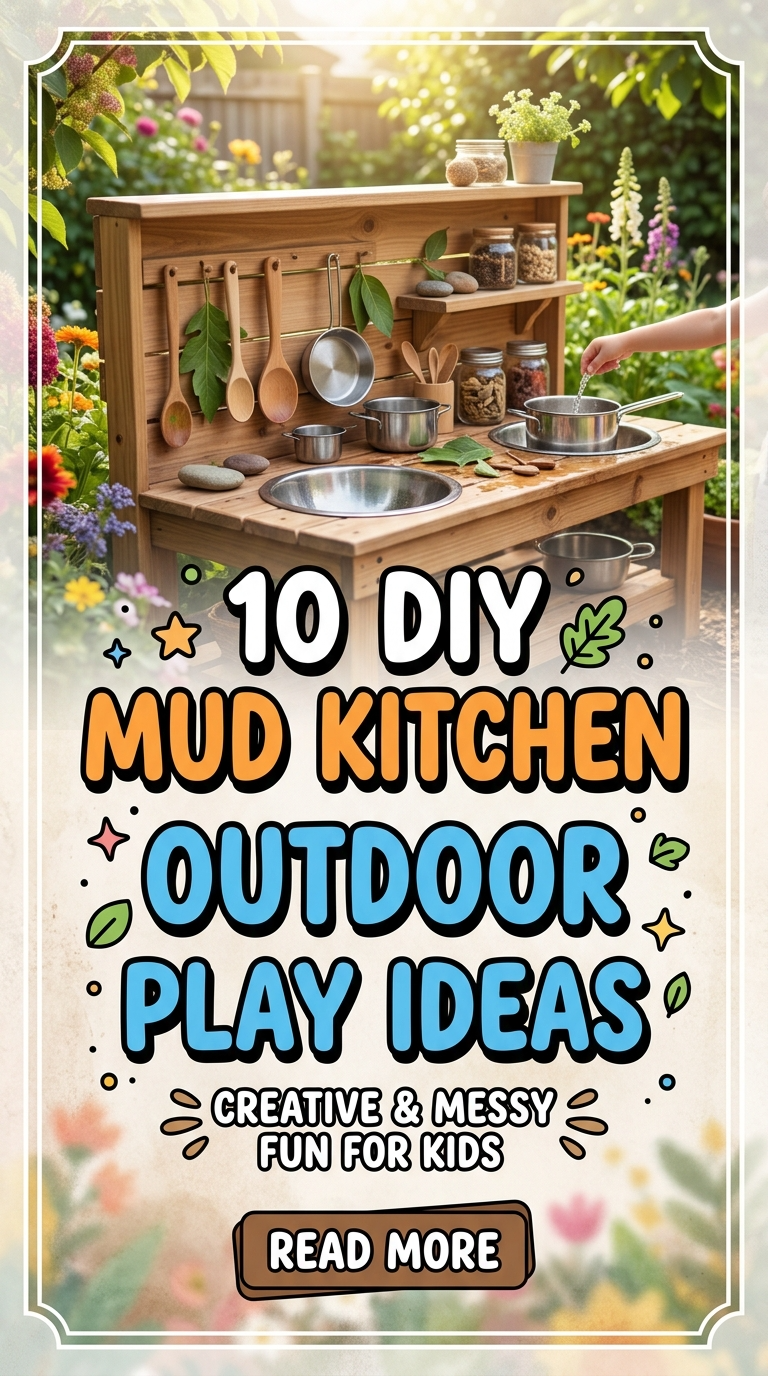
10 DIY Mud Kitchen Outdoor Play Ideas
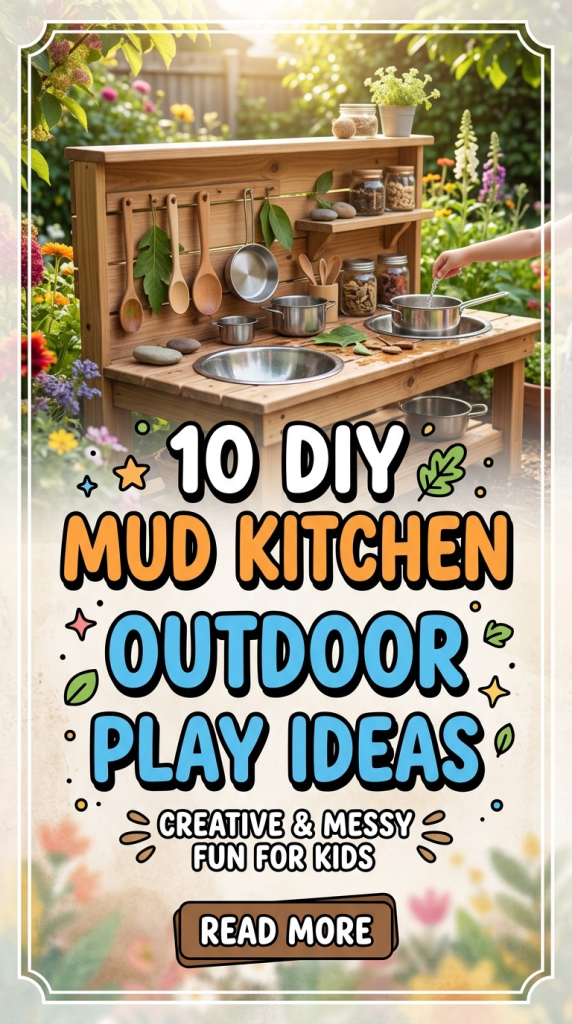
Outdoor play spaces for children continue to gain strong attention in Pinterest ideas, especially those that encourage hands-on exploration and imaginative learning. Among these, a mud kitchen has become a highly engaging concept that blends sensory play, creativity, and outdoor activity. The idea is simple: a dedicated outdoor setup where children can mix soil, water, leaves, and natural materials to simulate cooking and creative role play. This type of DIY setup supports open-ended play while also connecting children with nature in a meaningful way. In modern home decor thinking, outdoor play areas are no longer an afterthought but part of intentional planning that supports child development.
This article explores 10 detailed DIY mud kitchen outdoor play ideas designed for different spaces, budgets, and skill levels. Each idea focuses on practical construction, material selection, and real-world usability. Whether you are working with a large garden or a compact backyard, these creative ideas can be adapted easily. The goal is to provide clear, structured inspiration that helps you build a functional and aesthetically balanced outdoor mud kitchen using simple materials and beginner-friendly methods.
Why This Idea Is Trending or Useful
Mud kitchen setups have become increasingly popular in modern Pinterest inspiration due to their strong connection with sensory learning and outdoor education trends. Parents and educators are recognizing the value of unstructured play that encourages creativity, problem-solving, and independence. A DIY mud kitchen fits perfectly into this approach because it does not require complex tools or expensive materials. It relies on natural elements and basic construction, making it accessible for a wide range of households.
Another reason for its popularity is its alignment with sustainable and minimalist lifestyle preferences. Many people prefer budget ideas that reuse old furniture, wooden pallets, or recycled containers instead of buying new equipment. This approach supports environmental awareness while still creating a visually appealing and functional outdoor play area. Additionally, mud kitchens fit well into modern design trends because they can be styled in minimalist, rustic, or natural aesthetics. Their flexibility allows them to blend into home decor planning without disrupting the outdoor landscape.
Materials and Preparation
Before starting any DIY mud kitchen project, proper planning ensures both safety and functionality. The most common materials include wooden planks, pallets, old shelves, plastic containers, metal bowls, and non-toxic paints for finishing. Natural items such as stones, sand, soil, and leaves are also essential for sensory play. Tools typically include a hammer, nails or screws, sandpaper, measuring tape, and basic cutting tools for shaping wood. Depending on the design, additional items like hooks, storage bins, and small sinks or basins may be used.
Preparation begins with selecting the right outdoor space. A shaded area is preferred to ensure comfortable play conditions. The ground should be level and safe for children to move around freely. Planning the layout in advance helps determine storage placement, working surfaces, and mixing zones. It is also important to ensure durability by sanding rough edges and securing all structures firmly. Thoughtful preparation not only improves safety but also enhances the long-term usability of the mud kitchen setup.
MAIN IDEAS SECTION
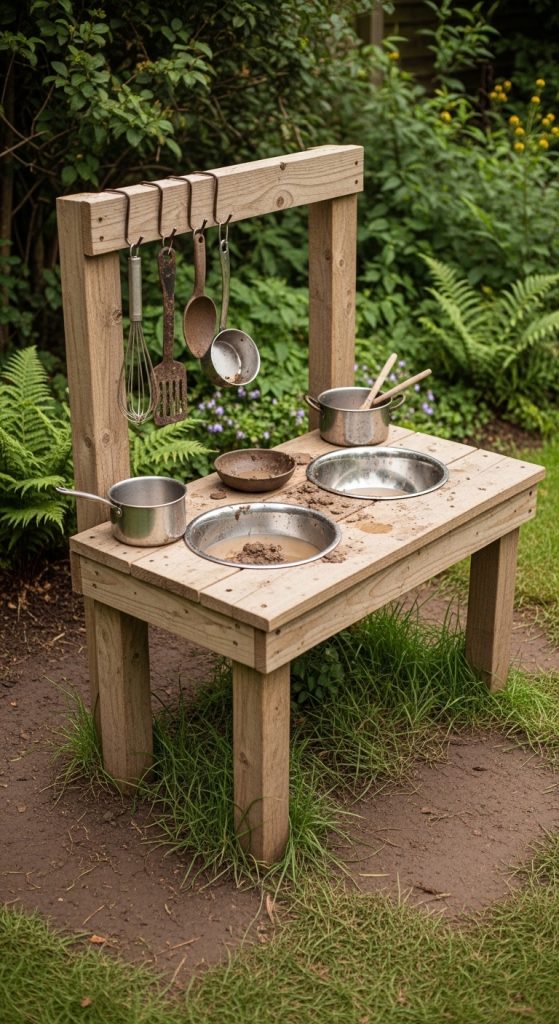
Idea 1: Rustic Wooden Mud Kitchen Station
How to Create
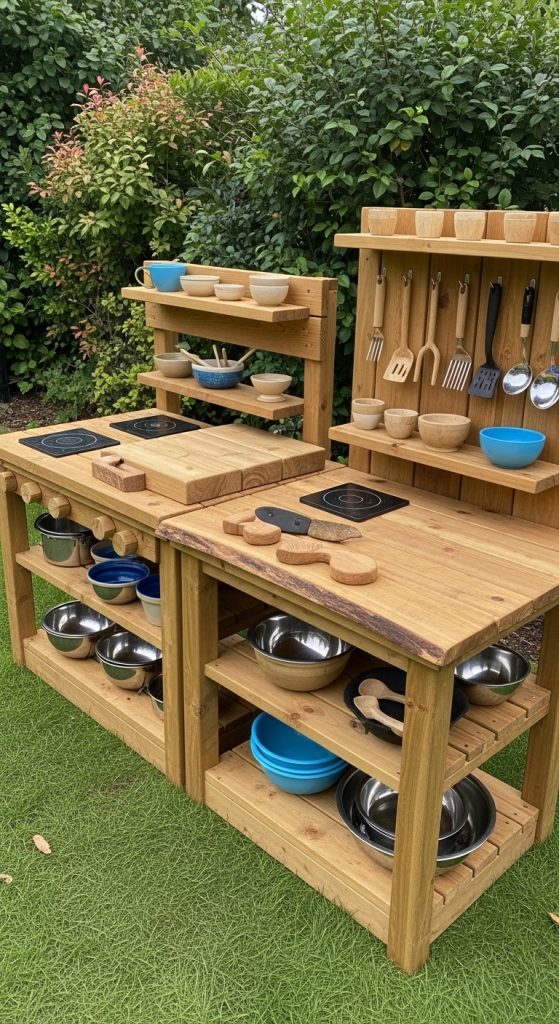
A rustic wooden mud kitchen station is one of the most timeless Pinterest ideas for outdoor play. It focuses on natural textures, earthy tones, and simple construction that blends seamlessly with garden environments. The concept revolves around using untreated or lightly finished wood to create a kitchen-like structure where children can mix, pour, and experiment with natural materials. The rustic aesthetic makes it visually appealing while maintaining a functional and durable design. This type of setup is ideal for families who prefer a minimalist style that still feels warm and inviting. It supports creative project development by encouraging children to use imagination rather than structured toys. The open design allows multiple children to play simultaneously, making it suitable for group activity. The natural wood surface also integrates well with outdoor environments, enhancing the overall aesthetic of home decor planning.
To build this structure, start with a sturdy wooden base and frame using reclaimed timber or pallets. Sand all surfaces carefully to ensure safety. Attach a flat worktop surface and add shelves underneath for storage. Metal bowls can be embedded into cut-out sections of the countertop to act as sinks or mixing areas. Hooks can be installed on the side panels for hanging utensils like ladles or cups. The entire structure should be secured firmly to avoid movement during play. Natural oils or water-based finishes can be applied for protection without losing the rustic appearance. This step-by-step method ensures a durable and beginner-friendly DIY mud kitchen suitable for long-term outdoor use.
Idea 2: Pallet Mud Kitchen with Sink Area
How to Create
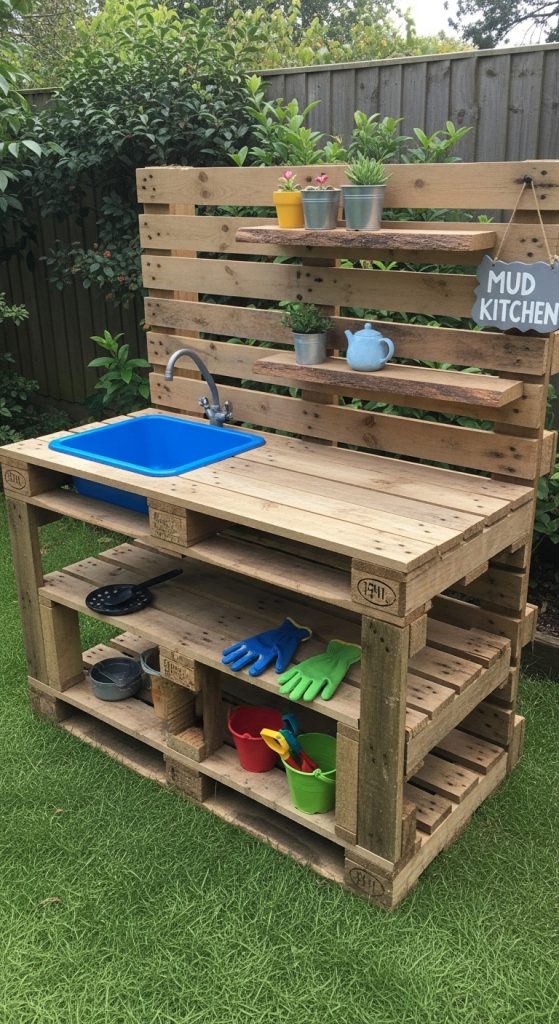
A pallet mud kitchen with a sink area is a highly practical and budget-friendly outdoor play design. It uses recycled wooden pallets as the main structural base, making it both sustainable and cost-effective. The design focuses on creating a functional cooking station where children can engage in water and mud mixing activities. The addition of a sink area enhances realism and encourages sensory exploration. This idea fits well into modern Pinterest ideas because it combines creativity, recycling, and educational play in one structure. The pallet design also allows flexibility in size and layout, making it suitable for different garden spaces. Its rough wooden texture contributes to a natural aesthetic that blends well with outdoor environments. This setup is particularly useful for encouraging group play and cooperative learning.
To construct this mud kitchen, begin by selecting strong, intact pallets and cleaning them thoroughly. Arrange two pallets vertically to form the back panel and one or two pallets horizontally for the base and counter surface. Secure them using screws for stability. Cut a circular or rectangular opening in the countertop to fit a plastic basin or metal bowl that will act as a sink. Ensure the sink is removable for easy cleaning. Add additional shelves or compartments using leftover pallet wood for storage of natural materials and tools. Sand all surfaces to prevent splinters and apply a protective sealant if needed. This step-by-step process results in a durable, beginner friendly DIY mud kitchen that supports creative outdoor learning.
Idea 3: Compact Corner Mud Kitchen for Small Gardens
How to Create
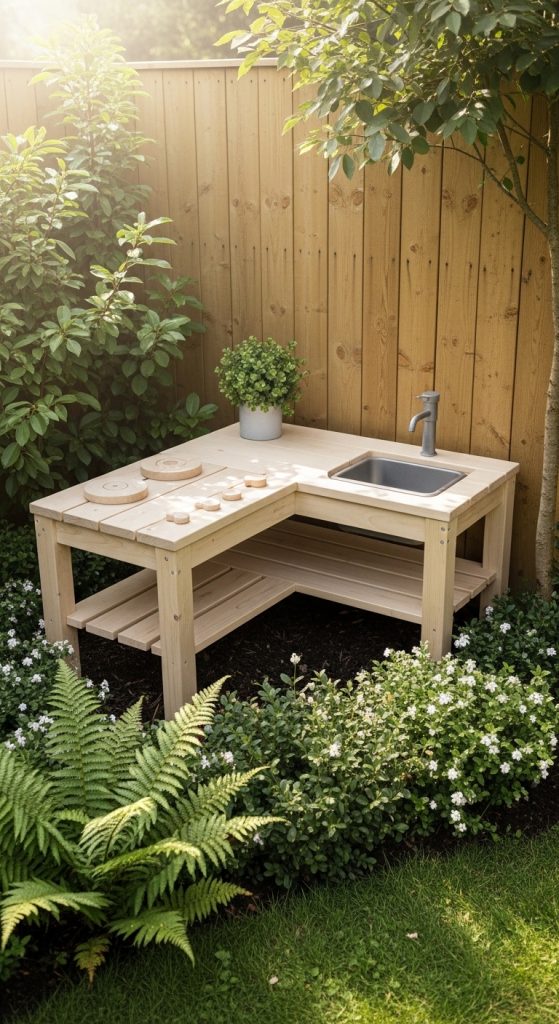
A compact corner mud kitchen is designed specifically for small outdoor spaces where maximizing efficiency is essential. This idea transforms unused garden corners into functional play zones without overwhelming the space. The design focuses on vertical and L-shaped structures that fit neatly into corners while still offering full creative functionality. It is one of the most practical Pinterest ideas for urban homes or limited backyard areas. The compact layout ensures that children still have access to essential play features such as mixing areas, storage shelves, and water play stations. Despite its smaller size, it maintains strong engagement value and supports imaginative play. The minimalist structure also aligns with modern design preferences, making it visually clean and organized.
To build this setup, measure the corner space and create a triangular or L-shaped wooden frame. Use lightweight wood to ensure easy installation. Attach a countertop surface at child height and include small shelves above or below for storage. A compact basin can be installed for water play, and small hooks can be added for utensils. The design should prioritize accessibility and safety while maintaining durability. Secure all joints properly and sand edges for smooth finishing. This step-by-step method ensures a functional DIY mud kitchen that works perfectly in small spaces while still offering full creative potential.
Idea 4: Portable Mud Kitchen Trolley
How to Create
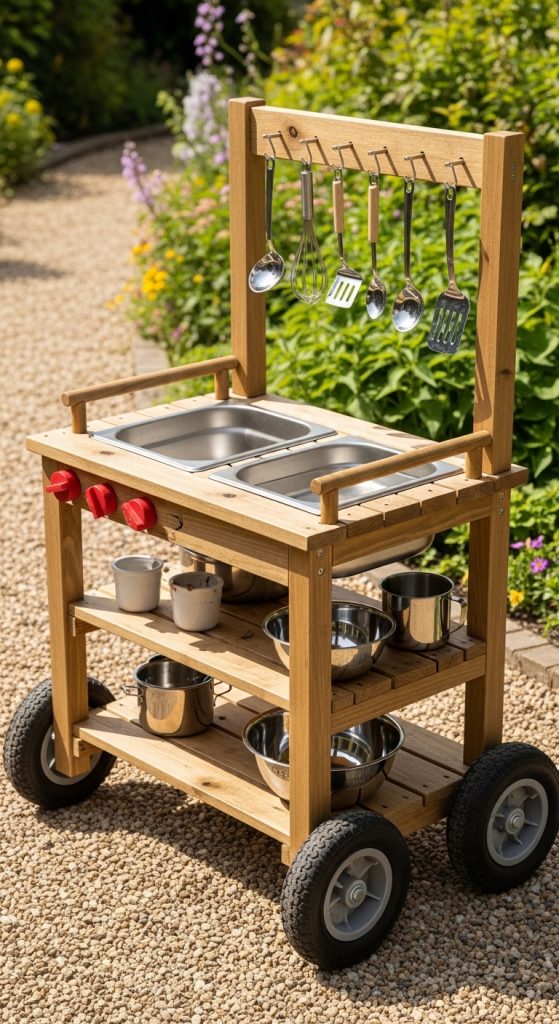
A portable mud kitchen trolley is a flexible and mobile solution for outdoor play. It allows children to move their play station to different areas of the garden or patio, making it highly adaptable. This design is ideal for families who prefer temporary setups or limited permanent outdoor structures. The trolley style aligns with modern creative project trends that emphasize mobility and multifunctional use. It also encourages independent play since children can reposition their setup based on their activity. The compact and movable design fits well into minimalist style preferences while still offering a full sensory play experience.
To create this trolley, start with a sturdy wheeled base such as a repurposed cart or custom wooden frame with caster wheels. Build a small countertop surface on top using lightweight wood. Add side rails to prevent items from falling during movement. Include small containers or trays for mud, water, and natural materials. Hooks can be attached for hanging tools, and lower shelves can store additional items. Ensure that wheels are locked for safety during play. The structure should be balanced to prevent tipping. This step-by-step approach creates a functional and easy-to-move DIY mud kitchen suitable for dynamic outdoor environments.
Idea 5: Recycled Container Cooking Station
How to Create
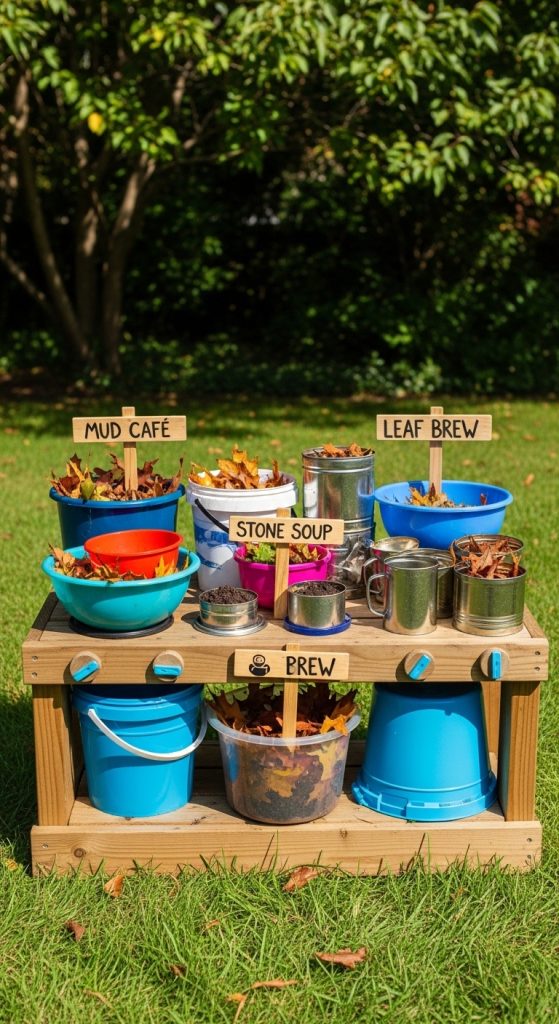
A recycled container cooking station focuses on sustainability by using everyday household items to build a functional outdoor play area. This concept emphasizes reuse and creativity, making it one of the most eco-friendly Pinterest ideas. Containers such as buckets, bowls, plastic tubs, and metal tins are repurposed as cooking tools and storage units. The design encourages children to explore textures, mixing, and pouring activities using readily available materials. It is highly budget-friendly and supports environmental awareness through hands-on learning.
To construct this setup, begin by selecting a base surface such as an old table or wooden board. Arrange recycled containers in designated sections for mixing, storing, and water play. Secure some containers into the surface using cut-outs or brackets to keep them stable. Add labeled sections for different materials like soil, water, and leaves. Ensure all containers are safe, clean, and free from sharp edges. The structure can remain flexible and rearranged as needed. This simple step-by-step process results in an adaptable DIY mud kitchen that promotes sustainability and creative exploration.
Idea 6: Multi-Level Mud Kitchen with Storage Shelves
How to Create
A multi-level mud kitchen introduces vertical structure to enhance functionality and organization. It is designed with multiple working surfaces at different heights, allowing children to engage in various types of play simultaneously. This setup is ideal for encouraging structured creativity while maintaining open-ended exploration. The inclusion of storage shelves helps keep materials organized, making it easier for repeated use. It fits well into modern home decor planning by combining functionality with aesthetic layering.
To build this structure, create a sturdy wooden frame with at least two levels of countertops. Reinforce each level with support beams for stability. Add shelves between or beneath the surfaces for storing tools and natural materials. Install bowls or basins at different levels for varied sensory activities. Ensure the structure is securely anchored to prevent movement. Sand and finish all edges for safety. This step-by-step construction results in a structured DIY mud kitchen that supports organized and engaging outdoor play.
Idea 7: Nature-Based Mud Kitchen with Natural Materials
How to Create
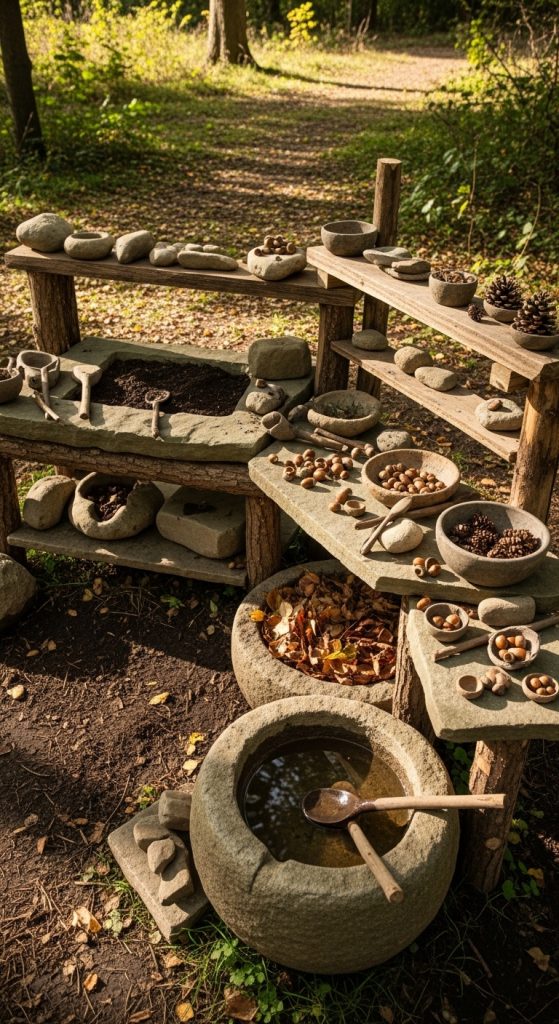
A nature-based mud kitchen focuses entirely on natural surroundings and materials. Instead of relying on manufactured items, it incorporates stones, logs, leaves, and soil as core elements. This design strengthens the connection between children and the environment while encouraging imaginative exploration. It is one of the most authentic Pinterest ideas for outdoor learning spaces. The natural setup blends seamlessly into garden landscapes and supports sensory development through direct interaction with nature.
To create this setup, select a shaded outdoor area and arrange natural materials into functional zones. Use flat stones as countertops and wooden logs as seating or work surfaces. Create designated areas for soil, water, and plant materials. Ensure all elements are safe and stable. The design requires minimal construction but strong planning for layout balance. This step-by-step approach results in an immersive DIY mud kitchen that promotes natural exploration.
Idea 8: Chalkboard Interactive Mud Kitchen
How to Create
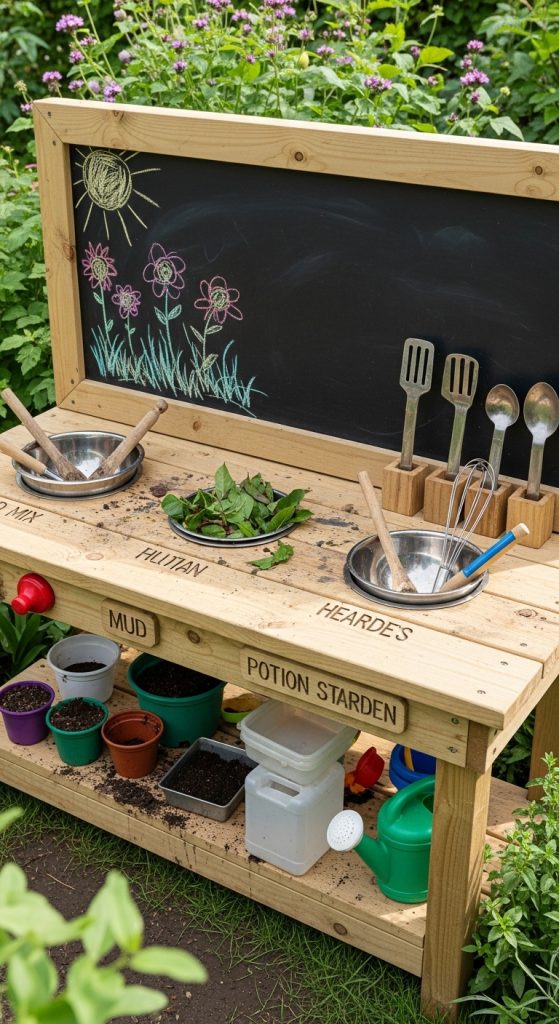
A chalkboard interactive mud kitchen integrates creative drawing and learning into outdoor play. It combines traditional mud kitchen elements with a writable surface where children can sketch menus, recipes, or designs. This enhances imaginative role play and adds an educational layer to the setup. It fits well into modern creative ideas that combine learning and play in one environment.
To build this design, attach a chalkboard panel to the back wall of a wooden mud kitchen frame. Ensure it is weather-resistant and positioned at child height. Combine it with a countertop, storage shelves, and mixing bowls. Add chalk holders and erasers for convenience. Secure all components firmly for outdoor durability. This step-by-step setup creates an interactive DIY mud kitchen that enhances creativity.
Idea 9: Sensory Water and Mud Mixing Station
How to Create
A sensory water and mud mixing station focuses on tactile exploration. It is designed to encourage children to experiment with textures, temperatures, and consistencies. This setup supports sensory development and creative learning. It is especially useful for younger children and beginner friendly outdoor setups.
To build this station, install multiple basins at different heights for water, mud, and mixed materials. Use a stable wooden frame and ensure each basin is removable for cleaning. Add scooping tools and containers for transferring materials. Secure the structure to ensure safety during use. This step-by-step method creates a highly engaging DIY mud kitchen focused on sensory development.

Idea 10: Minimalist Modern Outdoor Mud Kitchen
How to Create
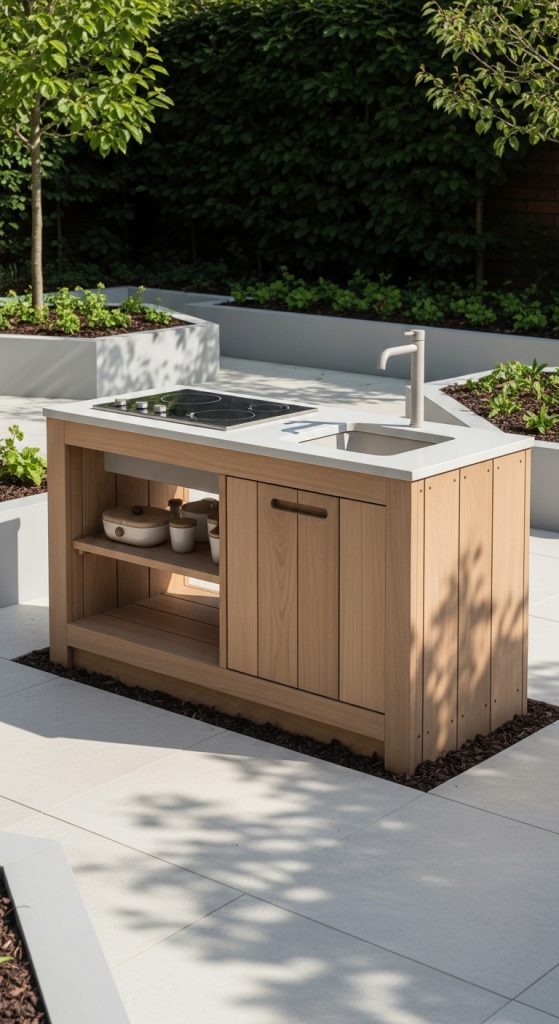
A minimalist modern mud kitchen emphasizes clean lines, simple structure, and neutral tones. It removes unnecessary decoration and focuses on functionality. This design fits well into modern design preferences and minimalist style outdoor spaces. It creates a calm and organized play environment while still supporting creativity.
To build this structure, use smooth wooden panels and a simple rectangular frame. Include a single countertop, a sink bowl, and limited storage compartments. Keep the layout open and uncluttered. Secure all components and apply a light protective finish. This step-by-step approach results in a refined DIY mud kitchen suitable for modern outdoor spaces.
Common Beginner Mistakes and How to Avoid Them
One common mistake in DIY mud kitchen projects is neglecting structural stability. Many beginners focus on design but overlook secure assembly, leading to unsafe play conditions. Another mistake is using untreated materials without sanding, which can create splinters and hazards. Poor planning of space layout can also reduce functionality. Avoiding these mistakes requires careful preparation, proper measurement, and attention to safety details.
Practical Tips for Better Results
Using weather-resistant finishes helps extend the lifespan of outdoor structures. Organizing materials into labeled sections improves usability and encourages children to maintain order. Choosing a shaded location enhances comfort during play. Incorporating adjustable elements allows the mud kitchen to grow with the child’s needs. These practical improvements ensure a more effective and long-lasting DIY setup.
Styling, Presentation, or Organization Ideas
A well-styled mud kitchen enhances both functionality and visual appeal. Using natural tones creates a cohesive outdoor look. Arranging materials in open shelves improves accessibility and encourages independence. Adding simple decorative elements like wooden signs or labeled containers improves organization. Keeping the design aligned with minimalist style ensures a clean and modern appearance.
Budget or Time Planning
Most DIY mud kitchen projects can be completed within a weekend depending on complexity. Recycled materials significantly reduce costs while maintaining quality. Planning ahead helps avoid unnecessary delays and material waste. Simple designs require less time, while multi-level structures may take longer due to assembly and reinforcement. Efficient preparation ensures smoother execution.
Creative Expansion and Advanced Inspiration
Advanced mud kitchen ideas include integrating garden beds, rainwater collection systems, or themed play zones. Expanding storage capacity or adding movable components increases versatility. Combining sensory zones with educational elements enhances learning value. These creative expansions transform a simple DIY mud kitchen into a complete outdoor learning environment suitable for long-term use.