10 Bird Bath Ideas DIY
Bird bath decoration has become an essential part of modern garden styling, especially within Pinterest ideas focused on outdoor home decor and natural aesthetic design. A bird bath is both a functional water source for birds and a visual centerpiece that can elevate the entire garden atmosphere. With simple DIY techniques, it is possible to transform an ordinary bird bath into a structured and visually appealing feature that aligns with modern design, minimalist style, and creative outdoor planning. This article presents ten practical and beginner friendly bird bath ideas DIY, designed to guide readers through clear step by step methods and realistic material use. Each concept focuses on accessibility, meaning no advanced skills are required, only basic materials and structured planning. Readers will learn how to create aesthetic, durable, and functional bird bath designs that blend seamlessly into garden environments. The goal is to provide practical inspiration that improves both visual appeal and outdoor organization through creative project execution.
Why This Idea Is Trending or Useful
DIY bird bath ideas have gained strong attention in Pinterest inspiration due to the growing interest in natural outdoor living and handmade decoration. People are increasingly looking for easy project solutions that improve home decor without requiring expensive materials or complex tools. Bird bath styling fits this trend because it combines functionality with aesthetic value, making it suitable for both small gardens and large outdoor spaces. These designs also support sustainable decoration practices by encouraging the use of natural materials such as stones, wood, and plants. The appeal lies in their adaptability, allowing users to match different themes including modern design, rustic garden styles, or minimalist outdoor setups. Another reason for their popularity is the beginner friendly nature of the projects, which makes them accessible to anyone interested in DIY tutorial content. This combination of creativity, practicality, and affordability has made bird bath decoration a consistent trend in creative ideas for outdoor organization and seasonal garden enhancement.
Materials and Preparation
Proper preparation is essential before starting any bird bath DIY project to ensure durability and aesthetic balance. Common materials include smooth stones, mosaic tiles, waterproof adhesive, outdoor sealant, ceramic paint, natural shells, wood pieces, and decorative glass elements. These materials support different styles ranging from modern design to rustic and natural themes. Basic tools required include brushes, gloves, sponge applicators, cleaning cloths, and cutting tools for shaping decorative pieces if needed. The preparation process begins with thoroughly cleaning the bird bath surface to remove dust, algae, and residue, as this ensures better adhesion and longer lasting results. It is also important to check the structural stability of the bird bath before applying any decoration. Planning the design layout in advance helps maintain balance and prevents overcrowding. Sketching the pattern or visual concept allows better control during execution. Organizing materials beforehand ensures a smooth workflow and reduces interruptions during the DIY process, making the entire project more efficient and structured.
Idea 1: Mosaic Stone Circular Harmony
How to Create
Mosaic stone decoration transforms a simple bird bath into a structured artistic feature by arranging small stones or tiles into circular or radial patterns. This concept is widely used in Pinterest ideas because it combines durability with visual detail. The design creates a textured surface that reflects natural light and enhances outdoor aesthetic appeal. It fits well into both modern design and traditional garden settings. The circular arrangement is especially effective for pedestal bird baths, as it follows the natural shape and enhances symmetry. This style supports creative project development by allowing variations in color, pattern, and spacing. It is beginner friendly because it does not require advanced artistic skills, only careful placement and planning. The final appearance adds depth and structure to garden decor while maintaining functionality for birds.
To create this design, begin by cleaning the surface thoroughly and allowing it to dry completely. Apply waterproof adhesive in small sections to maintain control during placement. Arrange mosaic stones or tiles gradually in a planned circular pattern, ensuring consistent spacing for visual balance. Continue layering until the entire surface is covered. Once complete, allow the adhesive to set fully before applying grout or sealant to secure the pieces. Smooth excess material carefully for a clean finish. After drying, apply a protective coating to enhance durability. This step by step tutorial ensures a stable and long lasting decorative surface suitable for outdoor use.

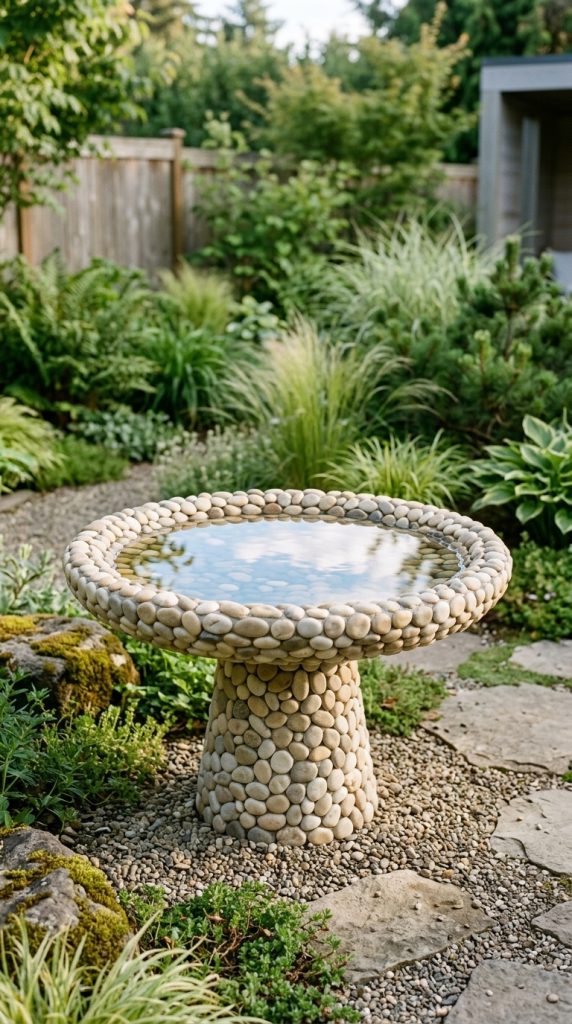
Idea 2: Natural Pebble Minimal Surface
How to Create
A natural pebble design focuses on simplicity and organic texture, creating a calm and balanced bird bath surface. This concept aligns with minimalist style and modern design principles that emphasize natural materials and subtle beauty. The use of uniform or mixed neutral pebbles produces a soft visual effect that blends easily with garden environments. It is often featured in Pinterest inspiration due to its clean appearance and low maintenance requirements. This design works well for users seeking easy project solutions that do not require complex tools or artistic skills. The natural variation of stones adds texture without overwhelming the structure, making it suitable for small or large outdoor spaces.
To create this design, select smooth pebbles and clean both the bird bath and materials. Apply waterproof adhesive evenly in small sections and press each pebble firmly into place. Maintain either tight spacing for full coverage or slight gaps for a more natural look. Continue working gradually across the surface to ensure alignment. Once finished, allow the adhesive to dry completely before sealing with an outdoor protective layer. This step by step process ensures durability and resistance to weather conditions while maintaining aesthetic simplicity.
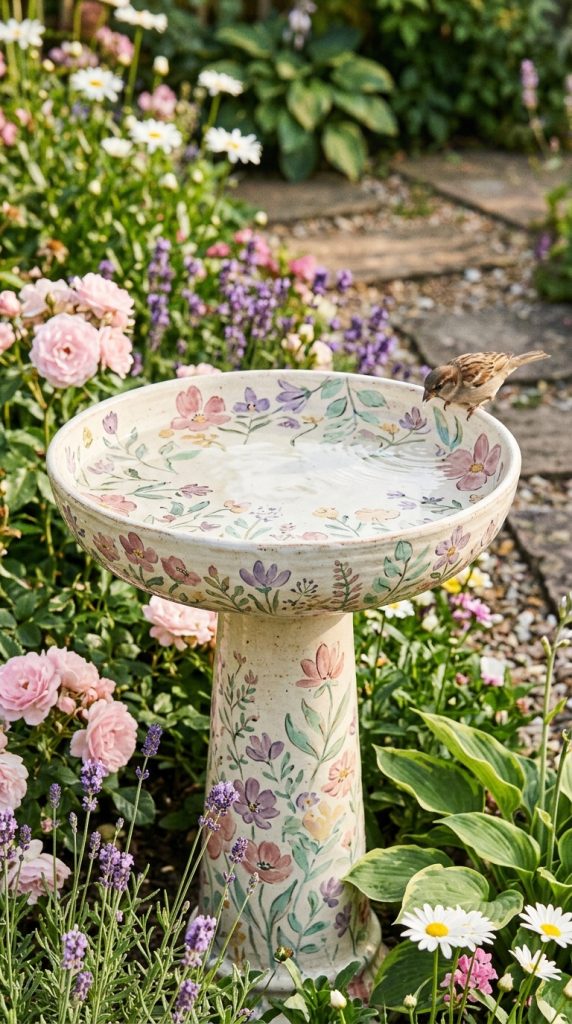
Idea 3: Hand Painted Floral Garden Art
How to Create
Hand painted floral decoration transforms a bird bath into an artistic surface that reflects natural inspiration and creative expression. This design is commonly seen in Pinterest ideas due to its handmade aesthetic and flexibility in design choices. Floral patterns such as leaves, petals, and botanical shapes bring color and life into outdoor spaces. This concept supports DIY culture by allowing full customization based on skill level and preference. It fits well into home decor themes that emphasize personalization and artistic detail. The painted surface creates a soft and elegant visual effect that enhances garden ambiance without requiring structural changes.
To create this design, begin by cleaning and priming the bird bath surface for better paint adhesion. Lightly sketch floral patterns using a pencil for guidance. Apply base colors first and gradually add details using fine brushes. Allow each layer to dry before applying additional elements to avoid smudging. Once the design is complete, apply a waterproof sealant to protect the artwork from weather exposure. This step by step tutorial ensures durability and long lasting color quality while maintaining a handcrafted appearance.
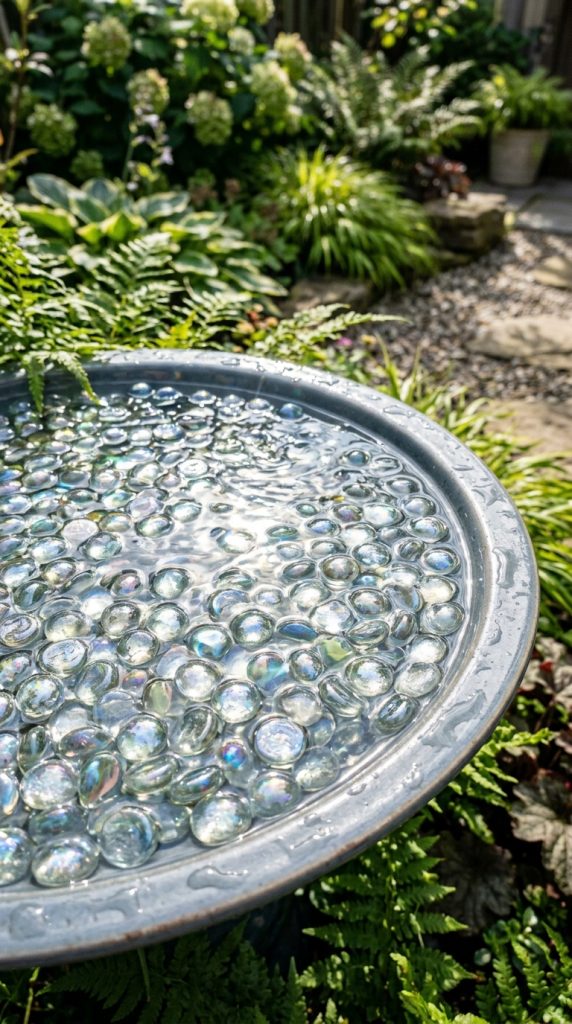
Idea 4: Glass Bead Reflective Surface Design
How to Create
Glass bead decoration introduces a reflective and light enhancing surface that changes appearance depending on sunlight. This design is popular in creative ideas for outdoor decor because it adds subtle sparkle and modern visual depth. The transparent and semi transparent beads create a shimmering effect that enhances water reflection. This concept fits well with minimalist style gardens that rely on light interaction rather than heavy decoration. It is beginner friendly and requires only simple materials and careful placement.
To create this design, apply waterproof adhesive to the surface in sections and place glass beads evenly across the area. Maintain consistent spacing to ensure balanced reflection. Once the surface is fully covered, allow it to dry completely before applying a clear protective sealant. This ensures durability and stability in outdoor conditions. The step by step process results in a visually dynamic surface that enhances garden lighting naturally.
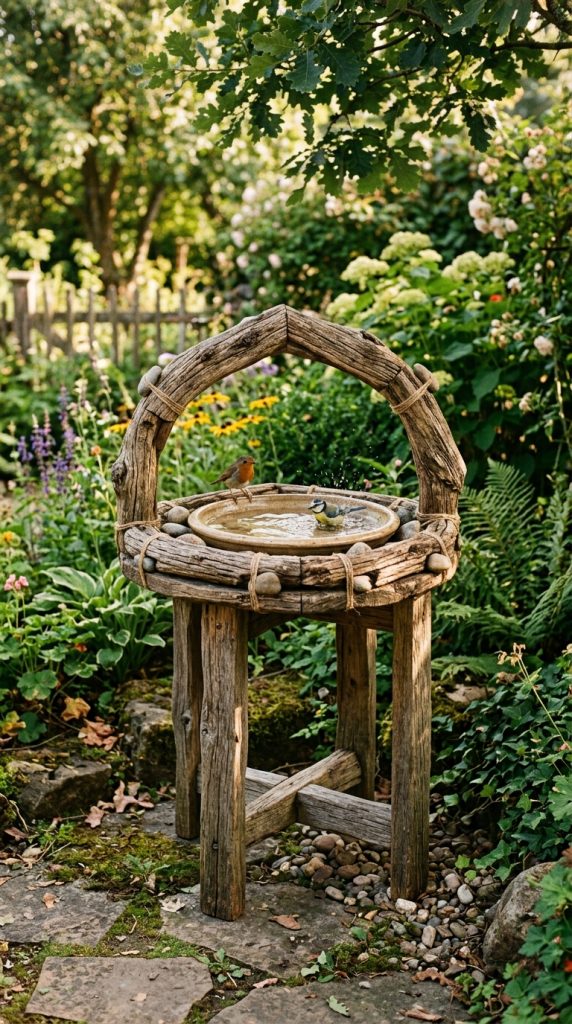
Idea 5: Rustic Wood Frame Integration
How to Create
A rustic wood frame design adds warmth and structure to a bird bath by surrounding it with natural wood elements. This concept aligns with rustic garden decor and natural outdoor aesthetics. The wooden texture contrasts with stone or ceramic surfaces, creating visual balance. It is often used in DIY tutorial projects because it requires simple construction techniques and basic materials. This design enhances home decor by introducing organic materials that blend naturally with outdoor environments.
To create this design, measure the bird bath rim and cut treated wood pieces accordingly. Attach them securely around the structure using waterproof adhesive or fasteners. Ensure even alignment for a symmetrical appearance. Once installed, apply a protective outdoor coating to prevent moisture damage. Allow the structure to set fully before use. This step by step method ensures durability and a clean rustic finish suitable for garden decoration.
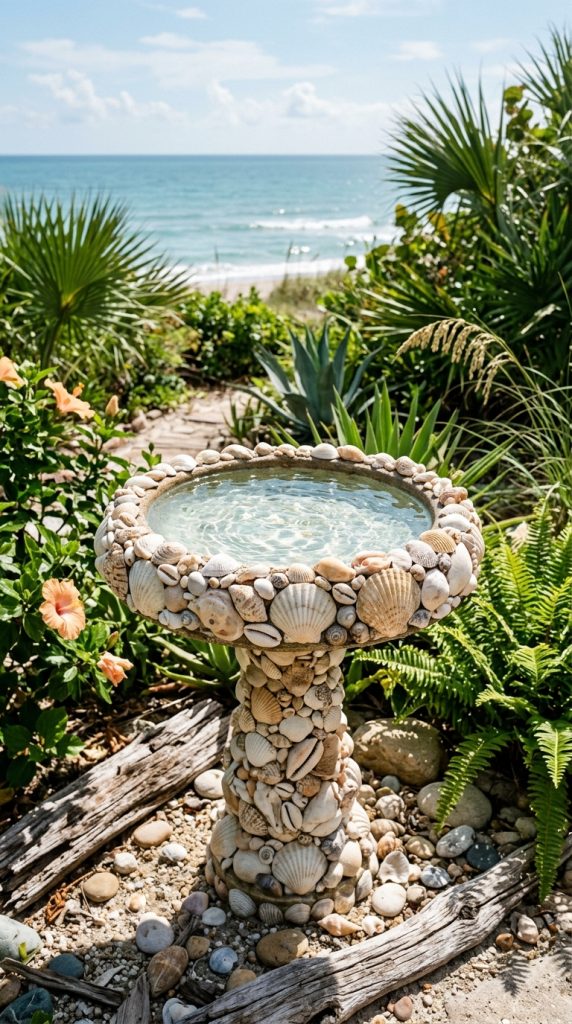
Idea 6: Coastal Shell Arrangement Style
How to Create
Shell decoration introduces a coastal theme using natural shells arranged across the bird bath surface. This design reflects beach inspired aesthetics and soft natural tones. It is widely featured in Pinterest inspiration due to its relaxing and organic visual appeal. The shells create texture and variation while maintaining a light decorative style. This concept works well for seasonal decoration and outdoor creative project ideas.
To create this design, clean the surface and select shells of different sizes. Apply adhesive in sections and place shells in a balanced pattern or scattered layout. Maintain spacing to avoid overcrowding. Once complete, allow drying time before sealing the surface. This ensures durability and weather resistance while preserving the decorative effect.
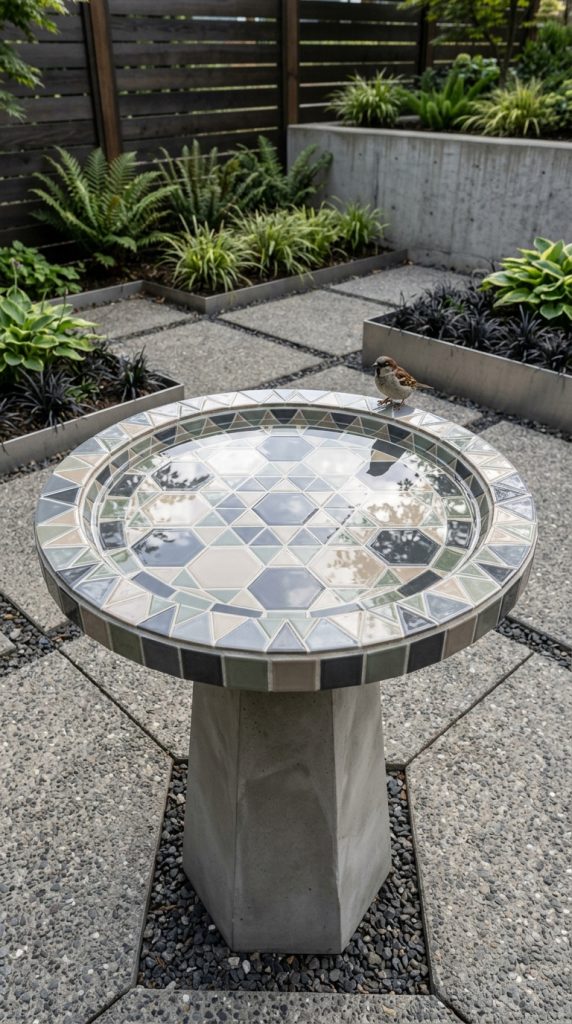
Idea 7: Geometric Tile Precision Layout
How to Create
Geometric tile design focuses on structured patterns such as squares, triangles, or hexagons arranged in symmetrical layouts. This concept aligns with modern design principles and organized visual structure. It is commonly used in Pinterest ideas for its clean and precise appearance. The design enhances garden decor by introducing architectural balance and controlled aesthetics.
To create this design, plan a geometric layout before starting. Apply adhesive evenly and place tiles according to the pattern. Maintain consistent spacing for accuracy. Once complete, allow drying before sealing with grout or protective coating. This step by step method ensures a polished and structured finish.
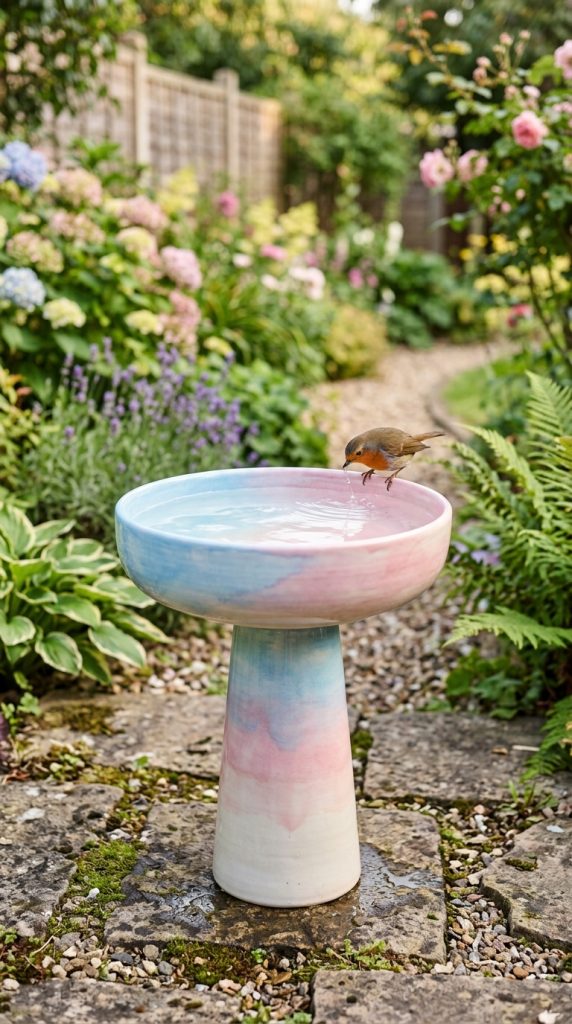
Idea 8: Gradient Color Painted Effect
How to Create
Gradient painting introduces smooth color transitions across the bird bath surface, creating a soft and artistic visual flow. This design supports modern aesthetic trends and handmade creative project styles. It allows blending of multiple tones for a dynamic yet balanced appearance.
To create this design, apply a base coat and divide the surface into color zones. Blend colors using a sponge or brush while still wet. Work gradually for smooth transitions. Once dry, apply protective sealant. This ensures durability and maintains color quality.
Idea 9: Herb Plant Integrated Base
How to Create
This design integrates small herb plants around the bird bath base, combining decoration with natural greenery. It supports eco friendly garden organization and enhances outdoor freshness. The living elements create a functional and aesthetic balance.
To create this setup, install small planting sections around the base and add soil. Plant herbs suitable for outdoor growth and maintain spacing. Water regularly while keeping the bird bath accessible. This method blends nature and design effectively.

Idea 10: Floating Floral Water Display
How to Create
Floating floral decoration uses fresh flowers placed on water to create seasonal beauty. This design is simple, natural, and widely featured in Pinterest inspiration due to its visual softness. It changes easily with seasons and requires minimal effort.
To create this effect, fill the bird bath with clean water and place lightweight flowers on the surface. Replace regularly to maintain freshness. This step by step method provides an instant decorative enhancement.

Common Beginner Mistakes and How to Avoid Them
Common mistakes include using non-waterproof materials, skipping surface cleaning, and overcrowding decorative elements. These issues reduce durability and visual balance. Proper preparation, material selection, and controlled application prevent these problems and improve long term results.
Practical Tips for Better Results
Using weather resistant materials, applying adhesive in small sections, and allowing proper drying time improves durability. Maintaining balance in design ensures better visual harmony. Careful planning before execution enhances efficiency and reduces errors.
Styling, Presentation, or Organization Ideas
Bird bath styling should complement surrounding garden elements. Positioning near plants or pathways improves visual integration. Using consistent color themes enhances organization. Subtle lighting can highlight decorative details and improve evening aesthetics.
Budget or Time Planning
Most bird bath DIY projects require low budget materials and can be completed within a few hours to a day. Proper planning reduces delays and ensures efficient workflow. Using natural or recycled materials further minimizes cost while maintaining quality.
Creative Expansion and Advanced Inspiration
Advanced designs can include mixed materials, layered mosaics, or seasonal decoration changes. Adding lighting elements or combining multiple styles enhances visual depth. Experimenting with asymmetry and thematic concepts expands creative possibilities while maintaining functionality.