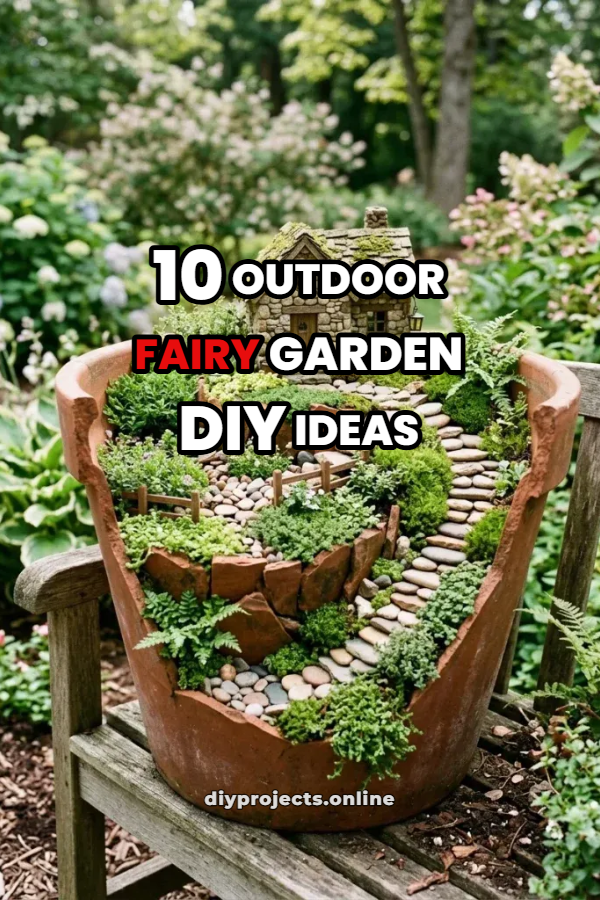
10 Outdoor Fairy Garden DIY Ideas
Creating a miniature enchanted landscape in your backyard is a delightful way to blend gardening with artistic imagination. Outdoor fairy gardens have captured the attention of homeowners looking to add a touch of whimsy to their landscapes, patios, or flowerbeds. This comprehensive guide explores ten unique, actionable concepts that allow anyone to design and construct a miniature magical world from scratch. Readers will learn how to select the right vessels, arrange tiny structures, cultivate appropriate small-scale plants, and incorporate natural elements to build cohesive scenes. This DIY project serves as an excellent creative outlet for individuals seeking to enhance their outdoor home decor with personalized, handmade touches. By understanding the core principles of miniature landscaping, such as scale, proportion, and moisture retention, you can establish an enduring outdoor feature that thrives through the seasons. Whether you possess an expansive suburban garden or a compact urban balcony, these miniature setups offer an accessible entry point into creative landscaping. The upcoming sections provide a detailed tutorial and practical inspiration to help you plan, assemble, and maintain your miniature outdoor display successfully.
The Growing Appeal of Miniature Garden Landscapes
Micro-gardening and whimsical outdoor decor have become immensely popular on visual discovery platforms because they offer high visual impact without requiring extensive acreage. These small-scale projects appeal to modern design sensibilities because they combine natural greenery with structural storytelling, making them highly shareable trending ideas. From a practical standpoint, miniature landscaping allows beginners to experiment with plant care, soil composition, and hardscaping techniques on a manageable scale. This accessibility makes it a highly rewarding beginner friendly activity that requires no previous carpentry or advanced horticultural experience. Additionally, the project relies heavily on repurposing everyday objects, natural items found in the yard, and budget ideas, which aligns perfectly with sustainable, eco-friendly DIY trends. The flexibility of these projects means they can adapt to any aesthetic, ranging from a rustic woodland theme to a sleek minimalist style, depending on the chosen materials. By focusing on small, controlled environments, enthusiasts can easily manage soil quality, moisture levels, and weed control, resulting in a low-maintenance yet highly captivating garden feature.
Essential Materials and Initial Layout Planning
Thorough preparation ensures the longevity and structural integrity of your outdoor miniature landscape. Before assembling your display, gather necessary materials including weather-resistant containers, well-draining potting soil, charcoal for filtration, and a variety of small stones or gravel for drainage and pathways. Select slow-growing, hardy plants such as succulents, mosses, miniature ferns, and dwarf conifers that can withstand local outdoor weather conditions. Tools for this project are simple and accessible, requiring only a small hand trowel, a spray mister bottle, pruning shears, and precise tweezers for positioning delicate components. The planning phase involves choosing a shady or partially sunny outdoor location that protects the delicate miniature items from severe wind and torrential rain. Consider the scale of your structures relative to the plants; maintaining a consistent ratio, such as one inch to one foot, creates a realistic and immersive visual environment. Clean all chosen containers thoroughly and drill adequate drainage holes in the bottom to prevent water logging, which can damage plant roots and destabilize your miniature structures over time.
Idea 1: Broken Ceramic Pot Wonderland
How to Create
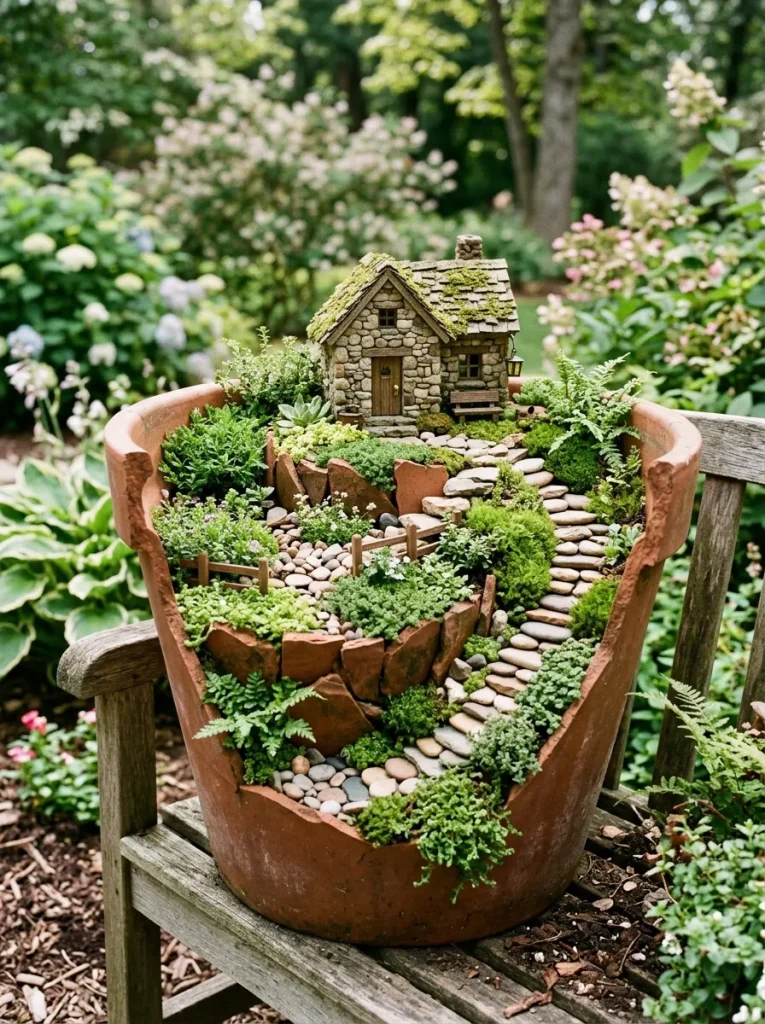
This design utilizes damaged or cracked terracotta planters to create a multi-tiered, cascading hillside landscape that maximizes vertical space. The concept transforms broken pottery into a structured, terraced mountain where tiny steps lead up to a focal dwelling at the summit. By utilizing the shards of the broken pot as retaining walls, you can build distinct layers of soil, allowing for varied plant placement and dynamic depth. This method is ideal for showcasing mosses and small succulents that thrive in well-drained, elevated positions. The aesthetic relies on the contrast between the rugged, weathered clay and the soft, vibrant green foliage that fills the crevices.
To construct this layered display, start with a large terracotta pot that has a significant broken section out of one side. Place a layer of gravel at the base for drainage, then position the largest broken shard vertically inside the pot to act as a retaining wall for the first elevated terrace. Fill the base layer with potting soil, packing it firmly behind the shard to secure it in place. Repeat this process with smaller shards, creating a winding staircase or a series of stepped platforms leading toward the top of the pot. Plant small creeping sedums or Irish moss along the edges of the shards to mimic alpine vegetation and stabilize the soil structure. Position a miniature stone cottage at the highest point, and lay tiny flat pebbles along the terraces to form a cohesive, winding pathway.
Idea 2: Hollow Tree Stump Enchantment
How to Create
Integrating a miniature landscape directly into a natural yard feature like an old tree stump creates a seamless blend between your yard and the display. This concept utilizes the organic textures, hollows, and bark of decaying wood to form a rustic, weather-worn dwelling that looks entirely native to the environment. The deep crevices within the stump provide excellent pockets for soil, while the surrounding root structure offers a dramatic foundation for external pathways and outer courtyards. This approach embraces a naturalistic woodland theme, focusing heavily on shade-loving plants, delicate lichens, and damp-loving mosses that naturally complement wood surfaces.
Begin by clearing out any loose, rotting debris from the center hollow or natural crevices of the stump to create clean cavities for planting. Line these hollows with a thin layer of landscape fabric to prevent soil from washing through deep internal cracks while still allowing excess water to drain away. Fill the prepared cavities with a rich, organic potting mix suitable for woodland plants like miniature ferns and baby’s tears. Fix a small, handmade wooden door directly onto the base of the stump using exterior wood glue or small pins to establish the entry point of the dwelling. Arrange a small pebble path extending outward from the door, winding around the natural contours of the tree roots, and place tiny twig benches nearby to complete the scene.

Idea 3: Vintage Wheelbarrow Village
How to Create
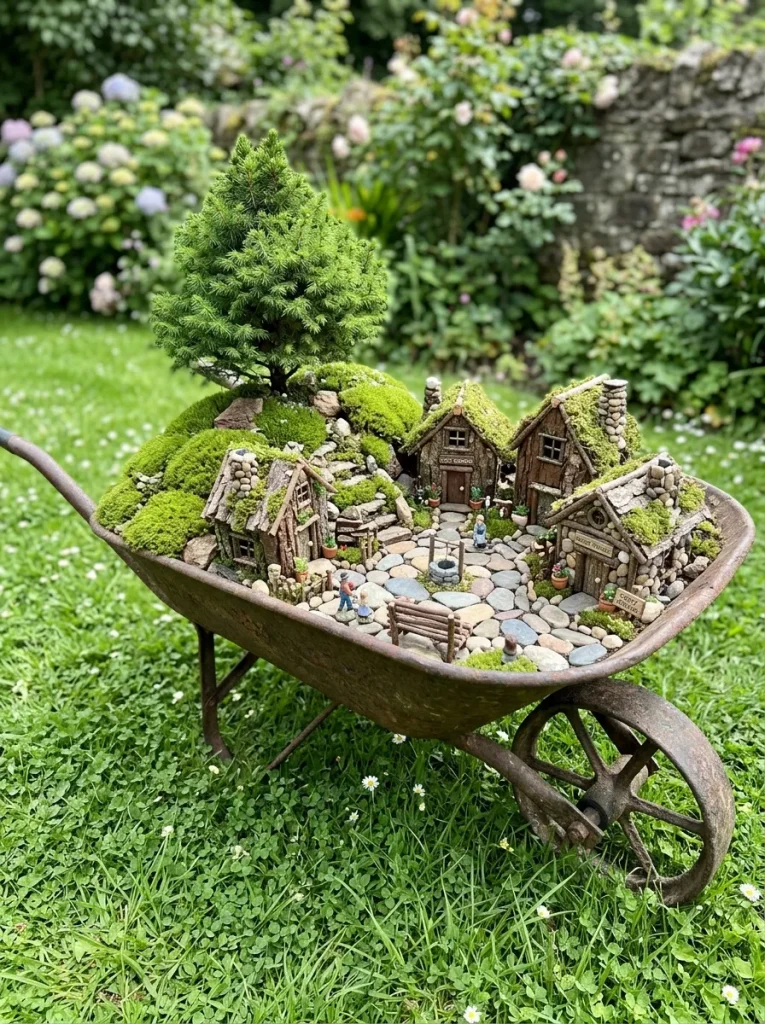
A vintage metal or wooden wheelbarrow provides an elevated, spacious, and portable foundation for an expansive miniature settlement. This concept allows you to build a sprawling landscape with multiple distinct zones, such as a residential residential quarter, a tiny farming plot, and a miniature forest. The depth of the wheelbarrow allows for robust root growth, enabling you to incorporate larger dwarf plant varieties that provide realistic canopy cover. Because the vessel is raised off the ground, it protects the delicate components from foot traffic and lawn mowers while acting as a striking focal point in your yard.
To execute this project, drill several drainage holes through the bottom of the wheelbarrow chassis if it does not already possess them to ensure proper water management. Lay down a two-inch layer of coarse gravel across the bottom, followed by high-quality, all-purpose outdoor potting soil filled to within an inch of the rim. Map out the topography by creating small hills and low valleys within the soil to give the landscape a natural, undulating appearance. Plant a dwarf Alberta spruce or a miniature juniper on one of the mounds to serve as a mature, overarching tree for the village below. Construct several small houses from bark and pebbles, arranging them in a semi-circle around a central plaza made of flat river stones, and fill the open spaces with dense Scotch moss.
Idea 4: Stone Pathway Herb Kingdom
How to Create
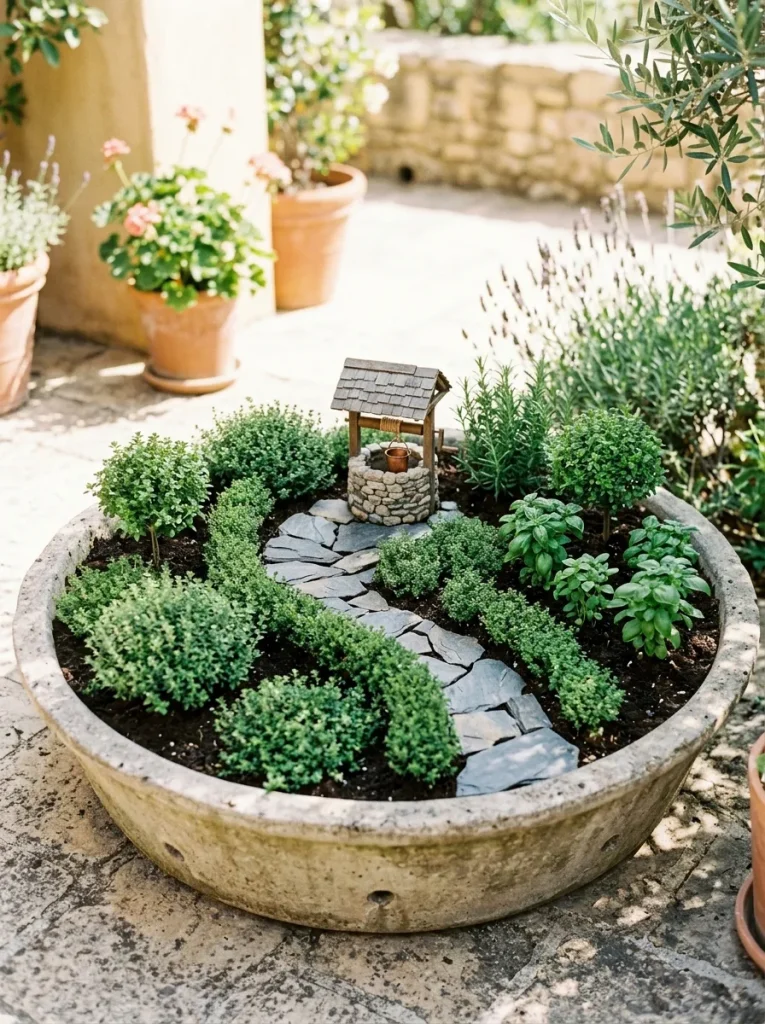
Combining miniature landscaping with practical herb gardening results in a highly functional and fragrant outdoor feature. This idea focuses on using aromatic, low-growing herbs to form the forests and ground cover of a tiny kingdom built inside a wide, shallow stone basin. Creeping varieties of thyme, rosemary, and miniature mint serve dual purposes as realistic landscaping vegetation and harvestable kitchen ingredients. The structured stone paths provide clear division lines between different herb varieties, keeping the design orderly while allowing easy access for trimming and harvesting. This approach fits perfectly within a cottage garden or a sunny kitchen patio setting.
Select a wide, shallow concrete or stone trough and fill it with a sharp, well-draining soil mixture composed of equal parts potting soil, sand, and perlite. Position three or four small culinary herb plants, such as creeping thyme and dwarf basil, leaving ample space between them for structural additions. Lay down a broad, winding pathway using flat slate pieces that cut across the container, connecting one side to the other. Place a miniature stone well or a tiny sundial at the center of the path intersection to serve as an architectural focal point. Use small pruning shears regularly to trim the herbs, shaping them like tiny hedges or manicured trees to maintain the correct scale relative to the path.
Idea 5: Galvanized Washtub Woodland
How to Create
Using a vintage galvanized metal tub creates a rustic, farmhouse-style frame for an old-world woodland scene. The reflective, weathered metal contrast beautifully with deep green foliage and dark, rich soil, enhancing the overall visual appeal of the arrangement. This design focuses on mimicking a dense, shaded forest floor, utilizing varied textures of wood, bark, and stone to create an aged look. It is an excellent choice for a covered porch or a shaded garden nook where moisture levels remain relatively stable throughout the summer months.
Ensure the galvanized tub has adequate drainage by puncturing the base several times with a hammer and a large nail, then spread a layer of charcoal over the bottom to keep the soil fresh. Fill the tub with a moisture-retentive potting mix mixed with leaf mold to replicate a natural forest floor composition. Arrange several thick pieces of weathered tree bark upright in the soil to represent massive rock faces or ancient cliffs within the miniature landscape. Plant small varieties of bird’s nest fern and selaginella moss around the base of the bark cliffs to establish a lush, multi-layered undergrowth. Position a small rustic cabin crafted from twigs in the center, and create a dried creek bed using smooth black pebbles winding through the ferns.

Idea 6: Secret Brick Wall Alcove
How to Create
Utilizing existing architectural features in your garden, such as a recessed alcove or a missing brick in an old retaining wall, offers an unexpected element of surprise. This concept involves building a hidden miniature dwelling directly into a vertical structure, making it appear as though tiny inhabitants reside within the wall itself. This style relies on minimalism and vertical spatial awareness, using the surrounding masonry as the natural ceiling and walls of the scene. It is a highly creative project that requires minimal plants but relies heavily on precise placement of architectural miniatures.
Clean out the chosen wall cavity or alcove thoroughly, removing loose mortar, dirt, and spiderwebs to create a stable working surface. If the space allows for soil, insert a small, shallow plastic liner filled with a succulent soil mix into the base of the cavity. Plant extremely resilient, low-moisture plants like sempervivum or small sedums that can survive with minimal soil depth and ambient moisture. Secure a miniature arched wooden door to the back wall of the alcove using a heavy-duty, weather-resistant construction adhesive. Place a tiny battery-operated, waterproof LED lantern just above the doorway to illuminate the hidden alcove during the evening hours, creating an enchanting nighttime display.

Idea 7: Succulent Desert Oasis
How to Create
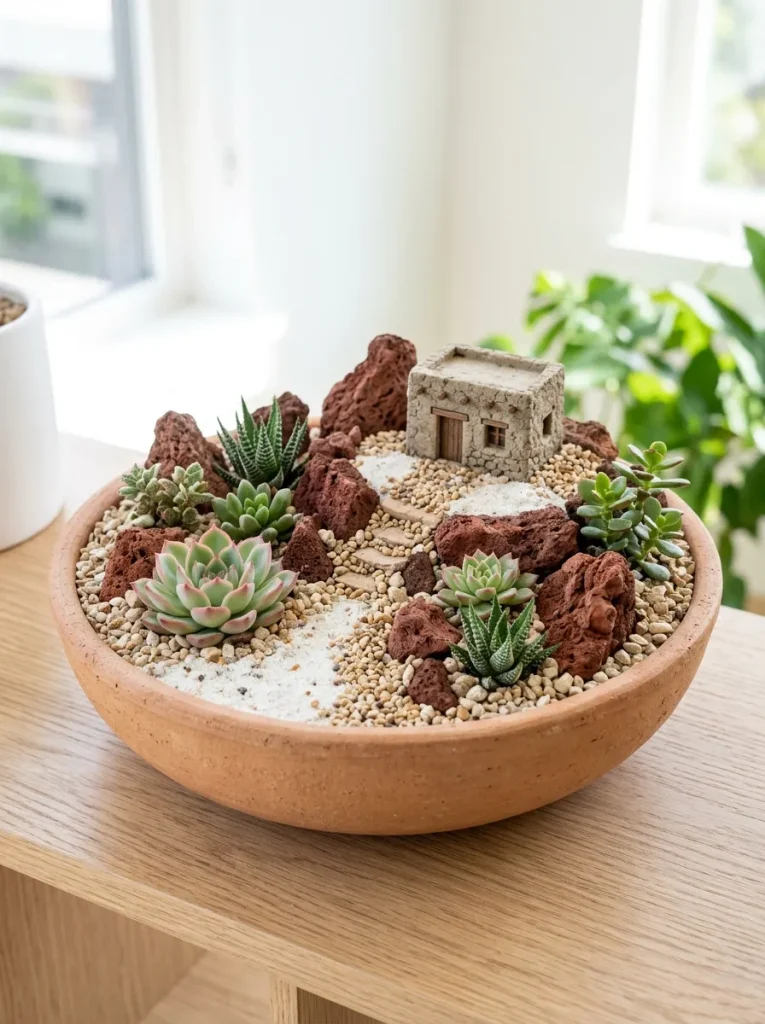
For hot, arid climates or sunny patios, a desert-themed miniature landscape using drought-tolerant succulents is a highly practical and low-maintenance choice. This concept replaces traditional mosses and ferns with colorful, geometric succulents and cacti, creating a miniature canyon or arid plateau scene. The design utilizes varying shades of sand, fine gravel, and jagged desert rocks to build an open, sun-drenched environment that requires minimal watering. This setup fits exceptionally well within modern minimalist home decor due to its clean lines, striking plant shapes, and low maintenance needs.
Choose a wide, shallow unglazed ceramic bowl that allows moisture to evaporate quickly from the sides, and fill it with a specialized cactus and succulent soil mix. Arrange several large, angular pieces of red lava rock or quartz across the surface to create the look of a miniature desert canyon wall. Plant a collection of small succulents, such as haworthia, echeveria, and tiny jade plants, in clusters between the rock formations. Cover all exposed soil surfaces with a thin layer of fine white sand or light beige gravel to create a clean, uniform desert floor appearance. Place a small resin or stone adobe-style dwelling on a flat plateau, and use tiny parched twigs to represent fallen logs or desert scrub brush.
Idea 8: Fairy Ring Birdbath Resort
How to Create
An old, unused concrete birdbath provides an ideal elevated platform for creating a circular, symmetrical miniature estate. This concept uses the natural round shape of the basin to design a balanced landscape, often featuring a central grand structure surrounded by concentric rings of paths and gardens. Being elevated on a pedestal protects the intricate components from ground-level moisture, soil splash during heavy rain, and curious garden pests. The shallow depth of the birdbath basin naturally limits root growth, keeping the plants compact and maintaining the correct scale without constant aggressive pruning.
Begin by verifying that the birdbath basin is securely attached to its pedestal and level, then add a thin layer of fine gravel across the bottom for water distribution. Because many birdbaths lack drainage holes, use a highly porous, sandy soil mix and monitor watering carefully to avoid oversaturating the roots. Place a prominent, detailed ceramic or stone fairy house directly in the exact center of the circular basin to anchor the entire design. Create a circular pathway around the central house using small mosaic glass tiles or colorful polished stones to form a bright, clean border. Plant dense ground covers like Irish moss or Corsican mint in the remaining outer ring, allowing the greenery to spill gently over the curved edges of the concrete basin.

Idea 9: Driftwood Beachfront Hideaway
How to Create
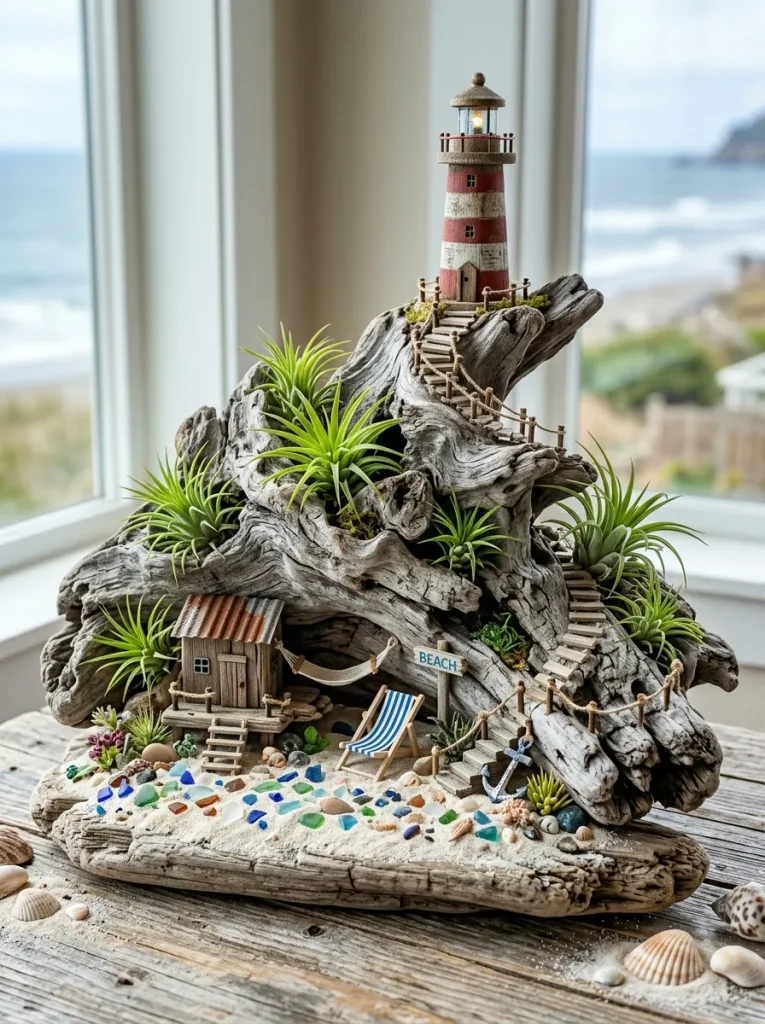
Incorporating large pieces of coastal driftwood allows you to construct an ocean-themed or lakeside miniature retreat. This concept uses the smooth, bleached, and twisted shapes of sea-worn wood to form natural bridges, balconies, and sheltered coves for miniature structures. The pale gray tones of the driftwood contrast beautifully with bright green air plants, sea glass, and fine beach sand, creating a relaxed coastal aesthetic. This design is highly unique because it can incorporate plants that do not require traditional soil, such as tillandsia, making the assembly clean and lightweight.
Select a sturdy, flat-bottomed piece of driftwood that contains deep natural depressions, curves, or hollow sections suitable for holding decorative elements. Mount the driftwood securely inside a shallow wooden tray or directly onto a designated sandy spot in your outdoor garden bed. Place small clumps of air plants or specialized moss varieties into the natural pockets of the wood, securing them with thin florist wire if necessary. Create a miniature sandy beach area at the base of the driftwood using fine beach sand and scattered fragments of colorful sea glass. Position a small, weather-worn lighthouse or a tiny beach shack on the highest point of the wood structure, and string fine twine between small sticks to mimic coastal fencing.
Idea 10: Upside-Down Crate Cottage
How to Create
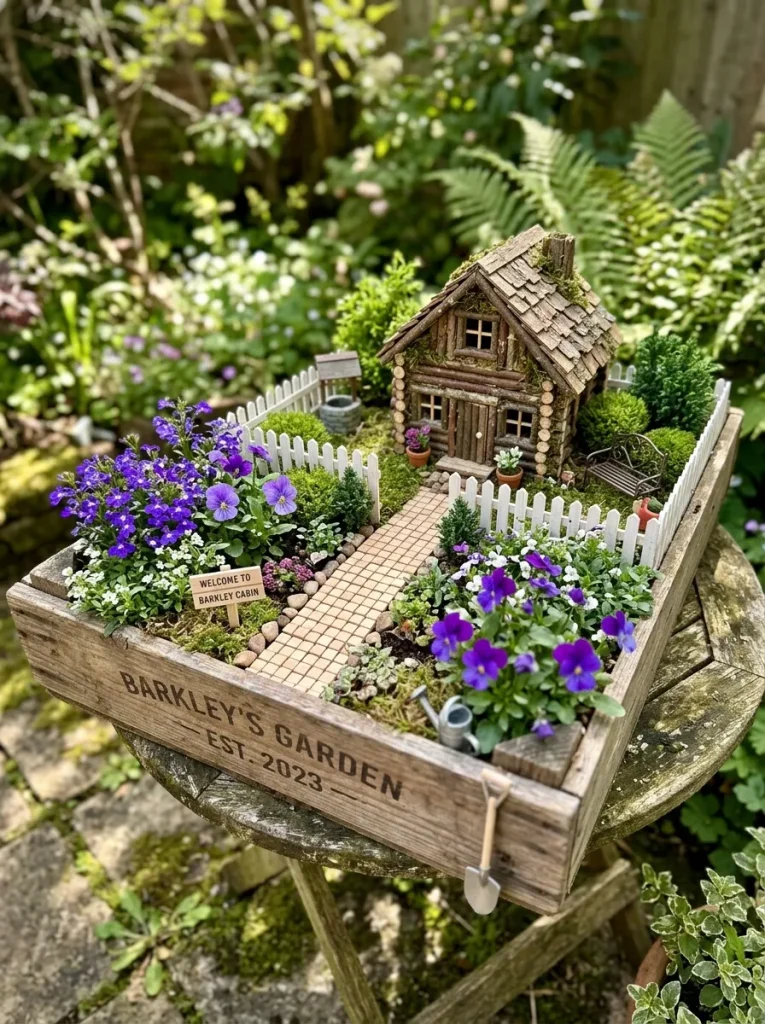
Using a slatted wooden fruit crate or a vintage shipping box provides a structured, multi-dimensional framework for a rustic country estate. By turning the crate on its side or using it as an elevated border, you can create a defined courtyard space with built-in wooden walls that offer shade and wind protection. This concept emphasizes a traditional country cottage theme, complete with miniature picket fences, tiny flowerbeds, and structured garden plots. The straight lines of the wooden crate make it easy to align pathways, fences, and structural boundaries accurately, which is highly beneficial for beginners practicing layout symmetry.
Place a sturdy wooden crate horizontally on a flat outdoor surface, ensuring the wood is treated with a non-toxic water sealant to prevent premature rotting. Fill the bottom portion of the crate with a layer of landscape fabric followed by a nutrient-rich potting soil mix, compacting it evenly. Install a small miniature picket fence along the front edge of the crate to define the property line of your tiny cottage scene. Plant small flowering annuals, such as lobelia or dwarf violas, to mimic massive, overflowing flowerbeds next to a small handmade log cabin. Lay a neat pathway made of tiny square wooden craft sticks leading from the entrance of the crate directly to the cabin door, creating a clean, structured entryway.
Common Beginner Mistakes and How to Avoid Them
One of the most frequent errors made by beginners entering the realm of miniature landscaping is neglecting proper drainage configurations within their chosen containers. Without adequate drainage holes and a coarse gravel base layer, soil quickly becomes waterlogged, leading to root rot and fungal growth that can destroy plants rapidly. Another common issue is mixing plants with entirely incompatible environmental requirements, such as placing moisture-loving ferns in the same container as drought-tolerant succulents. To avoid this, research each plant species beforehand and ensure all vegetation sharing a vessel requires identical amounts of sunlight, water, and soil nutrients. Additionally, many builders fail to consider the rapid growth rates of standard plant varieties, resulting in an overgrown landscape that completely obscures the miniature structures within a few weeks. Always select true dwarf or slow-growing varieties, and commit to regular trimming and maintenance routine using sharp pruning shears to preserve the original scale. Finally, using indoor-grade glues, paints, or delicate plastics on outdoor structures will cause rapid deterioration due to UV exposure and rain; always opt for exterior-grade, weather-resistant materials.
Practical Tips for Better Results
Achieving a professional-looking and long-lasting miniature landscape requires careful attention to detail, scale consistency, and material selection. When selecting materials, collect natural items like acorns, pinecone scales, unique seed pods, and unusually textured tree bark, as these organic elements look highly realistic at a small scale. To maintain visual immersion, adhere strictly to a single scale ratio throughout the entire design; if a doorway is two inches tall, ensure benches and tools match that proportion. When watering your display, avoid using a standard garden hose or watering can, which can dislodge delicate soil paths and shift tiny accessories out of place. Instead, utilize a gentle spray mister bottle or a narrow-spouted watering can directed precisely at the base of each plant to keep the layout intact. To add realistic depth and texture, use multiple grades of gravel and sand to differentiate between main roads, secondary walking paths, and decorative garden borders. Implementing a regular maintenance schedule every two weeks to remove yellowing leaves, trim sprawling roots, and adjust shifted stones will keep your creation looking pristine.
Styling, Presentation, and Organization Ideas
The visual impact of your handmade miniature garden depends heavily on how it is styled and integrated into your broader outdoor home decor. Grouping multiple small containers of varying heights together on a multi-tiered plant stand creates a dynamic, cohesive village display that draws the eye upward. Use surrounding larger landscaping plants, such as standard hostas, ferns, or ornamental grasses, to frame your miniature creation and blend it naturally into the wider yard environment. Incorporating subtle, low-voltage outdoor lighting, such as solar-powered micro fairy lights or waterproof LED pucks, allows the display to remain visible and captivating after sunset. Organize your design elements around a central narrative or theme, such as a rustic woodland retreat, a coastal fishing village, or an structured formal estate, to ensure all pieces feel connected. To create a strong sense of perspective, place larger plants and structures toward the back of the container and smaller elements toward the front, which creates a natural illusion of distance.
Budget and Time Planning
Executing a successful DIY miniature garden project does not require a large financial investment or an excessive amount of free time if planned efficiently. Begin by establishing a clear budget, prioritizing funds for high-quality potting soil and healthy dwarf plants, while sourcing decorative structural elements from nature or repurposed household items. Broken kitchen ceramics, old glass jars, worn leather straps, and discarded building scraps can all be transformed into houses, fences, and tools without cost. In terms of time management, allocate approximately two to three hours for the initial planning, material collection, and assembly phase of a single medium-sized container. To maximize efficiency, complete all structural assembly, such as gluing doors or building furniture, indoors on a flat workbench before moving outside to handle soil and live plants. Once established, these micro-landscapes require minimal ongoing time investment, needing only about fifteen minutes of weekly maintenance for watering and light pruning. By focusing on durable, slow-growing plants and weather-resistant structures, you create a sustainable feature that offers lasting aesthetic value for minimal ongoing effort.
Creative Expansion and Advanced Inspiration
Once you have mastered the basics of miniature gardening, you can expand your projects into more complex, advanced landscape designs. Advanced enthusiasts can explore incorporating real water features, such as a circulating miniature waterfall or a small running stream utilizing a low-voltage submersible solar pump. Another avenue for creative expansion involves building detailed multi-level subterranean elements, such as a hidden gemstone cave or a stone root cellar built directly into the lower soil layers. You can also experiment with seasonal decorating, updating the tiny landscape with autumn leaves, winter snow accents, or spring blossoms to reflect the changing calendar year. Developing your skills in advanced craft techniques, such as casting miniature concrete stepping stones using custom silicone molds, allows for completely customized architectural features. Over time, you can interconnect multiple separate container gardens using miniature rope suspension bridges or elevated wooden walkways, creating an expansive, sprawling network of tiny settlements across your entire outdoor living area.