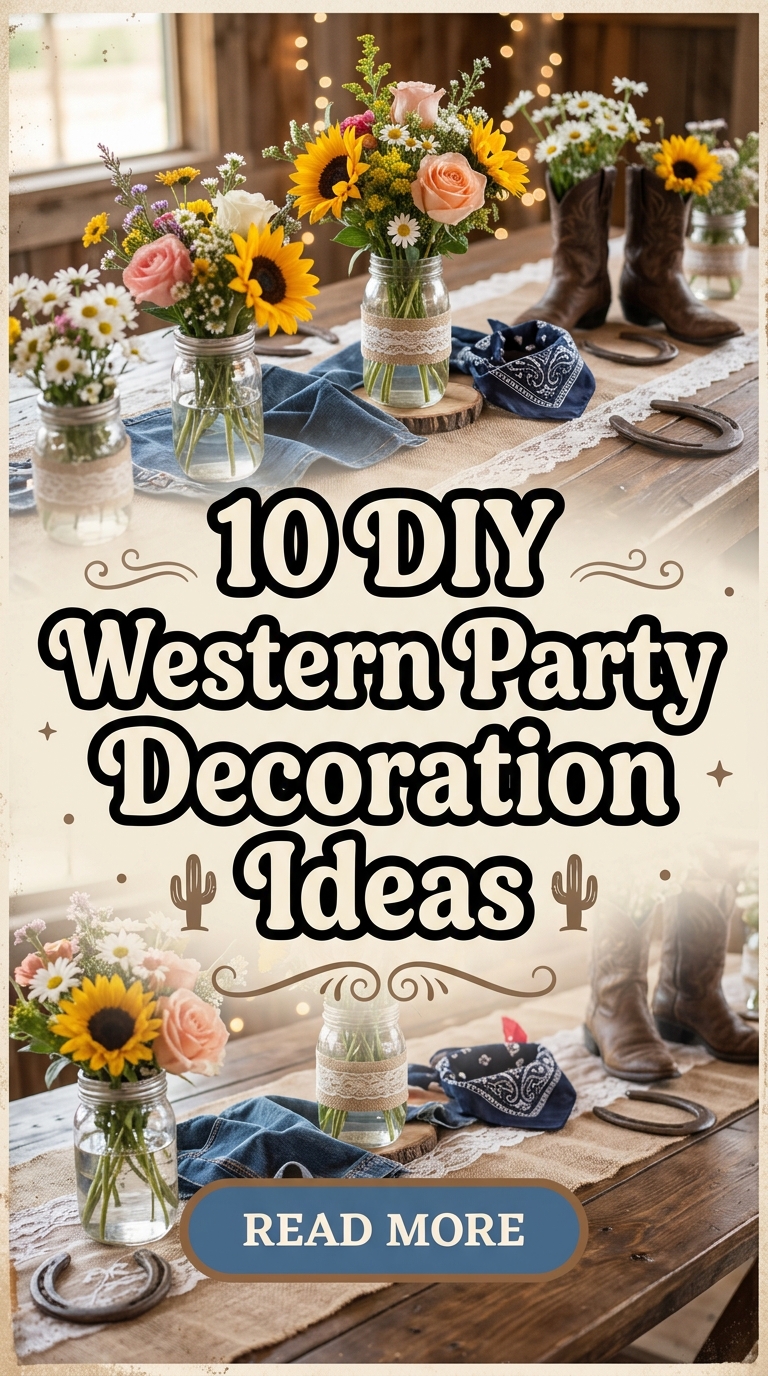
10 DIY Western Party Decoration Ideas
Planning an authentic rustic celebration requires a strategic blend of classic frontier elements, warm textures, and creative craftsmanship. This comprehensive guide provides step by step instructions for creating ten unique, budget-friendly decorations that elevate any backyard or indoor venue into a festive frontier experience. Readers will learn how to transform basic, easily accessible items into high-impact visual displays, including custom lighting fixtures, interactive photo backdrops, and functional table arrangements. This detailed tutorial focuses entirely on realistic, beginner friendly projects that maximize visual charm while minimizing production costs. By understanding the core design principles of rustic styling, hosts can confidently build a cohesive and memorable environment for their guests. Each project detailed below balances historical frontier charm with a sleek, modern design aesthetic, ensuring your gathering feels both intentional and visually striking. Whether you are hosting a small family gathering or a massive themed milestone celebration, these structured layouts offer practical, actionable blueprints to streamline your entire venue styling process.
Why This Idea Is Trending or Useful
Rustic frontier themes remain highly popular among trending ideas on major visual discovery platforms due to their timeless appeal and remarkable versatility. The practical value of this design scheme lies in its structural flexibility, allowing hosts to adapt simple materials to fit diverse spaces, from formal banquet halls to open-air barns. From a modern design perspective, the combination of raw wood grains, soft textiles, and metallic accents creates a deeply rich sensory experience that feels instantly welcoming. The inherent DIY appeal is exceptionally strong, as aging wood, fraying burlap, and distressing metals are forgiving techniques that naturally mask minor manufacturing mistakes. This makes the entire assembly process accessible for beginners who may lack advanced woodworking or crafting skills. Furthermore, utilizing repurposed everyday goods aligns perfectly with a minimalist style ethos, proving that high-quality, high-impact presentation does not require an exorbitant financial investment or complex toolsets.
Materials and Preparation
Executing a flawless frontier-themed transformation requires gathering essential foundational materials and setting up an organized workspace before commencing construction. The primary materials needed across these projects include premium jute twine, clean burlap rolls, corrugated cardboard sheets, clean empty glass jars, and thick cotton bandanas. Essential tools for your crafting station should feature a high-temperature hot glue gun, heavy-duty utility shears, water-based wood stains, matte acrylic paints, and a standard cordless drill. Preparation starts with thoroughly cleaning all recycled glass containers and smoothing down any rough wooden pallets with medium-grit sandpaper to prevent splintering. Planning considerations dictate measuring your venue spaces early to scale each prop accurately, ensuring large focal pieces do not overwhelm small rooms. Establishing a dedicated, flat assembly area protects your household surfaces and allows multi-step paint projects to dry undisturbed, guaranteeing a smooth and highly efficient production workflow.
Idea 1: Reclaimed Pallet Welcome Board
Step-by-Step Guide
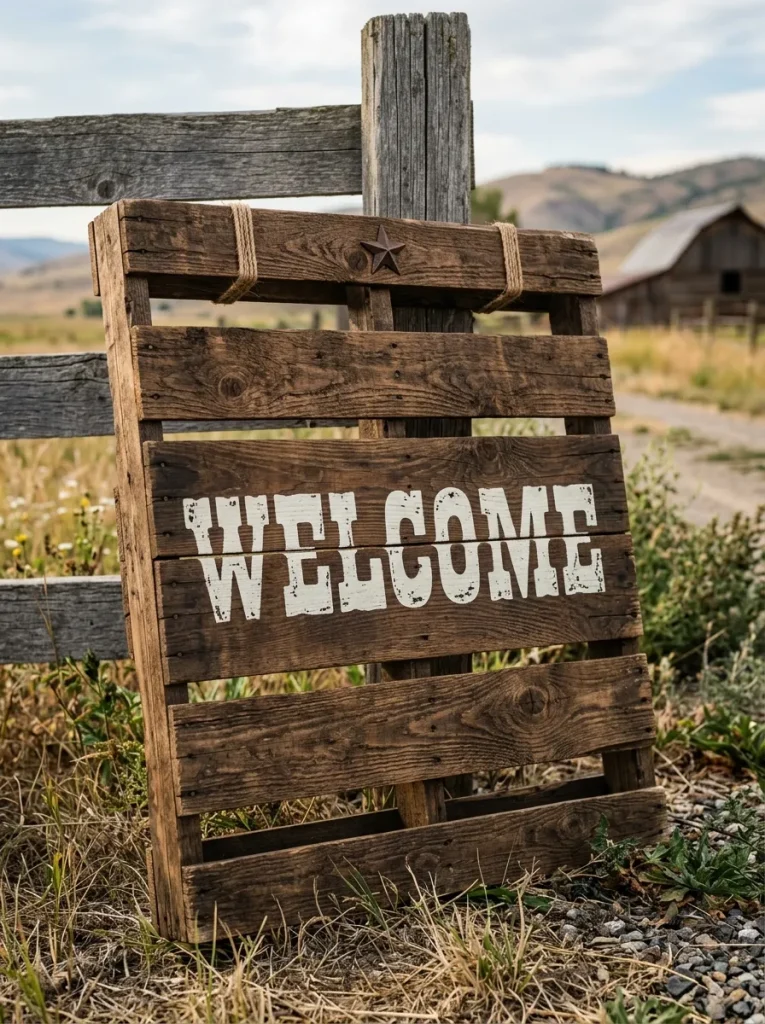
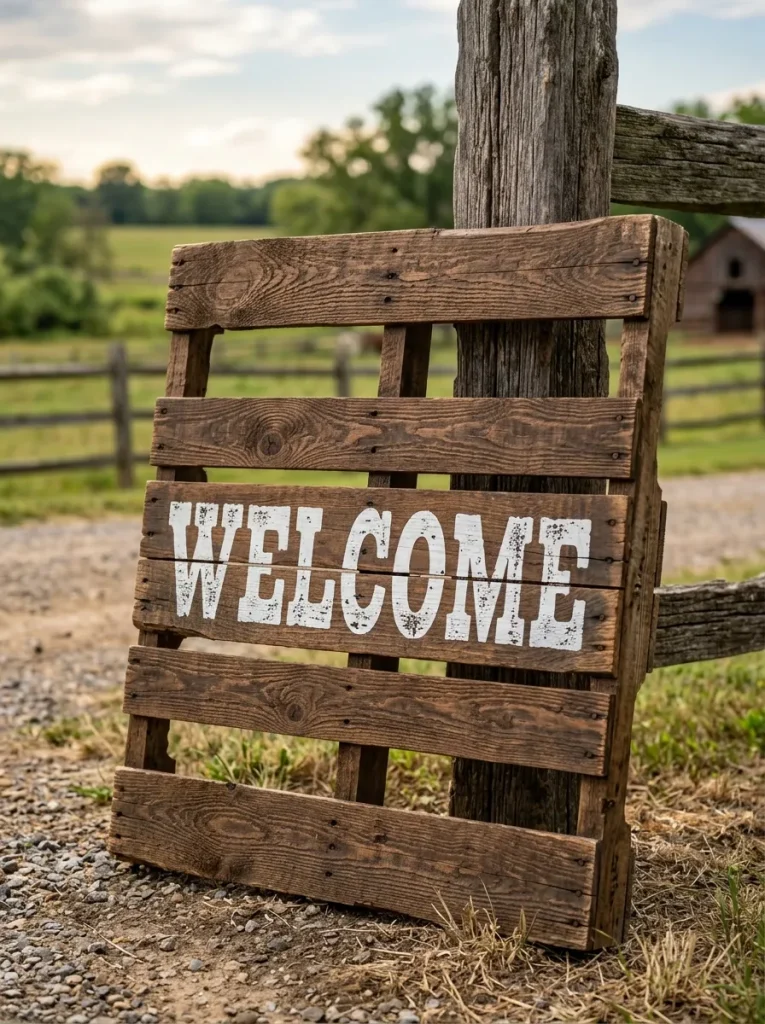
The reclaimed pallet welcome board functions as the primary visual anchor at the entrance of your venue, establishing an immediate rustic tone for arriving guests. This design leverages the natural weathering and varied coloration of discarded shipping pallets, transforming industrial waste into a beautiful piece of custom typography. By utilizing stenciled lettering, hosts can display welcoming phrases, event dates, or directional arrows that guide attendees deeper into the celebration space. The wide vertical slats provide excellent structural stability, allowing the finished sign to lean securely against walls, trees, or fence posts without requiring complex mounting hardware. Its raw, unpolished texture offers a beautiful contrast against crisp outdoor greenery, acting as a highly functional piece of handmade signage.
To build this entrance marker, source a clean, structurally sound wooden shipping pallet and sand the front-facing slats to remove large splinters while retaining the natural grain characteristics. Apply a thin layer of walnut or oak water-based wood stain using a foam brush, quickly wiping away excess liquid with a soft rag to create an aged appearance. Print your desired text onto heavy cardstock using a bold, classic font, then carefully cut out the interior of the letters with a utility knife to create a custom stencil. Secure the stencil across the upper portion of the pallet slats using painter’s tape, and apply matte white acrylic paint using a stippling motion with a dense sponge brush. Allow the lettering to dry completely before peeling back the cardstock, then lightly rub fine-grit sandpaper over the painted words to complete the distressed look.
Idea 2: Bandana Pennant Bunting
How to Make
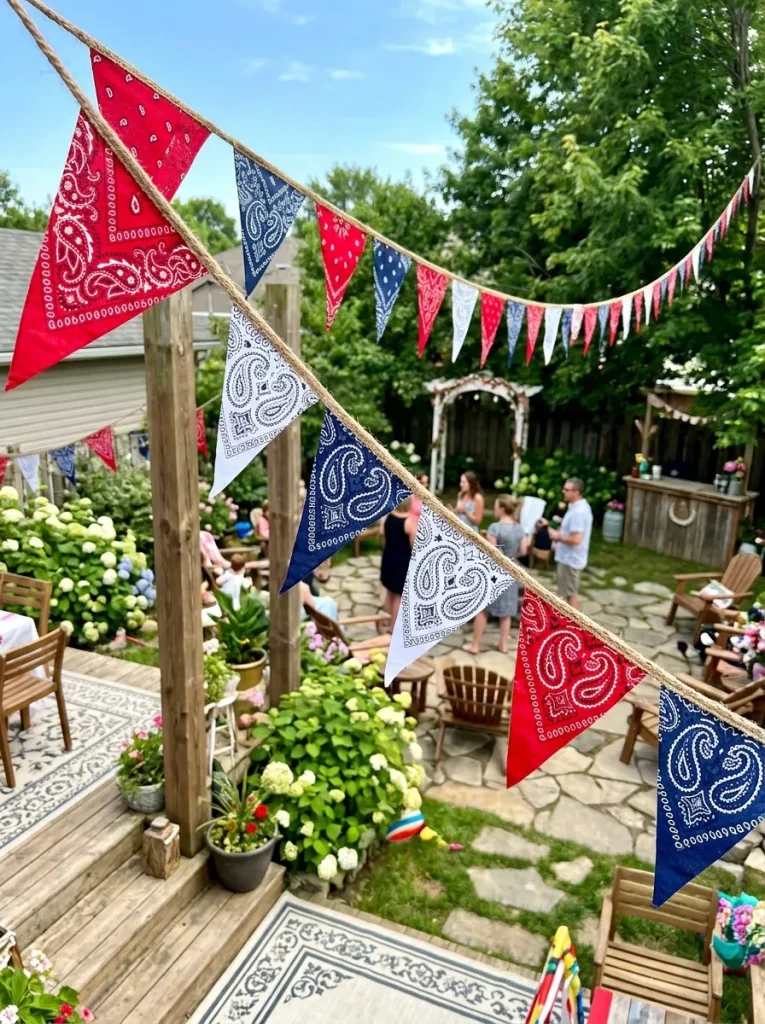
Bandana pennant bunting offers a vibrant, highly dynamic way to fill overhead dead space and define the perimeter of your gathering area. This project reimagines classic cotton western handkerchiefs, featuring traditional paisley motifs, by slicing them into sharp triangular flags that catch the breeze beautifully during outdoor events. Hanging overhead fabric instantly lowers high ceilings, making open-air venues feel significantly more intimate, comfortable, and celebratory. By mixing contrasting colors like deep crimson, navy blue, and crisp white, you introduce a lively festive energy that breaks up the monochromatic tones of wood and burlap. This decoration is incredibly lightweight, allowing it to span vast distances between posts without sagging excessively or putting strain on anchor points.
To assemble this festive hanging garland, collect several cotton bandanas in your chosen color scheme, laundering and ironing them flat to ensure precise cuts. Fold a piece of thick cardboard into an isosceles triangle measuring eight inches wide at the base and ten inches long to serve as your cutting template. Lay the bandanas flat on a self-healing cutting mat, place the template over the fabric, and use a rotary cutter to slice out identical fabric triangles efficiently. Arrange a long strand of half-inch wide jute twine across a flat table, leaving two feet of empty space at each end for easy hanging. Apply a continuous line of hot glue along the top edge of each fabric triangle, fold it over the twine securely, and repeat the process leaving a two-inch gap between each colorful pennant.
Idea 3: Mason Jar Rope Lanterns
Execution Process
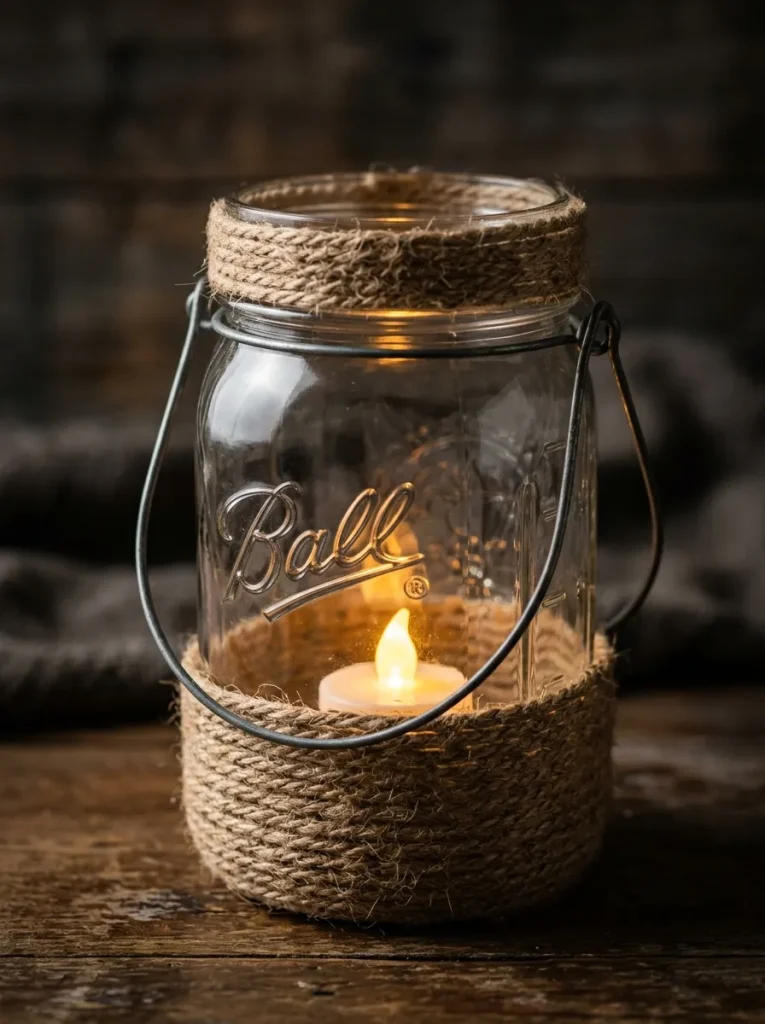
Mason jar rope lanterns combine the functional utility of mood lighting with the raw, textural aesthetic of coarse fiber wrapping. This project utilizes standard clear canning glass jars, converting them into protective vessels for battery-operated tea lights or flickering LED candles. Wrapping the exterior glass with intricate patterns of jute twine diffuses the light softly, casting beautiful geometric shadows across tables and walkways. These lanterns are exceptionally versatile, serving equally well as clustered table centerpieces, suspended tree branch illuminations, or ground-level pathway markers that ensure guest safety after dark. Their compact size and heavy glass bases prevent them from tipping over easily, even when subjected to sudden gusts of wind during outdoor evening events.
To construct these ambient light sources, wash and dry several clear quart-sized canning jars, ensuring the exterior surface is entirely free of sticky adhesive residue. Starting at the very bottom base of the glass jar, apply a small bead of high-temperature hot glue and anchor the end of a long strand of thick jute twine. Tightly wind the twine around the perimeter of the jar, adding small drops of adhesive every three rotations to prevent the fiber coils from slipping out of alignment. Continue wrapping upward until you reach the threaded collar of the jar, then cut the twine and glue the end down smoothly beneath the rim. Create an adjustable hanging handle by looping a separate twelve-inch piece of twine around the neck of the jar, tying it off with secure square knots on opposing sides.
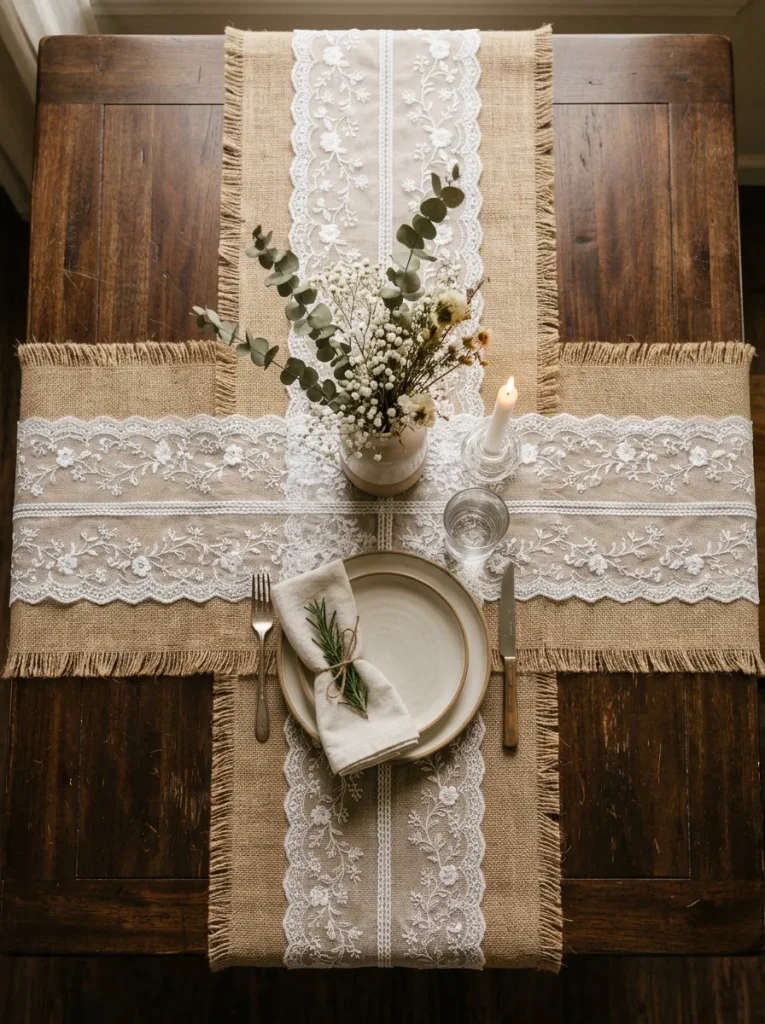
Idea 4: Burlap and Lace Table Runners
Setup Method
Burlap and lace table runners introduce a sophisticated touch of frontier elegance, beautifully balancing rugged durability with soft, delicate textile patterns. The coarse, woven texture of natural jute burlap provides a neutral backdrop that highlights dinnerware, while a center strip of white floral lace adds visual refinement. This layer-based design prevents long banquet tables from looking barren or industrial, creating a structured visual pathway that unifies centerpieces, cutlery, and floral arrangements. Because burlap is highly structural and naturally holds its shape, these runners lay perfectly flat without shifting, providing a highly reliable and durable foundation for busy food service stations or interactive beverage bars.
To prepare these rustic table dressings, purchase a roll of twelve-inch wide natural jute burlap fabric and cut it into lengths that extend twelve inches past each table end. Fray the short raw edges of the burlap manually by pulling out three parallel horizontal threads, creating an intentional, uniform fringe effect on both ends. Cut a strip of four-inch wide white lace ribbon to match the exact length of your prepared burlap base section. Lay the burlap flat on a clean workspace, run a thin, controlled line of clear fabric glue down the exact center axis, and press the lace ribbon firmly onto the adhesive. Place heavy flat books over the finished runner for one hour to ensure a strong, permanent bond between the contrasting textiles before rolling them up neatly for transport.
Idea 5: Corrugated Cardboard Boot Cutouts
Step-by-Step Guide
Corrugated cardboard boot cutouts provide a playful, high-impact dimensional element that can be utilized as wall decorations, photo booth props, or hanging silhouettes. This project transforms ordinary shipping boxes into large-scale iconic frontier footwear, utilizing clever painting techniques to mimic the appearance of hand-stitched leather. Because cardboard is highly rigid yet incredibly lightweight, these oversized shapes can be suspended easily from temporary backdrops or adhered to walls using surface-safe painter’s tape. This makes them an exceptional solution for decorating venues with strict structural rules against nails or heavy hardware. The large surface area allows for creative expression, enabling hosts to customize colors and patterns to match their precise event palette.
To create these large dimensional cutouts, flatten several large corrugated cardboard boxes and draw a large, stylized silhouette of a classic cowboy boot onto the surface using a dark marker. Carefully cut along your drawn lines using a sharp utility knife, ensuring clean edges by holding the blade at a consistent forty-five-degree angle. Coat the entire cardboard shape with a base layer of matte brown acrylic paint using a wide foam roller, allowing it to dry for two hours. Use a fine-tip artist brush dipped in cream-colored paint to add faux stitching lines along the seams, toe box, and upper collar of the painted boot. For an authentic textured finish, lightly smudge black soot pigment or diluted dark paint around the heel and toe areas using a dry cloth to simulate realistic wear.
Idea 6: Horseshoe Magnetic Photo Frame
How to Create
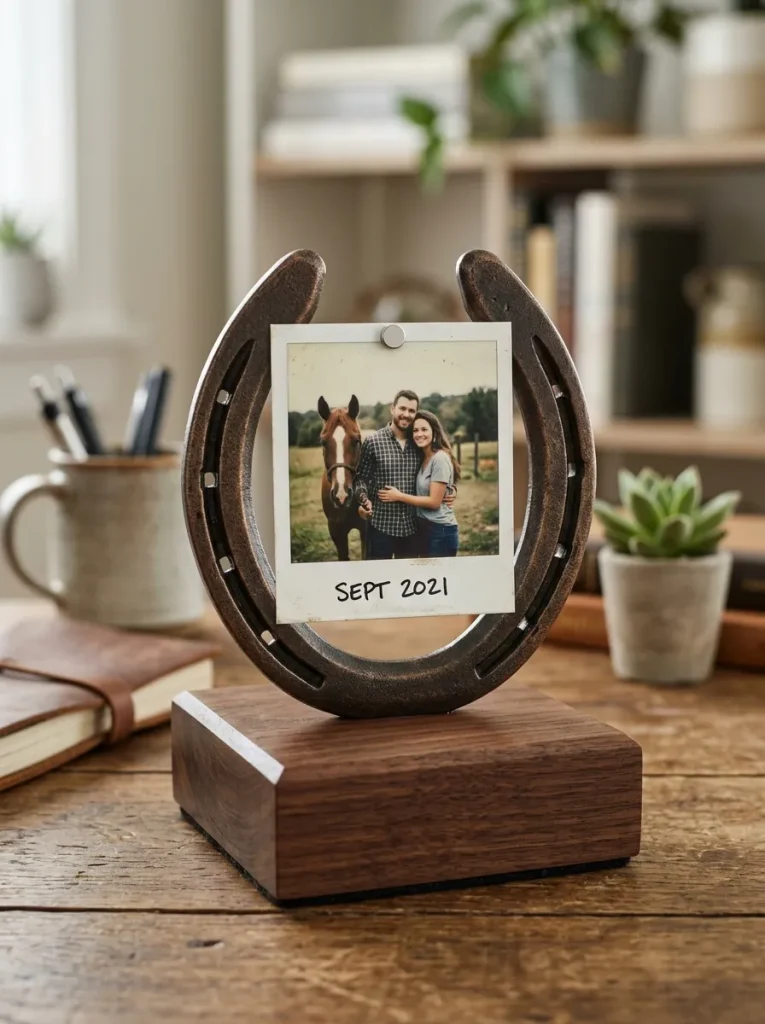
The horseshoe magnetic photo frame serves a dual purpose as an engaging table decoration and a highly interactive keepsakes station for your guests. This design utilizes genuine steel horseshoes, painting them to prevent rusting while transforming them into sturdy, freestanding structural mounts for personal photographs. Because horseshoes naturally possess an iconic, instantly recognizable shape, they reinforce the core theme perfectly while taking up minimal space on crowded accent tables. Guests can use miniature high-powered magnets to affix vintage-style instant photos directly to the metal face, creating an evolving gallery of memories throughout the duration of the party.
To construct these magnetic metal frames, clean used steel horseshoes thoroughly with a wire brush to remove dirt, loose scale, and rust pockets. Spray each clean shoe with two coats of metallic silver or oil-rubbed bronze rust-preventative paint, working in a well-ventilated outdoor area and allowing one hour of drying time between applications. Cut a two-inch square block of dense scrap wood to serve as a weighted stabilization base for each frame, coating the wood with a matching dark stain. Apply a generous pool of heavy-duty epoxy adhesive to the top of the wooden block, press the flat bottom curve of the horseshoe firmly into the glue, and hold it steady until set. Supply small, powerful neodymium magnets alongside the completed stands to allow easy attachment of event signage or guest polaroids.
Idea 7: Hay Bale Settee Photo Backdrop
Setup Method
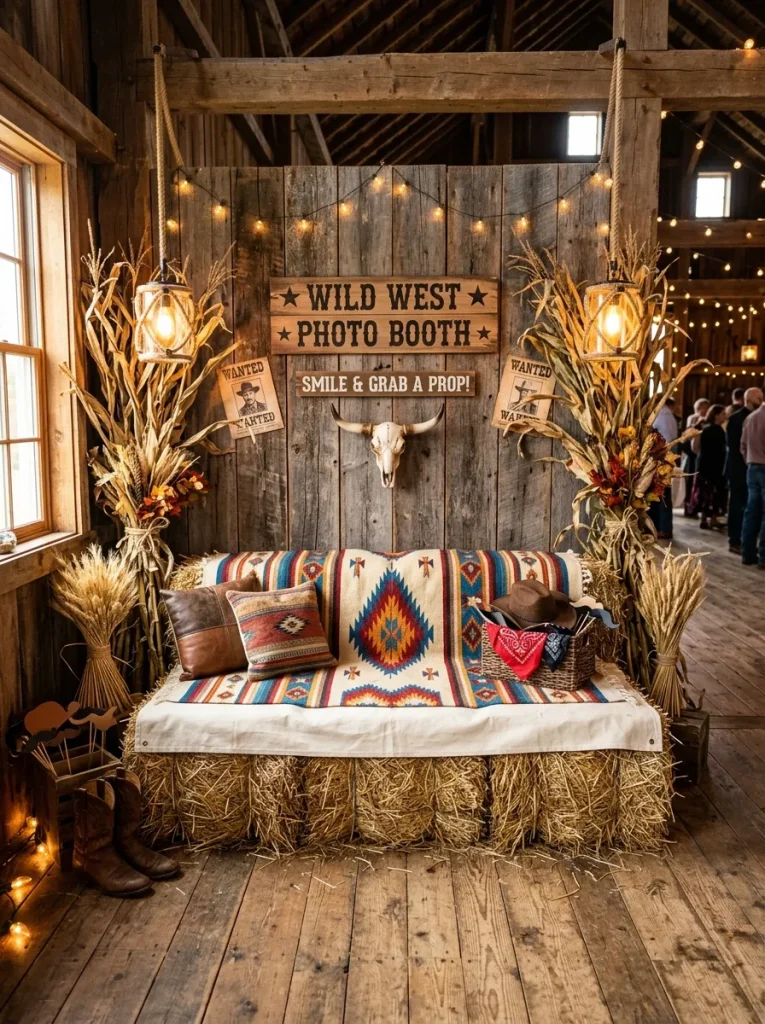
The hay bale settee photo backdrop functions as the primary interactive destination within your venue, encouraging guests to document their experience in a beautifully curated setting. This layout uses tightly bound straw bales arranged into a functional sofa configuration, providing comfortable, thematic seating that accommodates multiple people simultaneously. Covering the coarse straw with heavy canvas drops and patterned textiles ensures guest comfort while preventing prickly debris from snagging delicate clothing. Framing the seating area with vertical rustic elements creates a sense of depth, transforming an empty corner of your venue into a professional-grade, stylized photography studio space.
To assemble this large interactive seating installation, position three tightly bound rectangular straw bales side by side on a heavy tarp to form the main seat cushion base. Place two additional bales vertically at the rear edges to form a supportive backrest, leaning them securely against a structural wall or sturdy fence line. Drape a clean, heavy canvas drop cloth over the entire straw structure, tucking the excess fabric tightly into the crevices to fully conceal the underlying wire bindings. Layer a vibrant, southwest-patterned woven blanket across the center seat section, allowing the colorful fringe to drape over the front edge. Flank the completed seating arrangement with tall dried corn stalks, a vintage wooden ladder, and several strategically placed rope lanterns to complete the multi-dimensional photographic frame.
Idea 8: Tin Can Succulent Centerpieces
How to Make
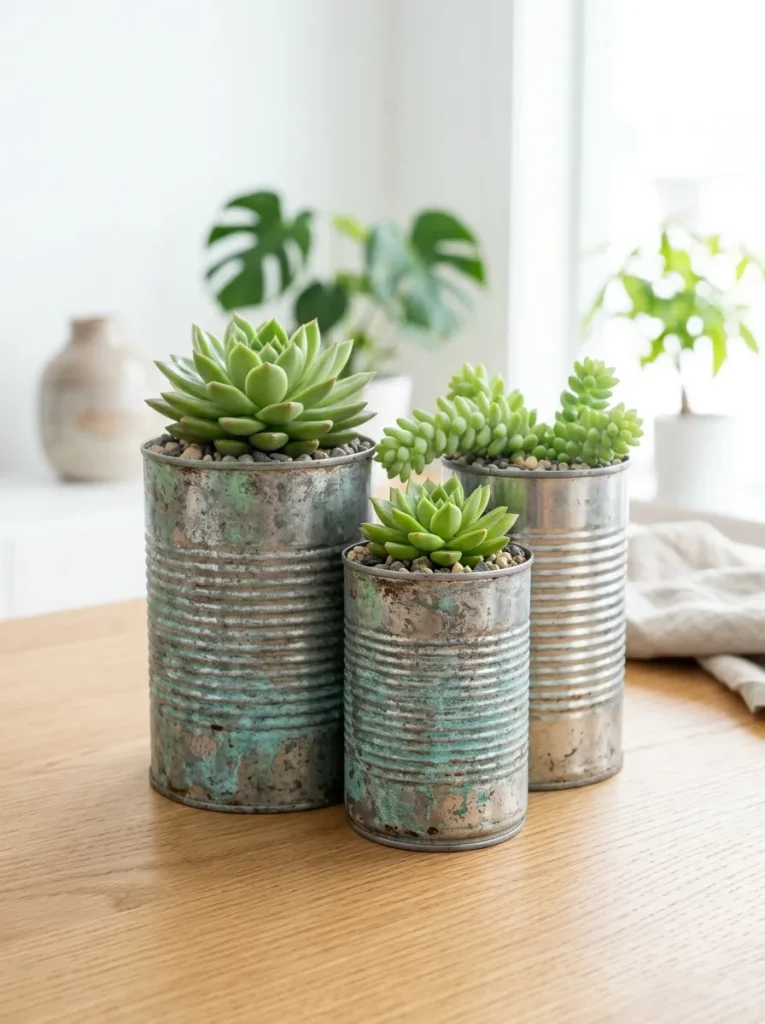
Tin can succulent centerpieces offer a beautiful, eco-friendly table arrangement that infuses fresh organic greenery into the predominantly woody texture palette of a frontier theme. This project repurposes standard aluminum food cans, applying simple distressing techniques to give the metallic surfaces an authentic, aged galvanized patina. Planting hardy, low-maintenance succulents inside these containers ensures the centerpieces remain vibrant and upright without wilting, even during hot summer afternoon outdoor gatherings. Their compact circular footprint leaves plenty of space for food platters and beverage service, making them highly practical for standard rectangular or round dining layouts.
To fabricate these metallic plant holders, collect several clean aluminum cans of varying heights, ensuring all sharp inner rims are thoroughly smoothed down using pliers. Submerge the cans in a mixture of warm water and white vinegar for one hour to gently etch the metal surface, removing the modern factory shine. Once dry, lightly dab a mixture of matte gray, turquoise, and burnt sienna acrylic paint onto the exterior using a crumpled paper towel to simulate an aged, oxidized metal finish. Drill three small drainage holes through the bottom of each treated can using a quarter-inch drill bit to ensure proper soil health. Fill the containers with a specialized sandy cactus soil blend, transplant your chosen live succulents securely, and top the soil with a thin layer of fine pea gravel.
Idea 9: Wagon Wheel Silhouette Chandelier
Execution Process
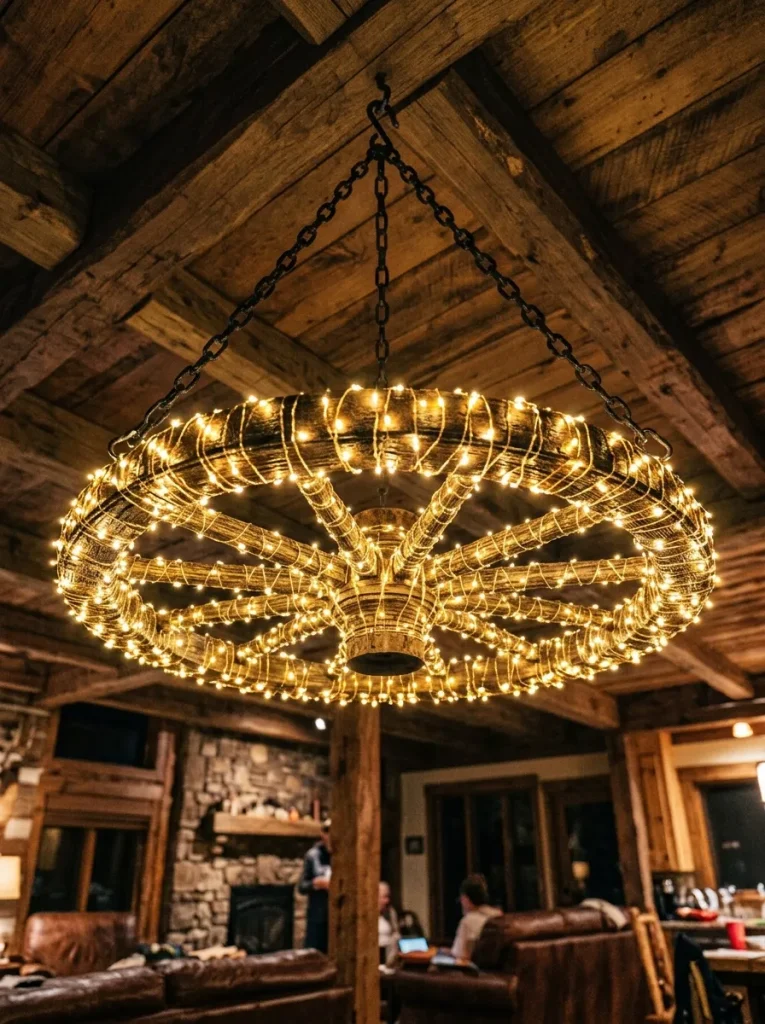
The wagon wheel silhouette chandelier serves as a spectacular central overhead focal point, drawing the eyes upward and filling vast ceiling voids with dramatic thematic architecture. This project uses lightweight wood or thick insulation foam cut into a classic spoked wheel shape, avoiding the extreme weight and safety hazards associated with genuine antique iron components. Suspending battery-operated Edison-style fairy lights along the circular perimeter creates a warm, golden canopy that bathes the dining or dancing area below in beautiful ambient light. This installation significantly enhances the overall scale of your decorations, giving the venue a professional, highly curated atmosphere.
To build this suspended overhead light fixture, trace a large thirty-inch circle onto a sheet of half-inch thick rigid insulation foam, drawing an inner circle and eight intersecting spokes to form a wheel pattern. Carefully cut out the open negative spaces between the spokes using a hot-wire foam cutter or a sharp utility knife to maintain clean, non-frayed edges. Coat the entire foam wheel structure with dark brown textured spray paint that mimics rough-hewn oak wood, ensuring complete coverage of all inner profiles. Wrap a twenty-foot strand of warm-white, battery-powered micro LED fairy lights uniformly around the outer circular rim, securing the battery pack neatly to the top side using heavy-duty hook-and-loop tape. Attach three equal lengths of lightweight black chain to the wheel rim, joining them at a central overhead carabiner for balanced, secure ceiling suspension.
Idea 10: Wanted Poster Beverage Menus
Setup Method
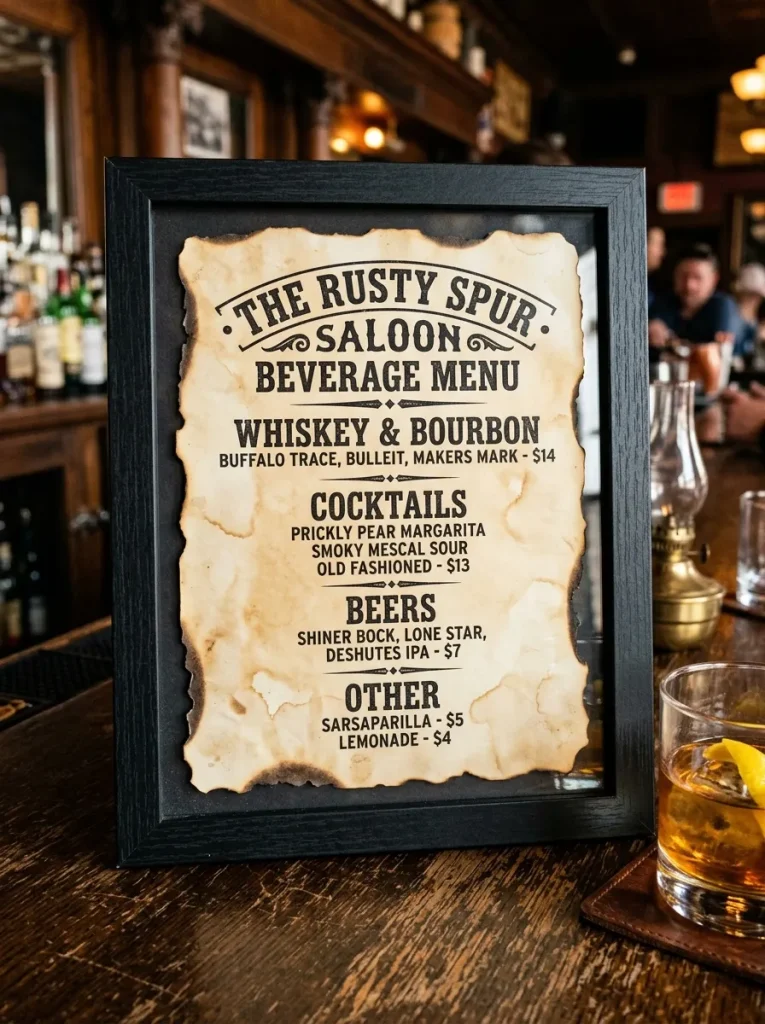
Wanted poster beverage menus add a delightful touch of historical humor and localized customization to your refreshment stations, transforming a standard drink list into an engaging thematic prop. This concept utilizes heavy parchment paper treated to look over a century old, featuring classic bold typography and stylized borders reminiscent of old frontier law enforcement broadsides. Displaying your signature drinks, mocktails, and sodas within this framework keeps guests informed while eliminating the need for modern, theme-breaking printed signage. Placing these stylized notices inside distressed wooden tabletop frames ensures they remain upright, legible, and fully protected from accidental beverage spills.
To produce these custom vintage menus, design your drink list on a computer using traditional western block fonts, incorporating decorative line borders and distressed text effects before printing onto heavy cream cardstock. Submerge each printed sheet into a shallow tray filled with strong, cooled black tea for ten minutes to impart a deep, authentic amber age coloration to the paper. Remove the wet sheets carefully and lay them flat on baking pans, allowing them to air dry completely or accelerating the process with a low-temperature hair dryer. Once dry, carefully singe the outer edges of the paper using a handheld lighter, quickly extinguishing the embers to create an authentic, fire-damaged frontier look. Fit the aged menus into simple wood frames painted with a matte black chalk paint, and place them prominently at all beverage service stations.
Common Beginner Mistakes and How to Avoid Them
One of the most frequent missteps beginners make when assembling a frontier-themed event is over-complicating the color palette by introducing too many synthetic, bright primary hues. Traditional rustic designs rely heavily on organic, earth-toned foundations; using unnaturally vibrant plastics or glossy synthetics instantly breaks the historical illusion and lowers the overall aesthetic quality. Stick strictly to neutrals, browns, creams, and faded denim tones, using bright shades only through traditional patterned accents like cotton bandanas. Another prevalent error is failing to secure lightweight outdoor decorations properly against unexpected shifts in wind velocity. High-surface-area props like cardboard cutouts and bunting can easily detach or blow away if they are anchored with low-grade tape; always utilize heavy-duty zip ties, structural twine, or weighted bases for exterior setups. Finally, many hosts overlook the safety hazards associated with placing open-flame candles inside lightweight containers near flammable materials like dry straw and raw burlap. To entirely eliminate fire risks while maintaining beautiful mood lighting, exclusively utilize high-quality, battery-operated LED candles that stay cool to the touch throughout the entire event.
Practical Tips for Better Results
Achieving a professional-grade presentation with handmade items requires implementing specific material treatments that enhance structural authenticity and visual depth. When working with brand-new jute twine or burlap fabric, spray the material lightly with water and allow it to dry in direct sunlight for a day to reduce the harsh chemical odor common in manufacturing processing. To make inexpensive pine or plywood look like expensive, centuries-old barn wood, score the surface vigorously with a wire brush or hit it randomly with a heavy metal chain before applying stain to create realistic deep grain pockets and physical distress markings. When hanging overhead bunting or heavy lighting fixtures, always incorporate a central structural support cable to relieve tension on decorative lines, ensuring your lines maintain a beautiful, uniform sag rather than an unstable drop. Additionally, cluster your table decorations in odd numbers—such as groups of three items of varying heights—to create a naturally balanced composition that pleases the eye far more than symmetrical pairings. Lastly, apply a final coat of ultra-matte clear sealing spray over all painted cardboard and wood projects to lock in the pigments and eliminate unnatural light reflections during flash photography.
Styling, Presentation, or Organization Ideas
The ultimate impact of your handmade decorations depends heavily on how they are systematically organized, zoned, and presented across the physical layout of your venue space. Designate specific, high-traffic areas for your largest focal installations, placing the welcome board exactly at the primary entry gate and the large photo settee in a spacious, easily accessible corner away from food queues. Use consistent lighting levels across different zones to guide guests naturally through the space, keeping food preparation areas brightly lit while maintaining a soft, golden glow across dining tables using your handmade rope lanterns. When styling long banquet tables, maintain a clear hierarchy of height by placing the low tin can centerpieces directly on the fabric runners, interspersed with taller lantern elements to create visual rhythm. Organize your beverage and food stations by mounting the custom wanted poster menus at eye level, surrounding the serving platters with loose clean horseshoes and scattered wood rounds to complete the thematic immersion. This meticulous attention to placement ensures that every angle of your venue offers a clean, balanced, and highly photorealistic backdrop for your guests to enjoy.
Budget or Time Planning
Executing a large-scale decorative project efficiently requires balancing your manufacturing schedule with a strict material acquisition budget to eliminate last-minute preparation stress. Create a detailed master checklist of all required components four weeks before the event, allowing ample time to collect recycled materials like aluminum cans and glass jars from friends and family free of charge. Allocate your funds primarily toward high-impact foundational items like heavy textiles, quality adhesives, and reliable LED lighting elements, while utilizing free cardboard and inexpensive twine for secondary filler accents. Dedicate the first two weeks of your timeline exclusively to messy, multi-step construction processes such as cutting cardboard shapes, drilling metal, and applying wood stains that require extensive drying windows. Use the final week before the celebration for clean assembly tasks, including folding bandana pennants, wrapping glassware, and printing custom menu broadsides. Breaking the workflow down into manageable, specialized daily tasks ensures you complete production ahead of schedule, leaving the final hours fully dedicated to effortless venue installation and placement.
Creative Expansion and Advanced Inspiration
For hosts looking to advance beyond foundational crafting techniques, there are numerous opportunities to expand these concepts into highly sophisticated, immersive environmental designs. Consider integrating custom digital projection mapping over large cardboard silhouettes or plain barn walls, casting moving shadows of horse herds or campfire embers to introduce dynamic motion to your static displays. Advanced woodworkers can scale up the welcome sign concept by building full-sized, functional saloon swing doors out of distressed cedar planks, creating a truly unforgettable interactive threshold for entering guests. Explore advanced textile manipulation by dipping edges of your burlap runners into custom indigo or walnut dye baths, creating a beautiful ombre effect that bridges traditional craft with haute couture design trends. You can also elevate the botanical elements by blending fresh cascading eucalyptus and dry desert pampas grass directly into the tin can succulent arrangements, adding luxurious textural variance and a rich natural fragrance to the air. Continuously challenging the boundaries of simple materials allows you to create a deeply personalized, gallery-worthy atmosphere that elevates your themed gathering into a truly legendary experience.