
10 Suncatcher DIY Ideas

Suncatchers are decorative ornaments designed to capture and redirect sunlight, creating vibrant visual displays within an interior space. These decorative pieces are typically hung in windows where direct sunlight passes through translucent, reflective, or refractive materials. The incoming light undergoes refraction or reflection, scattering colorful patterns, rainbows, or shifting shadows across a room. This tutorial provides comprehensive guidance on creating ten distinct types of handmade light-reflecting decorations. Readers will learn the exact construction processes, necessary materials, and design choices required to build functional ornaments that maximize natural lighting. Understanding how different textures and shapes interact with light helps individuals transform ordinary windows into dynamic focal points. This knowledge is highly useful for anyone seeking to enhance interior lighting environments using cost-effective, creative ideas. By assembling these pieces independently, creators can control the exact aesthetic, scale, and color palette to match their existing home decor. This comprehensive guide covers everything from basic structural assembly to advanced material selection, ensuring that every completed project operates efficiently and safely within a household window.
Why This Idea Is Trending or Useful
Suncatchers have become highly popular across digital platforms like Pinterest because they offer an accessible, beginner friendly approach to dynamic home decor. Modern interior styling emphasizes maximizing natural daylight, and these creative projects provide a direct method to amplify sunlight without permanent structural changes. The growing appeal of minimalist style combined with functional art makes these ornaments a staple in contemporary interior design inspiration. From a practical perspective, these items are inexpensive to produce, making them excellent budget ideas for individuals who want customized decorative accents. The manual construction process provides a rewarding DIY experience that does not require complex machinery or advanced technical training. Beginners can achieve professional, high-quality results by using basic household tools and readily available crafting components. Furthermore, these ornaments are highly adaptable, allowing creators to experiment with geometric patterns, organic materials, and various color schemes. As trending ideas lean toward sustainable and personalized living spaces, making handmade light reflectors allows people to combine utility with visual design, producing functional art that changes appearance throughout the day based on the angle of the sun.
Materials and Preparation
Executing a successful creative project requires proper planning and precise material collection. The primary structural components for these ornaments include clear glass beads, crystalline prisms, transparent acrylic sheets, translucent resin, and metallic frames or embroidery hoops. Securing these materials requires durable suspension mediums such as nylon monofilament fishing lines, copper jewelry wire, or thin metallic chains that withstand prolonged sun exposure without degrading. Essential tools include jewelry pliers, wire cutters, precision scissors, strong adhesives like clear epoxy, and protective gear such as safety glasses or gloves when handling sharp metals or glass.
Preparation steps begin with measuring the target window to determine the appropriate scale and weight limits for the finished piece. Clean the workspace thoroughly to prevent dust or debris from embedding into adhesive surfaces or clear coatings. Sketching a detailed blueprint helps establish spacing, balance, and color distribution before cutting any wire or string. Additionally, creators must consider the orientation of the window, as south-facing and west-facing windows receive the highest intensity of direct sunlight, which dictates how dense or reflective the materials should be to optimize light refraction.
Crystalline Geometric Mobiles
How to Create
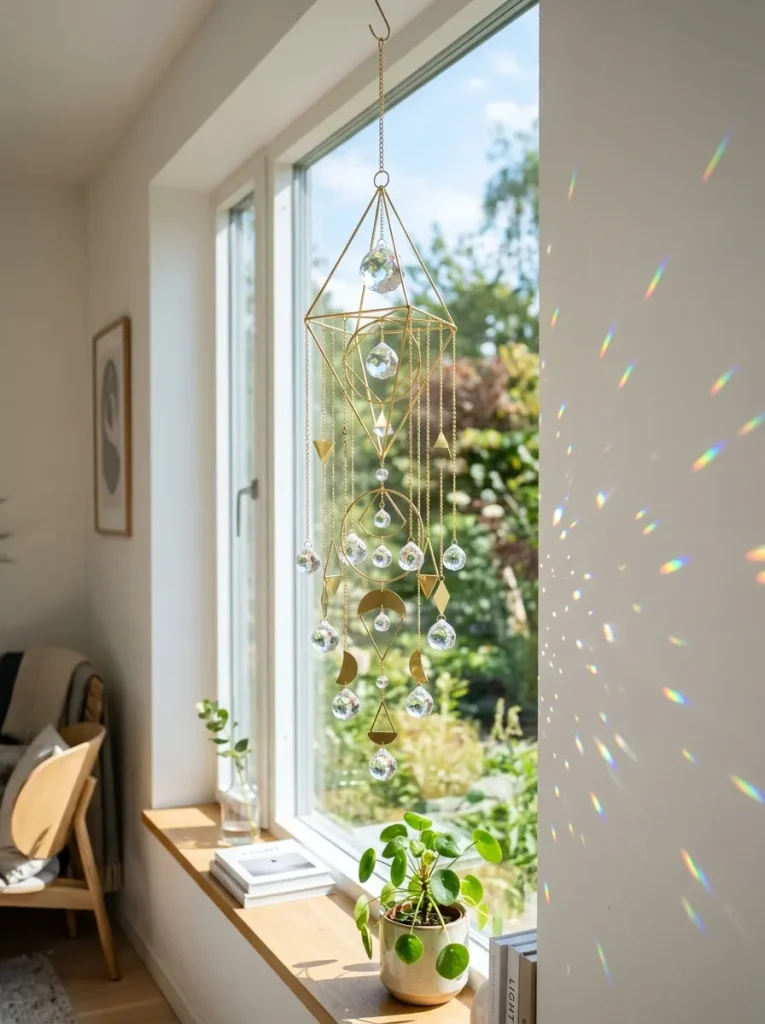
Geometric mobiles utilize structured symmetry and multi-faceted crystal spheres to break direct sunlight into distinct rainbow patterns. The core design relies on a rigid metallic frame, often shaped into triangles, squares, or concentric circles, which acts as the stable anchor for suspended elements. Hanging multiple multi-faceted glass prisms at varying heights ensures that as the sun moves across the sky, at least one crystal actively catches and refracts the light rays. This minimalist style emphasizes clean lines and balances heavy glass elements with delicate metallic chains. The contrast between structural geometry and fluid movement creates an engaging visual display that enhances modern design aesthetics in living spaces.
The step-by-step construction begins by selecting a thick brass hoop or geometric frame to serve as the primary chassis. Measure and cut five equal lengths of thin jewelry chain using wire cutters, ensuring the lengths create a tiered or cascading effect. Attach a multi-faceted crystal prism to the bottom of each chain loop using a sturdy jump ring, compressing the connection securely with needle-nose pliers. Connect the upper ends of the chains to the main brass frame at precisely spaced intervals to maintain physical equilibrium. Finally, tie a central nylon cord to the top loop of the frame, creating a secure hanging point for window installation.
Faux Stained Glass Acrylic Panes
Setup Method
Faux stained glass panels replicate traditional architectural glasswork using lightweight, shatterproof acrylic sheets and specialized translucent paints. This method allows creators to implement intricate designs, floral patterns, or abstract layouts without the need for glass cutting torches or lead soldering irons. The finished pane sits directly against the window glass, allowing broad beams of colored light to flood the room, mimicking historical cathedral window features. Using a solid border enhances the durability of the panel and provides a clean edge that fits neatly within standard residential window tracks or suspension frames.
Begin this creative project by wiping down a clear, pre-cut acrylic pane with rubbing alcohol to remove oils and dust. Place a printed line-art template directly underneath the acrylic sheet to serve as a visual tracing guide. Apply a thick line of black liquid faux-lead dimensional paint along the outline vectors, ensuring the lines form closed loops to contain the colored fill. Allow the black borders to dry completely for eight hours before using an eye-dropper or fine brush to fill the empty pockets with translucent glass gallery paint. Let the colored layers cure flat for twenty-four hours in a dust-free environment until the finish becomes entirely transparent.

Pressed Botanical Floating Frames
Execution Process
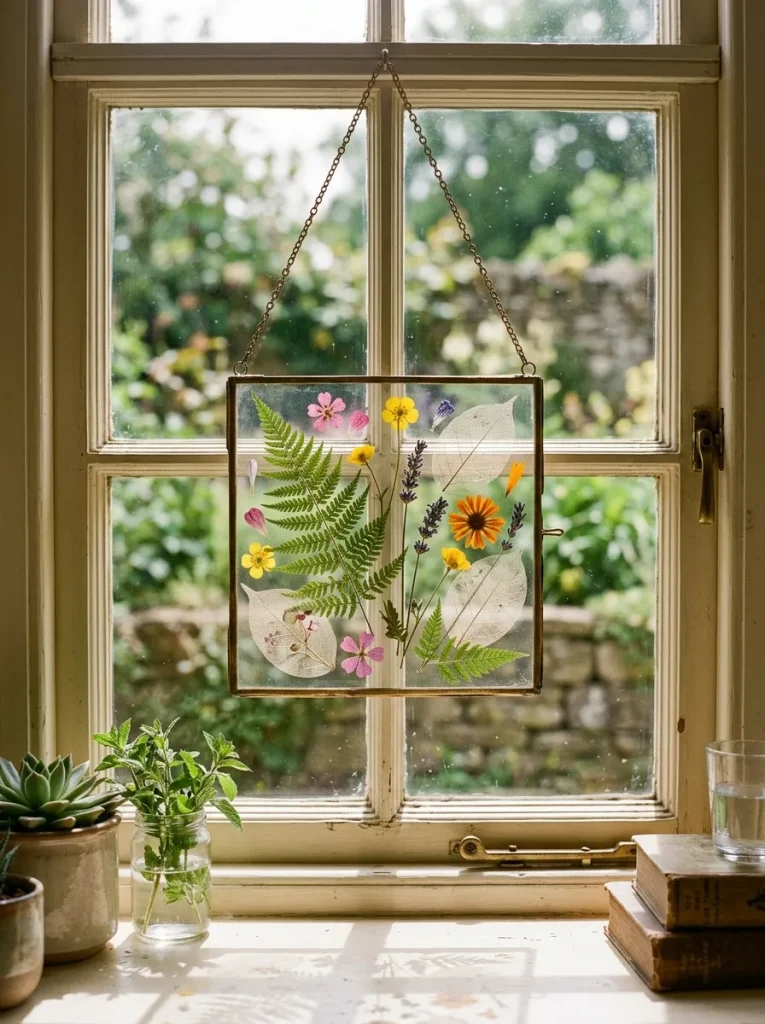
Pressed botanical frames incorporate real organic materials, such as dried fern fronds, colorful flower petals, and skeleton leaves, sandwiched between two layers of glass. This home decor approach merges natural elements with vintage styling, casting delicate, organic shadows into the room rather than bright rainbow refractions. The translucent quality of dried flora allows soft, warm light to filter through the delicate cellular structures of the plants. This type of ornament is ideal for low-light windows where subtle, natural illumination is preferred over high-intensity reflective glares.
Gather vibrant plant specimens and compress them inside a heavy book lined with parchment paper for two weeks until all moisture is removed. Select a double-glass floating frame with a thin brass border and open the latch to expose the inner surfaces. Thoroughly clean both glass panes using a lint-free microfiber cloth and glass cleaner to ensure complete clarity. Arrange the dried botanical elements carefully onto the bottom glass pane using fine tweezers to avoid tearing the fragile structures. Carefully lower the top glass pane directly over the arrangement, compress the layers together, and secure the frame latch before attaching a hanging chain.
Sea Glass Driftwood Chimes
How to Make
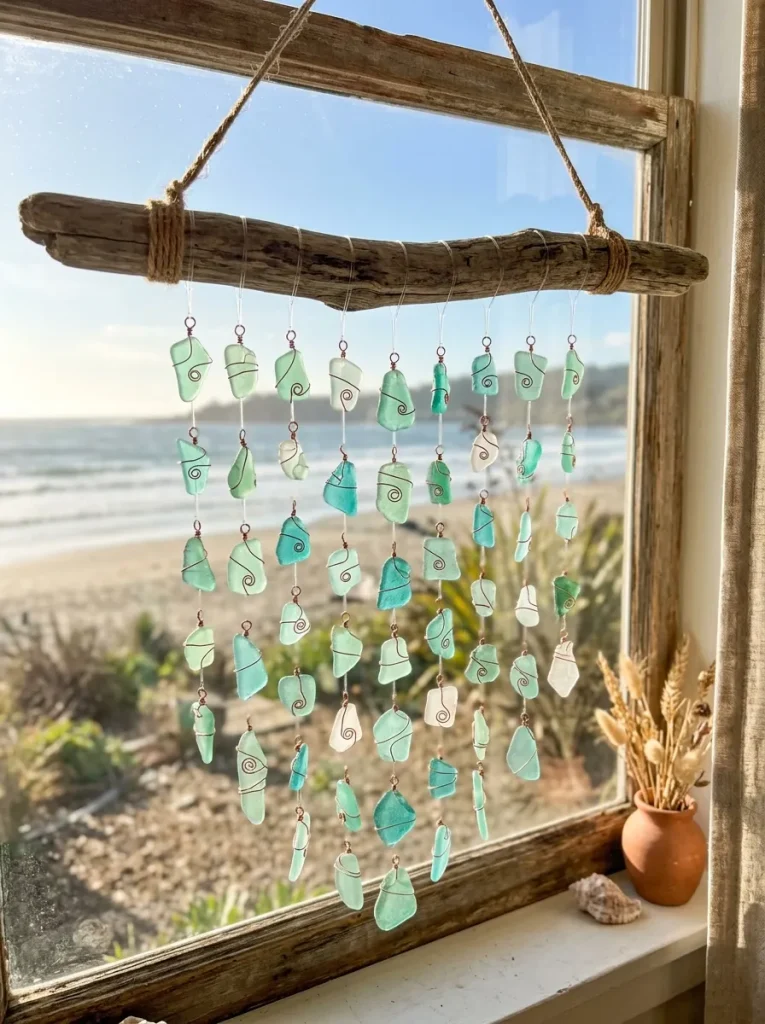
Sea glass driftwood chimes combine frosted, ocean-tumbled glass shards with natural weathered wood to create a rustic, texture-rich decorative accent. The frosted surface of sea glass diffuses sunlight gently, creating a soft, ambient glow rather than sharp refractions or harsh glares. When suspended in a window breeze, the glass pieces collide softly, generating a gentle auditory element along with the visual display. This design relies heavily on asymmetric balance and organic shapes, making it an excellent option for coastal or bohemian interior themes.
Select a sturdy, cured piece of driftwood measuring approximately twelve inches in length to serve as the main horizontal support. Use a power drill with a one-sixteenth-inch drill bit to create five evenly spaced vertical holes straight through the driftwood branch. Wrap twenty-gauge copper wire securely around the center grooved portion of seven selected sea glass pieces, twisting the wire tightly at the top to form secure loops. Thread a clear monofilament string through each drilled hole in the wood, tying knots underneath to lock the strings in place. Attach the wire-wrapped sea glass pieces to the hanging strings at staggered intervals to prevent overlapping.
Translucent Epoxy Resin Discs
Step-by-Step Guide
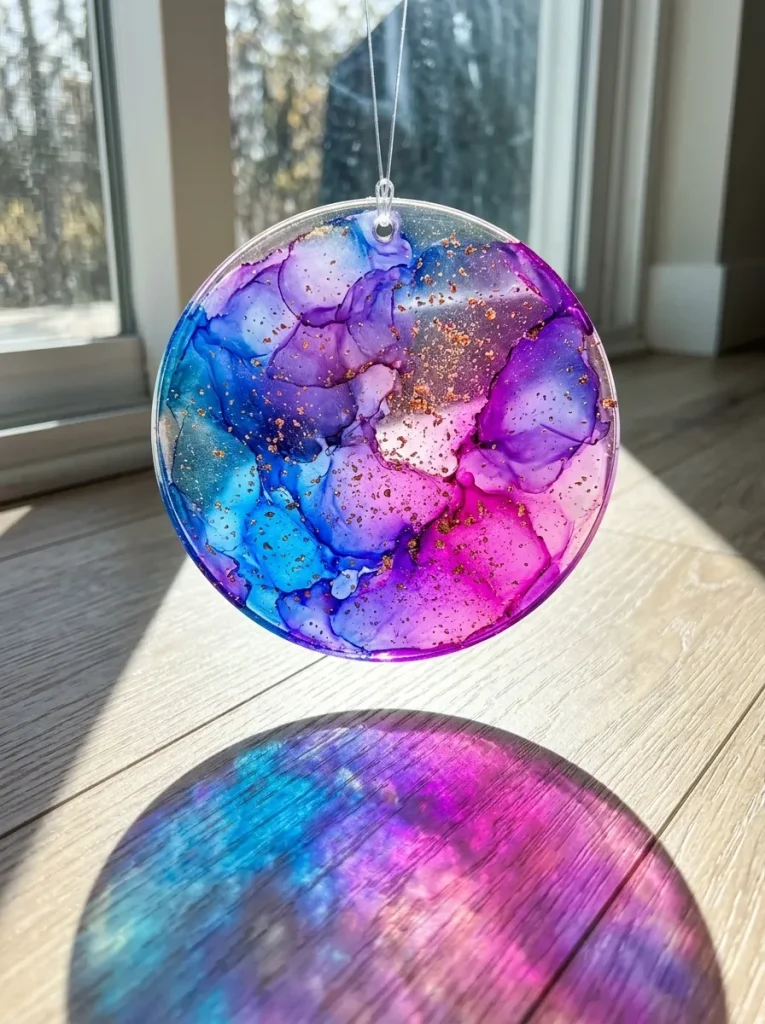
Epoxy resin discs provide a completely flat, glass-like medium that can hold suspended glitters, dried pigments, or embedded reflective metallic flakes. Using clear epoxy allows for total customization of color gradients, enabling creators to blend blues, pinks, and purples seamlessly within a single solid piece. When hung in direct sunlight, the colored resin acts as a vibrant filter, tinting the incoming light rays to match the selected pigment palette. This durable material is highly resistant to shattering and can withstand substantial temperature fluctuations without cracking.
Set up a level workspace and place a circular silicone coaster mold directly onto the flat surface. Mix equal parts of clear epoxy resin and hardener in a plastic cup, stirring slowly for three minutes to prevent air bubbles from forming. Divide the mixed resin into separate cups to add different shades of translucent alcohol ink, keeping the mixtures clear rather than opaque. Pour the tinted resin slowly into the silicone mold, using a toothpick to swirl the colors together into an aesthetic gradient pattern. Pass a handheld butane torch lightly over the liquid surface to pop any rising air bubbles, then let the disc cure undisturbed for forty-eight hours.
Beaded Monofilament Curtains
Setup Method
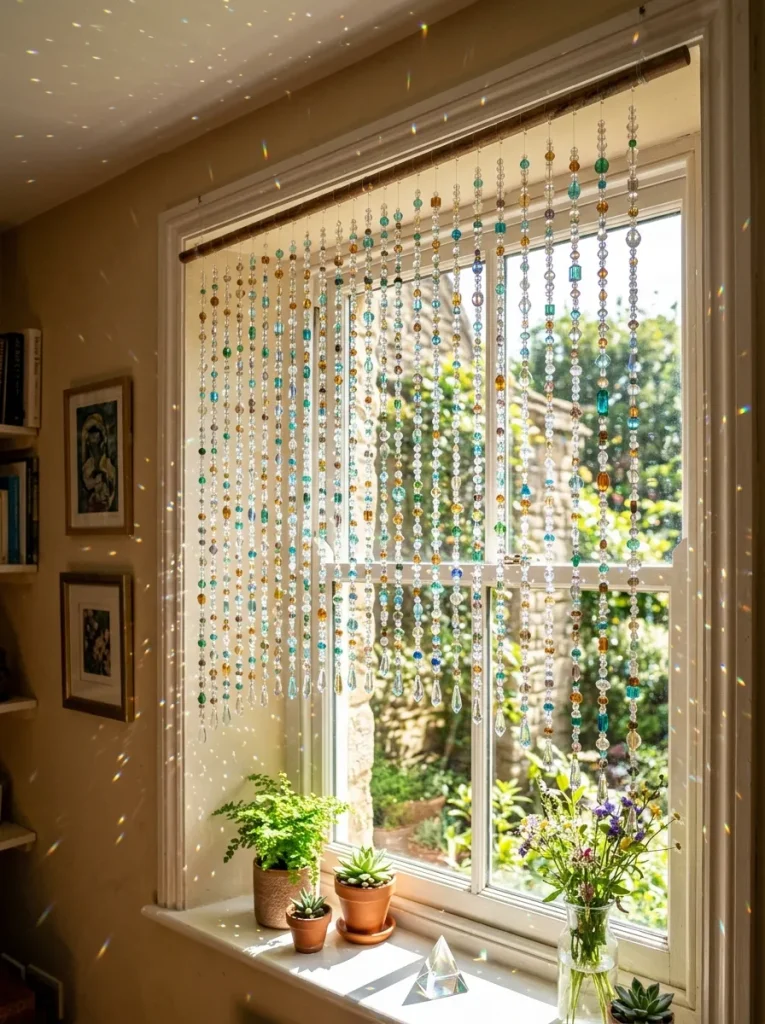
Beaded curtains consist of multiple vertical strands of glass beads hung closely together to form a shimmering barrier across a window pane. This style maximizes light movement because each individual bead acts as a independent point of refraction, scattering light continuously as the strands sway. Using a variety of bead shapes, such as bicones, rondelles, and cubes, ensures that light is caught from every possible angle. This project provides excellent organization for loose bead collections and allows for intricate vertical pattern designs.
Cut a piece of wooden dowel to match the exact width of the target window pane to serve as the horizontal mounting rod. Drill tiny pilot holes every half-inch along the bottom edge of the wooden dowel using a micro drill bit. Measure the height of the window and cut lengths of heavy-duty monofilament fishing line that are six inches longer than that measurement. Secure the top of each fishing line to a screw eye inserted into the dowel holes, using a crimp bead to lock the line. Thread glass beads onto each strand in a planned color sequence, finishing each line with a heavy glass teardrop pendant and a final compressed crimp bead.
Wire-Wrapped Agate Slice Hangings
How to Create
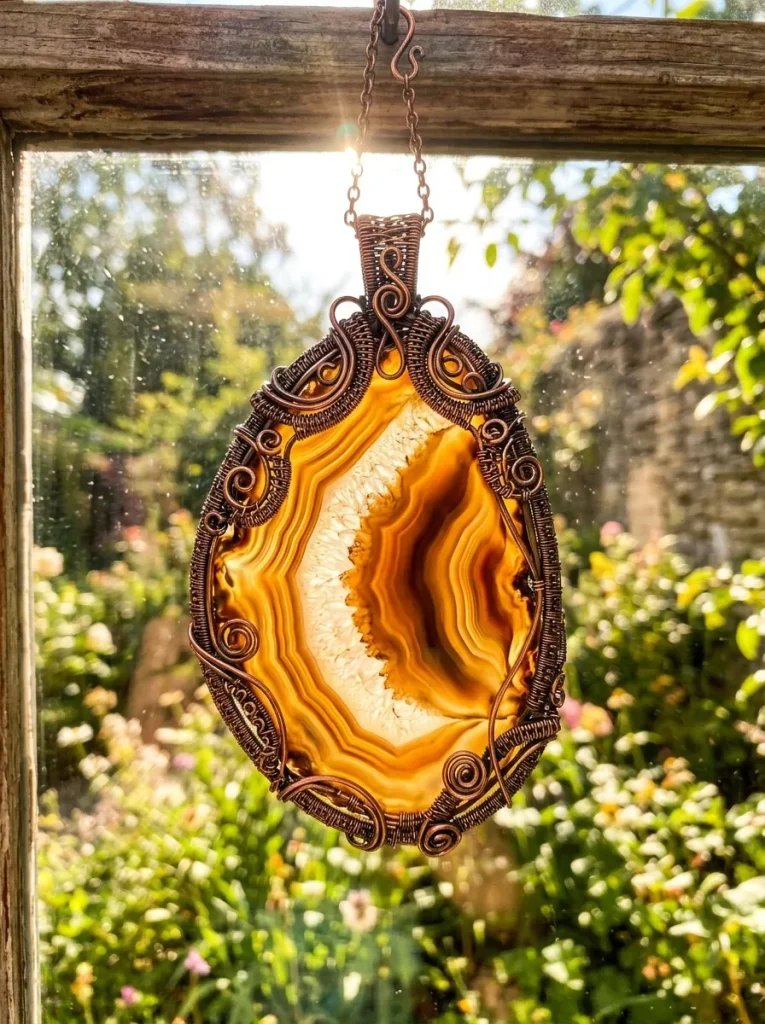
Agate slices feature concentric bands of varying mineral density that create natural translucent patterns when backlit by the sun. Wire-wrapping these stone slices preserves their organic borders while providing a highly secure mechanical connection for hanging. The dense crystalline structures within the stone filter sunlight into deep, rich tones, creating a dramatic, earth-toned lighting effect within the room. This project is highly durable, long-lasting, and aligns perfectly with natural history or organic modern design styles.
Select a thin, polished agate slice that possesses translucent central bands when held up to a direct light source. Cut a twenty-four-inch piece of twenty-gauge artistic jewelry wire to serve as the structural binding harness. Fold the wire in half, creating a small loop at the midpoint that will serve as the top attachment eyelet. Wrap the two wire ends tightly around the perimeter of the stone slice, crossing the wires firmly at the bottom and sides to create an escapement-proof cage. Twist the remaining wire tails into decorative spirals against the stone face, trim excess length with wire cutters, and attach a suspension chain to the top loop.
Upcycled Mason Jar Ring Collages
How to Make
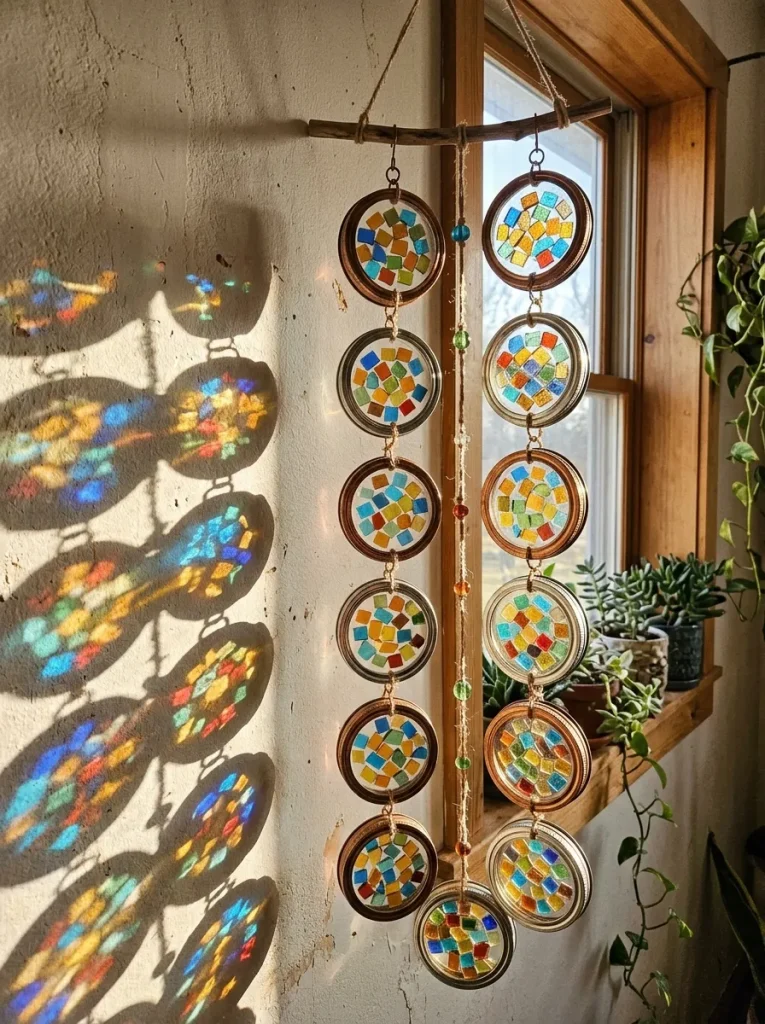
Upcycled mason jar rings provide a rigid, circular framework for holding translucent plastic layouts or colorful melted bead configurations. This budget-friendly DIY project utilizes common household utility items to create a cluster of circular suncatchers that can be linked together into a large panel. The metallic rings provide a clean, rustic border that contrasts sharply with bright, colorful interiors. This method is highly accessible for individuals seeking an easy project that minimizes material waste.
Gather five clean metal mason jar lids and remove the flat center discs, retaining only the outer threaded screw bands. Cut circles out of clear plastic transparency film that match the exact interior diameter of the metal rings. Apply a continuous bead of clear silicone adhesive along the inner lip of the metal band and press the plastic circle firmly into the glue. Arrange colored transparent plastic mosaic tiles or glass pebbles onto the film layer, securing them with additional clear adhesive. Once dried completely, drill a tiny hole through the outer edge of the metal bands to connect the rings vertically using small metal jump rings.
Melted Plastic Bead Mosaics
Execution Process
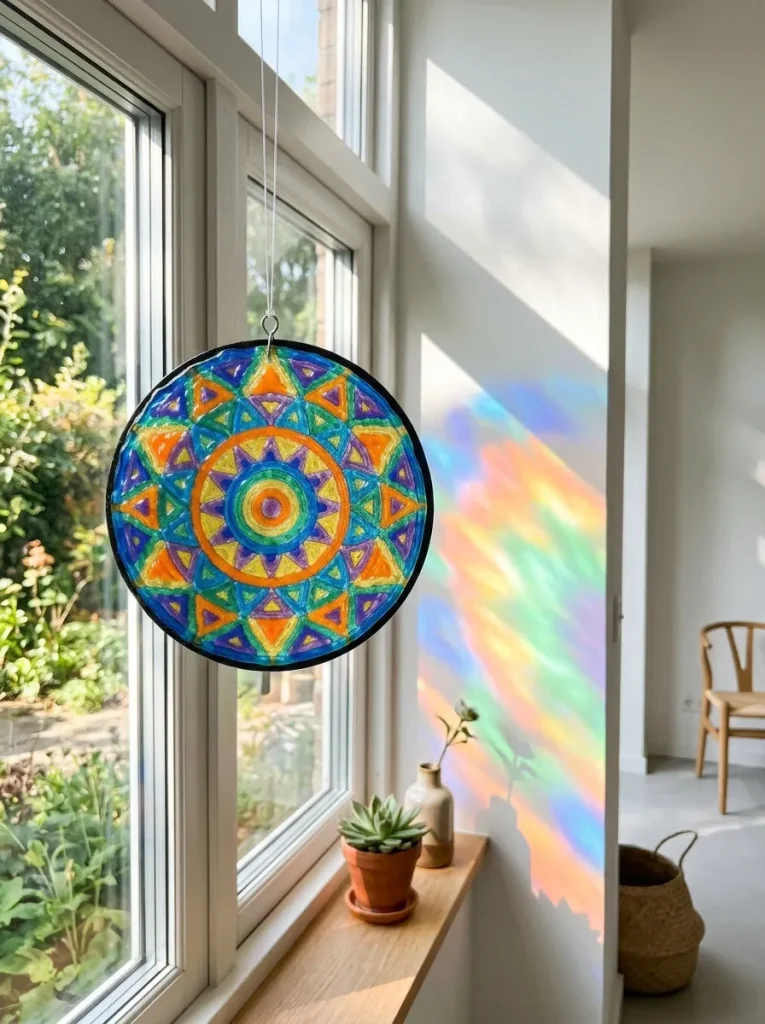
Melted plastic bead mosaics utilize translucent plastic pony beads arranged inside metal baking pans and melted into a solid, glass-like disc. This technique creates highly vibrant, durable panels that display intense color saturation when hung in sunny windows. The melting process fuses the separate beads into a singular sheet with a textured surface that diffuses light broad distances across an interior space. This method requires proper ventilation but yields highly consistent, professional results for minimal financial investment.
Preheat an outdoor toaster oven or conventional home oven to four hundred degrees Fahrenheit, ensuring exhaust fans are active or windows are open. Arrange a single layer of translucent plastic pony beads inside a metal cake pan, positioning them into geometric patterns or solid color blocks. Ensure the beads are packed tightly together with no visible gaps showing the metal bottom of the pan. Place the pan into the preheated oven for fifteen minutes, watching closely until the plastic beads melt completely flat into a uniform sheet. Remove the pan from heat, allow it to cool completely for twenty minutes until the plastic contracts, then pop the hardened disc out of the mold.
Clay Cutout Prism Rings
Step-by-Step Guide
Clay cutout rings utilize oven-bake polymer clay to create solid, matte-finished frames that encase central glass prisms or crystal clusters. The stark contrast between the opaque, smooth clay border and the brilliant, translucent glass creates a clean, modern design aesthetic. This method allows creators to sculpt custom shapes, arches, or crescent moons that frame the light-catching glass perfectly. The clay can be colored to match specific wall paints or trim colors within the home.
Roll out a block of white polymer clay until it reaches a uniform thickness of one-quarter inch on a non-stick silicone mat. Use concentric circular cookie cutters to slice out a perfect doughnut shape, creating a hollow ring frame. Use a needle tool to punch a vertical hole through both the top and bottom walls of the clay ring before baking. Bake the clay structure in an oven at two hundred and seventy-five degrees Fahrenheit for thirty minutes, then let it cool completely. Thread a copper headpin through a crystal prism, pass it through the pre-drilled bottom hole of the clay ring, and secure it by twisting the wire tightly.

Common Beginner Mistakes and How to Avoid Them
One of the most frequent errors encountered during this DIY tutorial is using weak or brittle suspension materials that degrade under UV exposure. Standard sewing thread or low-grade nylon lines can become brittle and snap after a few months of direct sunlight exposure. To prevent this, always select UV-resistant monofilament lines or stainless steel jewelry wire. Another common issue is failing to balance the physical weight of asymmetric designs, causing the ornament to tilt awkwardly when hung. This can be corrected by using a temporary layout board to find the center of gravity before finalizing any knots or wire wraps.
Additionally, beginners often apply overly thick layers of adhesive or paint, which results in cloudy, opaque sections that block light instead of refracting it. Applying glue or glass paint in thin, staged layers ensures total transparency when cured. Finally, ignoring the structural weight of glass components can lead to suction cup failures on window panes, causing the handmade pieces to fall and shatter. Always verify the weight capacity of your hooks or suction mounts, opting for permanent hardware screws if the finished ornament exceeds one pound.
Practical Tips for Better Results
To maximize the visual output of your creative project, placement and material selection should be optimized systematically. Use multi-faceted glass crystals rather than plastic acrylic beads whenever sharp, rainbow-colored refractions are desired. Glass possesses a higher refractive index, splitting light into significantly brighter and sharper color bands across walls. Cleaning the window glass thoroughly before hanging your decoration prevents dust accumulation from dimming the incoming light patterns.
| Material Type | Refractive Quality | Best Window Orientation | Weight Class |
| Faceted Glass Crystal | Sharp Rainbow Refractions | South or West | Heavy |
| Sea Glass / Frosted | Soft Diffused Glow | East or North | Medium |
| Translucent Resin | Broad Color Tinting | South or West | Light |
| Agate Slices | Deep Ambient Filtering | West | Heavy |
When designing vertical cascading strands, place the largest and heaviest elements at the absolute bottom of the line to act as a stabilizing plumb bob. This structural arrangement minimizes excess spinning or swaying caused by indoor air currents from heating or cooling vents. Additionally, incorporating small metallic spacer beads between large colored pieces increases the overall flexibility of the strands, allowing them to hang completely straight without kinked wires.
Styling, Presentation, or Organization Ideas
Integrating suncatchers seamlessly into your existing home decor requires strategic spatial arrangement and consideration of interior color palettes. Grouping multiple handmade ornaments together at varying heights creates a dynamic gallery-wall effect directly inside the window frame. This clustering technique is highly effective in large living room windows or sliding glass patio doors where a single small piece might look isolated. For a clean, minimalist style, choose monochrome frames made of polished brass or black matte metal that match the window trim.
If your interior design leans toward bohemian or eclectic styling, mixing different materials like driftwood, sea glass, and copper wire introduces rich, layered textures. Consider the color scheme of the room when selecting glass tints; for instance, warm amber and amber-gold glass complements rooms with earth tones, while sapphire blues and emerald greens enhance cooler interior designs. Hanging these items in front of plain white walls allows the moving rainbow reflections to serve as shifting, temporary wall decoration throughout the daylight hours.
Budget or Time Planning
Efficient planning ensures that these creative ideas are completed successfully without unnecessary spending or excessive construction delays. Most basic designs require minimal material investments and can be completed using affordable budget ideas, such as repurposing old jewelry or using household scraps. Splitting the project into clear chronological phases prevents errors and allows adhesives or coatings adequate time to dry completely.
- Phase 1: Sourcing and Planning (1–2 Hours): Measure windows, purchase bulk glass beads, and sketch out the structural pattern configuration.
- Phase 2: Component Assembly (2–3 Hours): Wire-wrap stones, string beads onto monofilament lines, or apply glass paints to acrylic panes.
- Phase 3: Curing and Drying (12–48 Hours): Allow resins, paints, or epoxy glues to harden completely in a protected, dust-free zone.
- Phase 4: Final Balancing and Installation (1 Hour): Attach suspension chains, test weight distribution, and mount the finished ornament to the window frame.
Buying core supplies like crimp beads, monofilament wire, and glass prisms in bulk quantities significantly lowers the cost per unit, making it easier to create multiple handmade gifts or matching window sets throughout the household.
Creative Expansion and Advanced Inspiration
Once you master the basic assembly methods detailed in this tutorial, you can expand your creative horizons by incorporating advanced design elements. Integrating solar-powered micro-motors allows the ornaments to rotate slowly at a constant speed, casting moving rainbow patterns across the entire room even when there is no breeze. Another advanced upgrade involves embedding solar-recharging glow powders into epoxy resin discs, enabling the ornament to absorb sunlight during the day and emit a soft, luminescent glow throughout the night.
You can also explore complex metalworking techniques, such as soldering custom copper frames into geometric terrarium styles that hold multi-layered glass configurations. Combining these light-reflecting projects with indoor hanging plants creates a living window display where leaves and crystals interact to produce shifting layers of light and shadow. By continually experimenting with new textures, structural materials, and scaling options, you can elevate this basic handmade craft into complex architectural art installations that significantly enhance the lighting aesthetic of your home.